How to Paint Floors Essentials

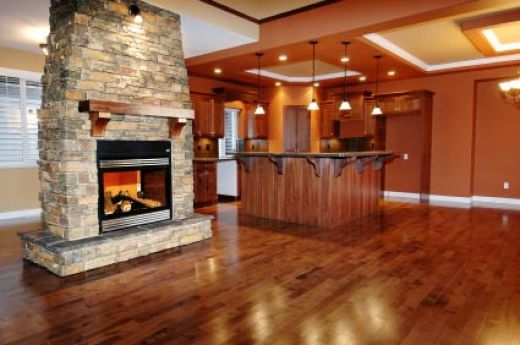
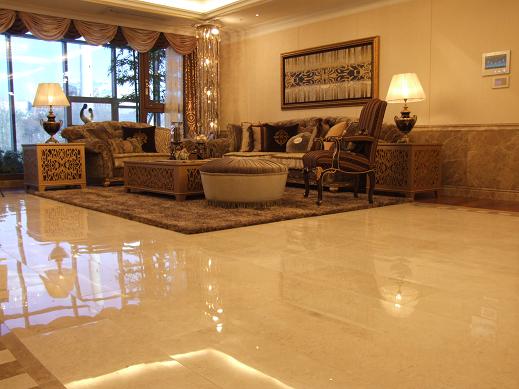
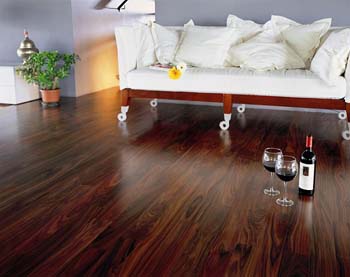
Painting your floors is one of the cheapest, quickest and easiest way to update the look of any of the rooms in your home. Compared to walls and ceilings, we often notice the floors because while we rarely look at them, we often feel them.

One of the main advantages of painting floors is that they are applicable to any floor – whether its wood, stone or concrete. Once the paint cures and sets, it’ll also require less maintenance compared to other floor coverings like wood that will require yearly staining and tiles that needs regrouting. Finally, minor damages are repairable and it takes only a fraction of the costs of other flooring materials.

ashleyannphotography.com

If you are convinced that you want to paint your floors and do-it-yourself while you’re at it, keep reading to know more.

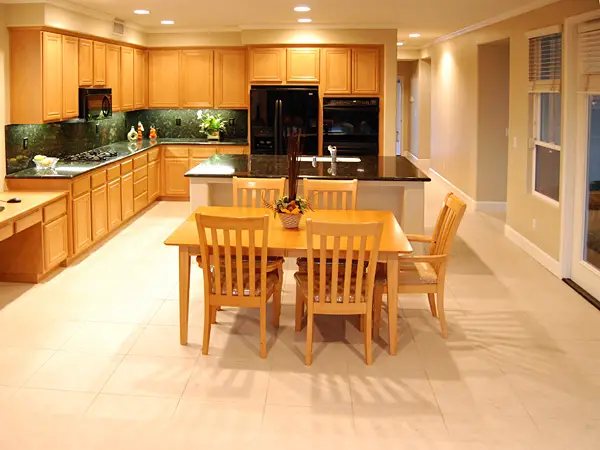
Whether it’s wood or concrete, its best to know if your subfloor is suitable for painting. So, can your existing floors be painted?

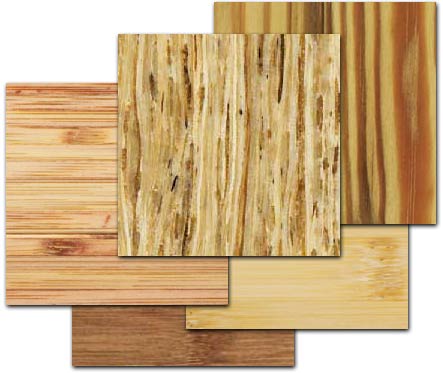
In general, laminate, vinyl and linoleum may not be painted. Paint is commonly recommended for concrete and hardwood-based flooring.

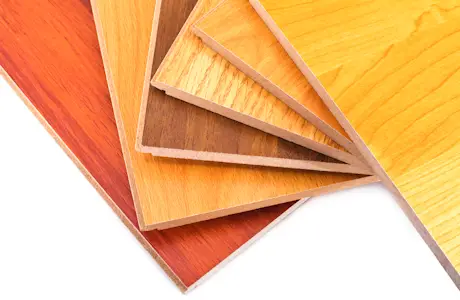
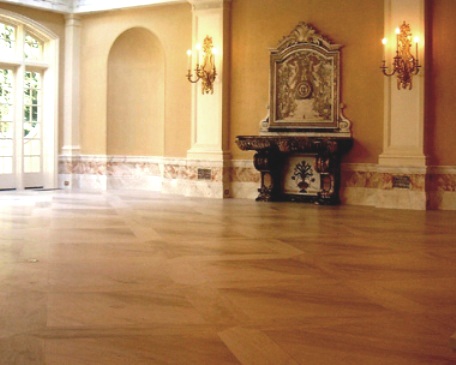
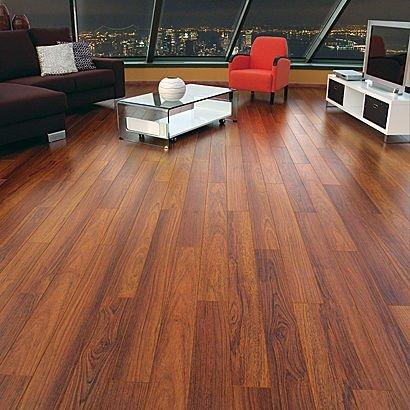
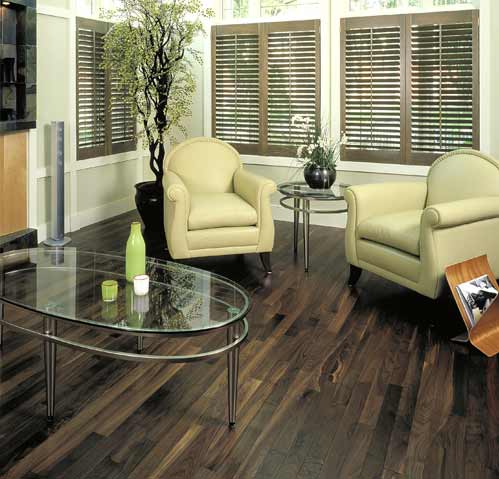
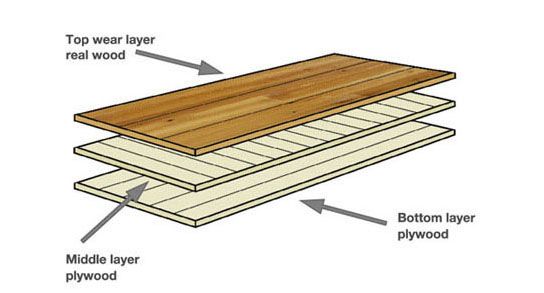
Painting Wood Floors

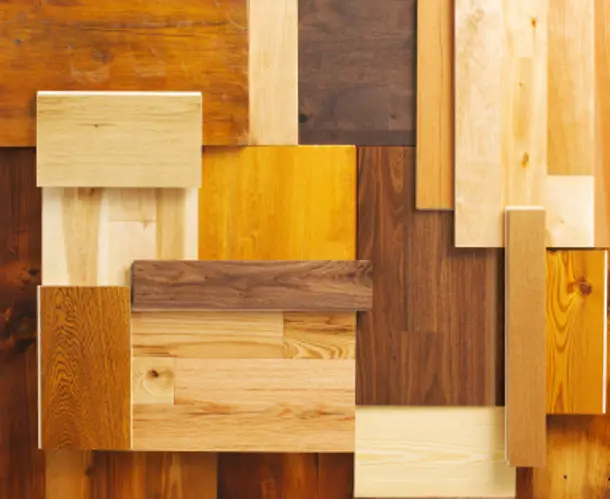
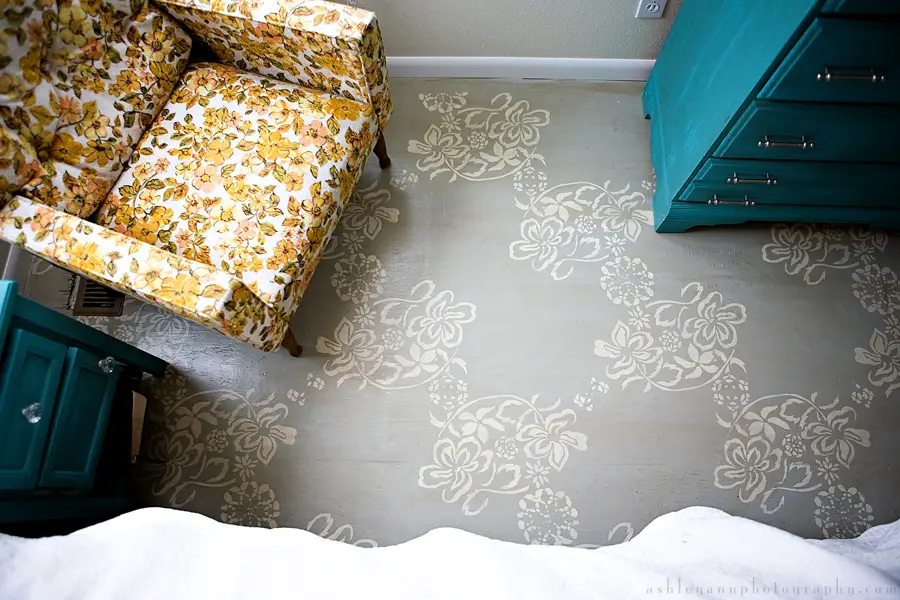
Historically, wood floors are the first ones to be painted as far back in the 1700s mainly for aesthetic reasons. While the last few centuries have waned its popularity, painted wood floors are making a comeback because of certain innovations and of course, economics. There are different varieties and shades of paints available making it possible to create visually satisfying patterns and designs and its not that costly to be creative.

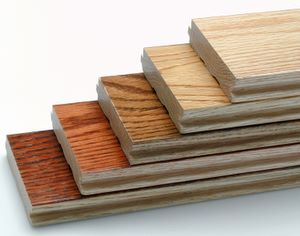
When it comes to wood floors, try to find out about the type of hardwood flooring you have, the paint recommended for it and the type of finish it has. Be sure to re-sand the surface to remove the old stain and finish before applying the paint. Ensure that sufficient sanding is done – meaning all of the existing finish and stain is removed and you are left with nothing but bare wood flooring. A word of caution when sanding though, try not to put too much weight on the machine and do not focus on a specific area for too long as it may cause an uneven surface afterwards.   Test the paint on a small location first to check if its compatible with your wood flooring.

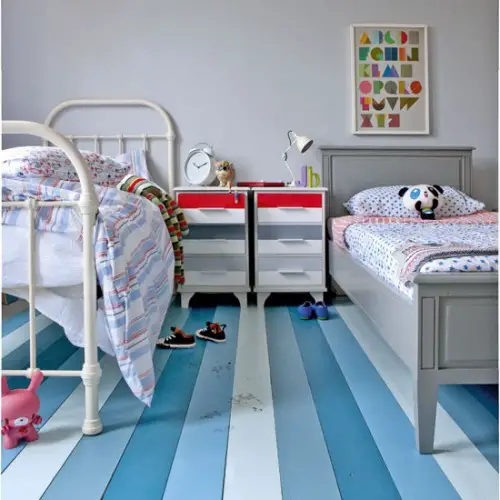
thekidsroomdecor.com

This is very important. If you have painted floors that ages back to 1970 or earlier, its best to have professionals handle paint removal or, if possible, have the old painted flooring replaced because paint before 1970 has lead which is highly toxic. Exposure to lead can cause serious illnesses.

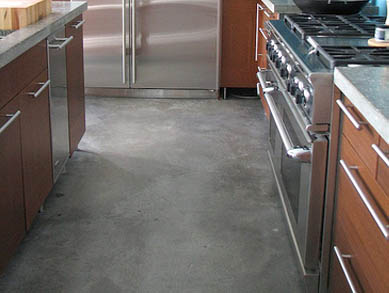
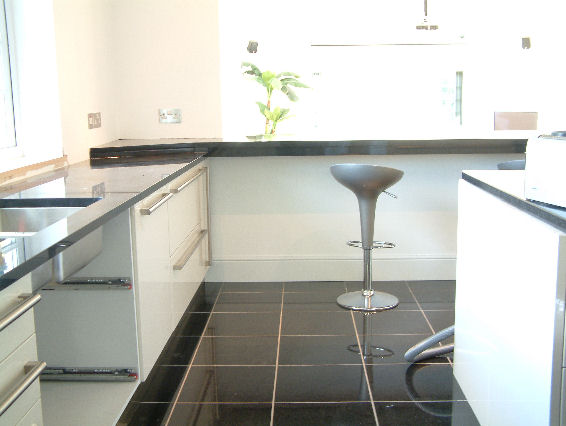
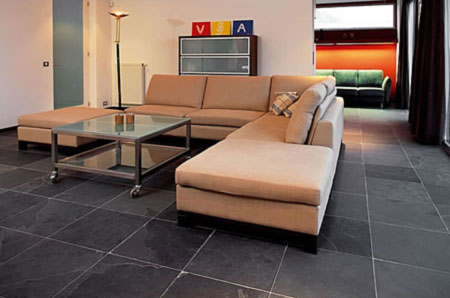
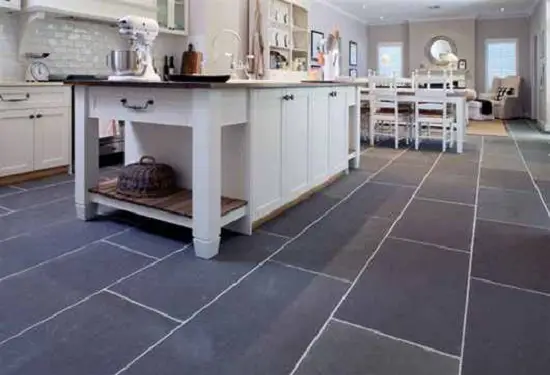
Painting Concrete Floors

Compared to wood floors, there are some tests you need to do if you have concrete floors. First of these if the moisture test that determines if paint can tolerate moisture on the concrete’s surface. To test if there is excessive moisture, cut a piece of plastic crap, about 2×2 inches and place it on the concrete to be pasted securing and sealing all the edges with a duct tape. Leave it for 24 hours if you find that there is water inside or that the plastic wrap is damp, the floor cannot be painted. Consult local contractors to help you fix the problem.

The second test is the porosity test. This is to identify if the concrete has a coating finish that needs to be removed. to do this test simply sprinkle water on the concrete floors surface. If the water droplets get soaked up by the concrete then we are all ready to start painting. If it remains on the surface then we need to have that coating removed.
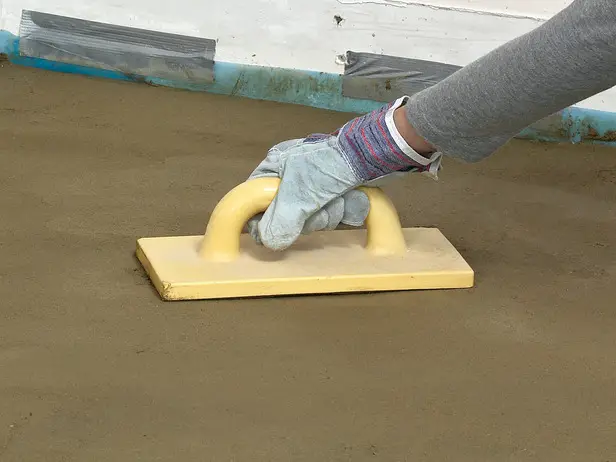
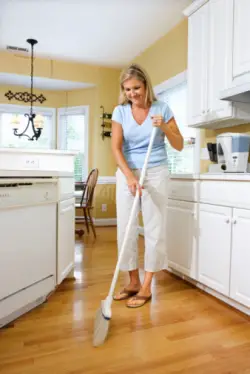
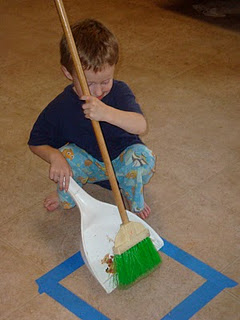
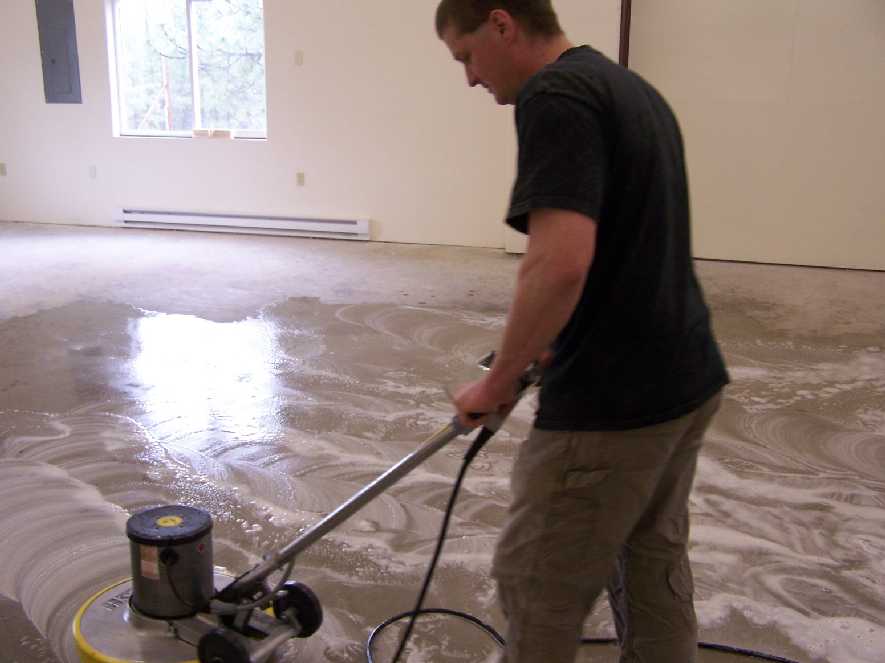
Clean and clear

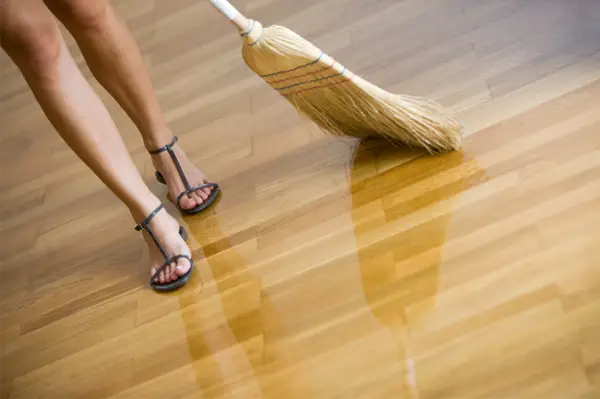
Whether you are working with concrete or wood flooring remember to clean it up pristinely after the finishes have been removed. There should be no dust, debris and residue left in order to achieve a smooth and welcoming finish.
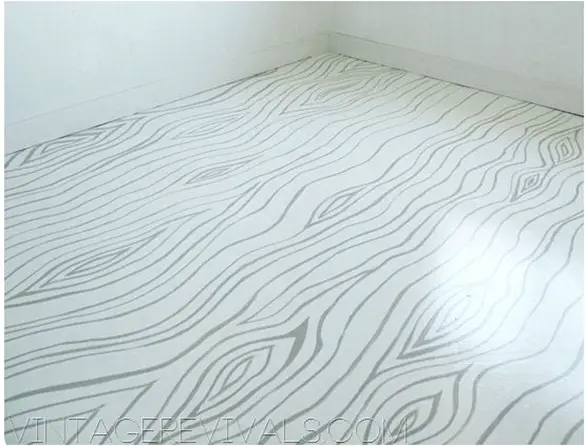
glenconey.com

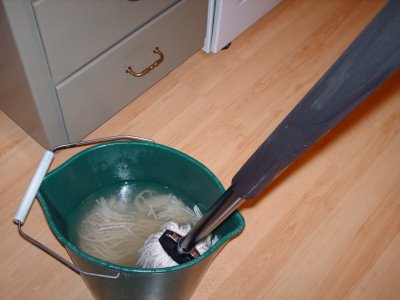
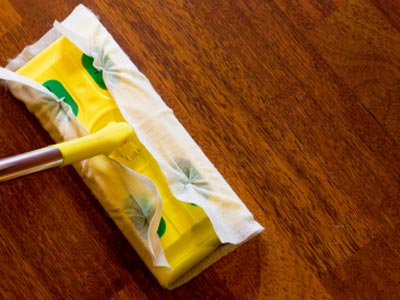
After sanding be sure to sweep or vacuum the surface and wash it with detergent or soap and allow to dry for 24 hours at least. If washing is not possible then thoroughly mop and re-mop until the surface is squeaky clean before applying paint.

Tune in to our next post for more tips and ideas.

How to Level Concrete Flooring

Concrete floors, sturdy and versatile. Gone are the days that decorators and homeowners shunned away from bare concrete flooring. Recent trends have made concrete not only in fashion but also reasonable flooring choice among home builders and DIY enthusiasts.

Cover ‘em up with other flooring products: area rugs and carpet tiles, paint and stickers they offer a cheap alternative than usually high-end markets occupied by natural stones and even hardwood. All it takes is a little effort and considerable amount of imagination.

All throughout our DIY flooring series, you heard us use the phrase “make sure the concrete subfloor is even…” and yada-yada. So today, we take a break from our installation posts and go over how to level concrete floors.

Whether or not you want your concrete slab as a subfloor or the main floor, continue reading and you’ll find useful tips below on understanding some cold hard facts about levelling concrete.

First, sweep and vacuum the concrete floor then grab a level bar and check the entire room. For slightly high spots, use a scraper or buff with heavy grit paper. Vacuum or sweep again till all the dust is removed before checking.

Use a framing square or even a piece of straight, flat lumber and mark all the  low and high points on the concrete floor.

For the larger bumps, better rent a grinder and make sure you know how to operate the tool and gear up for safety. If you’re not familiar with it, better contract to services of professionals. Also remember to cover furniture to protect them from getting scratched by debris from the grinder.

Work on the high spots you’ve marked earlier and grind it down till the bumps are gone and leveled with the flooring.

Sweep or vacuum the floor and check if you were able to even the lumps and bumps. Go back on some spots as needed.

For the low spots, prepare the levelling compound according to manufacturer’s instructions. Apply the dame with a trowel and work on small amounts as the compound hardens easily.

How to Get the Perfect Laminate Flooring

With all the varying features and styles of laminate flooring how do you pick the perfect one that will meet all your needs and add value to the space where it’ll be installed? Below are some basic tips every consumer should consider when shopping for the perfect laminate flooring, we have categorically split them into 2: design and function. These 2 elements are essential to finding the right one for your flooring needs.

The Perfect Laminate Flooring: Design Element

One of the reasons you might have chosen to install laminates over other flooring solutions is because its one of the most cost-effective. Chances are most of us will rather do the design of the room or we already have in mind what we like a particular space to look like. We assume a designer or stylist is no longer necessary and that’s the spirit, trust your own creative genius. However should you find yourself lost in the sea of choices you have, keep these pointers in mind:

  • Keep a particular in color family in mind and automatically eliminate the ones you don’t want to narrow the choices down. You can be bold in choosing the colors: they can contrast or blend with all the fixtures in the room.
  • The size of the room or the effect you want to achieve is another important consideration in terms of style. Darkly colored laminate floors tend to make a room look smaller and light ones give it a more spacious appeal.
  • Traffic is another thing to consider on the stylish side as lighter easily appear dirty or worn compared to dark hues. If you have canines or felines, a good move is getting laminate flooring the same shade as their fur to conceal pet hairs.
  • Bring a picture of the room, an object in the exact shade you’re looking for when you visit the store and show it to the salesperson or design professional if they have one as they may be able to make intelligent suggestions and even provide you with additional information.

The Perfect Laminate Flooring: Function Element

Aside from aesthetics, function plays an important role when choosing the right laminate flooring, here are some important areas to ponder upon before buying:

  1. Locking Systems. Most laminate flooring products available today have click-lock systems that makes them very easy to install and a perfect DIY project. However, be sure to check the quality of the locking system before buying. The pieces should lock perfectly: no gaps and planks should lay flat and even. No piece should be higher than the other.  Tongue and grooves should be thick and must have uniform thickness as this determines the strength and stability of the locks.
  1. Surface Texture. Yes, texture is more of a function than design. While texture initially imitates the feel of the material the laminate is replicating, texture lessens slippage and makes the floor ideal for little kids or the elderly.
  1. Wear Layer. This is probably the most important aspect of laminate flooring. Durability at a lower cost is the promise every manufacturers make but in most online forums, you’ll see unsatisfied customers naming companies or products that failed to deliver on that promise. Traffic is something constant that floors will face daily so be sure to get the appropriate kind of wear layer for your flooring needs.

  1. Core and Thickness. The core provides stability and thickness makes sure your hardwood- or stone-looking floors wont feel hallow and empty underfoot. Normally, those 10 to 12 mm thick ones provide a more solid feel compared to thinner laminate flooring.
  2. Backing & Edges. While these two might seem more compatible with the design element, they serve a more functional purpose. The edges should be seamless and should lock properly to make sure floors stay in place and accidents don’t happen. Backing on the other hand should be non-toxic and moisture tolerant to avoid rotting or growth of molds underneath.

Some final notes:

Aside from form and function, the perfect laminate flooring should also be competitively priced. Check from different stores and see what they have to offer. Its not bad to bargain, in fact its even smart to think of ways to save on costs.

Learn about each stores after sales service and warranties. Since laminate flooring is durable but not indestructible, knowing product warranty can probably help you over time.

Cleaning and upkeep should be another concern since laminate flooring can’t be refinished after they’ve been worn, knowing how to best protect them is probably one of the best bets anyone can have in getting the best out of their perfect laminate flooring.

How to Clean Laminate Flooring

One of the reasons why laminate flooring is very popular is because it’s low on maintenance and quite easy to clean.

Before plunging in ahead and dragging that wet mop with your favorite cleaning solution across laminate flooring, be sure that you’ve read the warranty and cleaning instructions from the manufacturer or store and checked if there are restrictions or recommended cleaning products to preserve the beauty of your floors.

However, should there be limited information about them, we have gathered some common  ways of cleaning laminate floors:

  1. What materials do you need?
      • broom w/ soft bristles and a dustpan or a vacuum cleaner with a soft brush
      • mop – make sure its soft to prevent abrasion; this is to get stains and dust or debris residue off
      • microfiber cloth to wipe the laminate floor dry
      • water and vinegar or any cleaning product the product manufacturer recommend
  1. Dust ‘em off! First step is to get off as much dust and debris as possible. Nothing beats good old fashioned sweeping with a broom and a dustpan to  get the job done. You can also use a vacuum cleaner to make it easier.

  1. Then take the mop and wet it with the recommended or other appropriate cleaning products. If there are none is recommended, then going natural is the way to go. Get a bucket and fill it half full with warm water and add 2-4 tablespoons of vinegar and use the solution to wipe the laminate floor clean.

  1. You can then wipe the cleaning solution to rinse the floor and get off any residue that might leave any unwanted markings when they dry. Some leaves the vinegar to dry since the smell doesn’t last long but some wipe it off to prevent it from wearing the laminate surface.

  1. After rinsing the laminate floors, wipe it dry with microfiber or terry cloth, this is also another way of ensuring that excess water or cleaning solution does not seep in between the planks.

Regularly clean your laminate flooring not just to prolong its useful life  but mostly so that your home will always have that welcoming feel. It would also help to take precautionary steps like putting doormats and area rugs near the doors and bathrooms. Wiping spills immediately, not dragging heavy furniture or sharp objects on the floor and putting protective pads under the foot of chairs, furniture  and other objects.

How to Clean Hardwood Flooring

Okay, now you’re finally beginning to get settled, your beautiful hardwood flooring has been installed, your home has now become warmer and more inviting. Now with everyday wear and tear comes the most important question: how do I keep my hardwood floors clean and at its best all the time? This is a common concern among homeowners who has hardwood installed on their floors, the beauty came with a hefty price tag after all.

While manufacturers know best, they most probably handed you over everything you need when you bought the flooring materials. It could be that you forgot the instructions or don’t have the time to get the exact same products they recommend most of the time, don’t fret. Hardwood is generally easy to maintain.

The goal is to keep them shined to perfection but before you drag a wet mop across that beautiful wood, consider first the following:

Begin with the finish.

The thing with hardwood is that it’s not the type of the wood that determines how to best clean or maintain the flooring, its the type of finish.

  • Most newly installed hardwood are finished with either urethane, polyuerthane or polyacrylic sealants making them water and stain resistant and therefore easier to clean: just sweep and mop and you’re done.
  • Another common finish are those that penetrates or gets soaked into the wood. Also known as oil-treated, these types needs more pampering and protection usually paste or liquid wax does it.
  • While they are considered finishes, lacquered, varnished or untreated floors are not resistant to wear and moisture unlike the first tow we mentioned. Untreated hardwood should be taken care of the same way oil-treated ones are.

To quickly determine the finish of your hardwood, simply rub your fingers across the floor. If doing so left your floors smudge-free then its surface sealed. If you created a smudge then it is oil-treated.

Cleaning surface-sealed floors: some dos and don’ts

This type is usually the high-gloss ones as polyurethane leaves some sort of plastic finish on top of the hardwood flooring. What’s great about it is that its hard wearing and enhances the durability of the hardwood.

When cleaning treated or finished hardwood, be mindful and think before you wipe or scrub as some materials might be harmful and might compromise if not cause damage to those gorgeous floors.

For surface-sealed floors, using oil, wax or furniture sprays is generally not advised. Oil leaves residue which can only draw dust and debris in. Wax makes refinishing difficult and furniture spray makes the floor really slippery. Abrasive and alkaline products is another no-no as they will dull the hardwood’s luster.

Again, the best way to clean hardwood floors is to do it the way the guys who installed them told to and with the products they recommend. If this product is hard to find, stick with products whose ingredients are  not specifically ruled out by your warranty as this might void the agreement.

You can also go for products which have a neutral PH. Remember to maintain a routine cleaning schedule and add protective and preventive measures for your hardwood floors.

Cleaning penetrating-seal-treated, oil-treated, varnished, lacquered and untreated floors

Before re-applying wax, remember to remove wax residue or build up on your hardwood floors first using a manufacturer-recommended product or mineral spirits from your local hardware.

Apply paste or liquid wax compatible to your floor. Liquid wax is easier to apply but it leaves a thinner coat compared to past wax making it less effective in protecting your hardwood. Avoid using products that specifically say that they are water- or acrylic-based as they might leave your floor with white marks or smears.

A must before wax application is making sure that the hardwood floors’ surface have been cleaned and dust and debris is removed either through simple sweeping with a broom or vacuuming.

Make wax application and sweeping a routine  and after wax has been applied buff your floors to perfection. Remember to buff in the direction of the wood grain for a better luster and again, take preventive steps to protect your hardwood flooring.

What preventive steps to take?

We cannot over emphasize the importance of taking preventive steps in preserving or prolonging the life of your hardwood floors.  Its really not that complicated, you can do much just by following these simple rules:

  1. Make sweeping a habit. Dirt and dust can damage the finish of your floor, regardless what it is, aside from the fact that it neither looks good or feels good underfoot. To prevent build-up regular sweeps of once or twice a day would be a good practice.
  1. Meet mat. Yes, doormats can do preventive and protective wonders for you. Some research suggests that by putting doormats in the right places or high traffic areas, 80% of dirt does not get dragged into the room.
  1. Wipe up. As soon as wipes or spills happen, act fast and wipe them immediately. In cases that substances which might be corrosive to the finish gets spilled, try blotting it to minimize the damage.
  1. Be wise when you accessorize. Make sure whatever you put on the surface of the hardwood will not cause it to scratch or stain. Over time you might get bored with plain wood or might want to accent a specific area with rugs or make it more functional by adding a different type of flooring. Before putting anything on top of your hardwoods, ask flooring professionals first if it can harm or stain the floor.

How to Buy Natural Stone Flooring

Natural stone tile flooring are timeless pieces that is a statement of elegance and stability. They also come with a hefty price tag so we ought to be rather careful and check out all possible factors that will affect the quality of our home and our chosen natural stone flooring.

To be honest these buying guides did inspired a new series to help shoppers and homeowners know more about natural stone flooring. We’re planning to put it up in the next few days, just watch up for it. In the meantime this part 4 of of our series and we’ll look into the different factors to consider when buying natural stone flooring,

This kind of flooring have long been associated with the well-to-do members of society and somehow, that is still true today. They offer not just luxury but also history.

When buying natural stone flooring consider these two main factors: finish, color. Consistency might be a little harder to achieve since these types have very unique patterns based on the true nature of the material itself. Variation even in the slightest degree is something that should be anticipated.

Common natural stone flooring products available are:

Granite – composed mostly of quartz and feldspar, this is the hardest among natural stones second only to diamonds. They are durable and versatile and has different uses all around the home.

Scratch proof, stain and water resistant, they come in different colors and is low on maintenance.

Marble – is another material that has classic elegance and timeless endurance. This metamorphic rock has been used in ancient civilizations as a medium for arts and crafts as it is soft enough to be worked with tools yet hard enough to withstand exposure to the elements.

Slate – is a naturally slip resistant material suitable for both indoor and outdoor use for both commercial and residential purposes. Its mainly composed of shale, marine silt and other minerals giving in a unique layered texture.

Limestone –  formed in the seabeds made up of marine skeletal fragments and corals, this i dubbed as “young marble” but it is not as hard as marble and is actually considered as a soft stone.

Travertine – a member of the limestone family, it has a porous appearance and rich textures. They are available in smooth filled finished or finished in their natural porous state for a more rustic look and feel.


Sandstone – are slip-resistant and extremely durable flooring materials though they may look frail. They are also warmer compared to other natural stone tiles.

While there are different type of natural stone flooring choices and we will be coming up with a series on that in a week or 2, here are some basic pointers to keep in mind when buying granite, marble, travertine, sandstone or limestone flooring products:

  1. Absorbtion Rating – defines how porous is the natural stone flooring material. The more porous or absorbent the product is, the susceptible ti is to getting stained and cracking during cold weather. There are 4 types of absorption ratings:
    • Non-vitreous – the highest level of absorption. An important thing to keep in mind that tiles with this type of rating should not be installed in moist or damp areas.
    • Semi-vitreous – though these type is less absorbent than non-vitreous tiles, be be careful because the more liquid this type gets exposed to, the more maintenance it requires.
    • Vitreous – is the standard absorption level ideal for flooring tiles in mid traffic indoor areas.
    • Impervious – resistant to liquid absorption and is easier to maintain. Recommended for  high traffic commercial use.

Don’t let the terms confuse you. Granite is considered as waterproof, while sandstone is the most porous and marble, travertine, slate and limestone has medium absorption rates.

  1. Grade – is simply a system retailers use to rate the quality of materials: size, shape thickness and overall condition of a tile can be graded. Grade 1 or A is commonly the top grade – with the least defect if not entirely perfect.
  1. Coefficient of Friction – refers to the measure of how slippery a material is. This is very important when buying natural stone flooring if you have specific traction needs. In the US, the Americans with Disabilities Act (ADA) require at least a 0.6 dryness coefficient.

How to Buy Laminate Flooring

Laminate flooring has become a popular choice of different homeowners. From the simplest to the most discriminating tastes, anyone will find something to meet their fancy with the different patterns, colors, textures, thickness and designs to choose from. Given all these choices, there is virtually no limit to what you can create.

Unfortunately the problem with having so much choices is making a choice itself: deciding what to buy. In part 2 of this series called How to Buy Flooring, we’ll take a look on the must-knows on how to buy laminate flooring.

A quick history

Laminate flooring as we know it now started as a spin-off of a product used in kitchen countertops. It was created in Scandinavia by the firm Perstorp AB Holdings back in 1977 and was first marketed under the brand name Pergo. The brand quickly became a household name when the product was marketed in North America.

Finding the correct laminate flooring

To find the correct material that will meet your needs, it’s best to first learn the basics about laminate flooring: how its made, the different layers, the different abrasion classes and other important considerations like design and function.

One of the reasons laminate flooring is such a popular alternative to hardwood flooring is durability and convenience. Laminates are basically easier to clean and maintain.

Lastly, perhaps the most important consideration is cost. This will determine the quality and appearance of your flooring project. So what are the factors that’ll affect cost? First is the area – its size and location, how much are we covering? How about exposure to moisture and water or the amount of footfall to expect. Then the type of subfloor we are dealing with as they will require a substrate or at times even repair to guarantee that the underside of laminates are well-protected from moisture exposure and eventually, damage. You would also need to think of accessories – trims, moldings, underlayment and even cleaning materials.

How to Buy Hardwood Flooring

In this third installment of our floor buying series, we’ll let you in on the basics of buying great hardwood flooring.

So speaking of basics, let’s start with the ABCs of hardwood flooring. There are generally three types: solid hardwood, engineered hardwood and acrylic-impregnated wood.

Solid Hardwood is the traditional flooring that is hardwood from top to bottom. This type is the kind that adds value to the property and can last for over a century if well taken care of. This type is further classified into:

  • Strip Flooring – has a set width but varies in thickness; thickness can vary from 5/16 to ¾  inches wide but is only available in widths of 1 ½, 2 and 2 ¼ inches.
  • Plank Flooring – unlike strip flooring, planks come in various widths, they are available in certain thicknesses of ½ or ¾ inches while widths vary from 3 to 8 inches.
  • Parquet Flooring – visually different from other forms of wood flooring as they are made up of different geometric patterns.

Solid hardwood flooring is available both pre-finished and unfinished types. Pre-finished is already sanded and coated at the factory, ready for installation then you’re all good. Unfinished on the other hand means it has to be sanded and finished on-site after installation.

Engineered Hardwood Flooring is wood flooring made by layering plastic laminate veneer with real wood. This should not be mistaken with laminates as laminate flooring contains no actual wood. The main difference is that the top layer of engineered hardwood flooring is the real wood. The base is just reinforced to make it more stable and resistant to moisture.

Acrylic-impregnated Wood Flooring is one which is infused with acrylic which is commonly used as surface sealant making it harder and more resistant to scratches. This type is commonly used in non-residential areas.

Known for its classic elegance and timeless endurance, hardwood flooring remains a top commodity among homebuilders and a good selling point to buyers. So what to look for when buying hardwood flooring?

Some simple instructions include:

  1. Determining the areas where you want the floors installed, better if you can get the exact measurement (in square footage) of the said area.
  2. Determine your budget for the project and make sure that your choose a variety and grade that fits perfectly in your budget including nails, trimmings and other accessories you might need.
  3. Identify the subfloor you’ll be working on. Is there one or does it need to be replaced or repaired? Remember that thickness of both the subfloor and the hardwood might require you to change trimmings and other accessories.

  1. Think it through if you want your product pre-finished or unfinished. Pre-finished is convenient because once its installed, then its done. Unfinished wood flooring would require more sanding and extra on-site work after installation.
  2. Decide whether you’ll go DIY or hire professional installers, remember that hardwood can be a bit harder to install compared to laminate flooring planks or carpet tiles.
  3. Provide waste allowance of 10-25% when you decide how much of the material you would get.
  4. Shop around – go check out different stores and suppliers so you can compare quality, cost and value-adding services and pick out the one that’ll meet your specific needs.

Also check out all about hardwood flooring, cleaning and repair tips before heading out to buy your hardwood floors.

How to Buy Flooring the Basics

With a wide range of flooring products available in the market today, buying a new floor can be an overwhelming task. You head out to your local retailer with a couple of things in mind: a simple shade, common pattern, resilient, easy to install and on the budget.

A minute with a salesperson then you might already feel lost with all the questions and suggestion he or she has. Yes, the sales rep is probably trying to be helpful as he tries to close a deal, but it won’t hurt to have done your homework correctly so that you’ll have an idea on what to ask or look for when you walk in the store.

In this series, we’ll try to give you quick and effective points on how to buy specific flooring solutions. To begin with, here are the some things to consider:

  • Consider your overall style. This includes your lifestyle as well as the architectural leanings of the property and its interiors. The floor you want to buy must fit perfectly with room you plan to have it installed.
  • Home location and market value. This is another thing to keep in mind before you buy a flooring product. The climate in the property’s location will help you determine the right one and the market value will help you decide if you’re not over-investing. Having luxury flooring doesn’t really increase a property’s market value if its in a mid-class residential area.
  • Budget and warranty. A budget identifies expense ceiling, it prevents you from overspending and since floors doesn’t come cheap, make sure you get one which comes with a good warranty.

Once you have thought of the points mentioned above, try doing these tips from the World Floor Covering Association:

  1. Identify the type of flooring you want to replace and why. Establish the need, is it really necessary to do it and do it now?
  2. Identify the subfloor you’ll be working with and if it needs special preparation or treatment before the new flooring is installed.
  3. Get an approximate measurement of the area you want to cover, this way you immediately have an idea how many – the quantity of the materials and how much it’ll probably cost you.
  4. Keep in mind that the final costs will be affected by some factors like the quality of the material, its quantity, the pattern you wish to create and of course, waste allowance.
  5. Try to invite the local flooring retailer in your home prior to purchase and installation so they can examine a flooring product’s compatibility with the rooms and take the exact measurement to give you an exact quote.
  6. Also take note of the sources of light as light plays a significant role in flooring visuals or appearance.
  7. In terms of longevity, determine traffic pattern – where it is the heaviest and lightest. Knowing the concentration will help you pick the appropriate material.
  8. Identify adjoining surfaces for both aesthetics and functionality.
  9. Lastly, think of furnishing, electronics and other installations you have in the home or specific areas you want the new floors installed, they should somehow go together.


Buying floors doesn’t have to be a mystery. Keep on the lookout in the next couple of days as we continue with this series for more tips on:

  • How to Buy Laminate Flooring
  • How to Buy Hardwood Flooring
  • How to Buy Natural Stone Flooring
  • How to Buy Ceramic and Porcelain Tile Flooring
  • How to Buy Cork Flooring
  • How to Buy Bamboo Flooring
  • How to Buy Carpet Tiles and Area Rugs

How to Buy Cork Flooring

For years, people have benefitted with the many uses of enduring cork. Its soft, cushiony and comfortable and some of you might be wondering if it would be a perfect fit as a flooring choice. You might be surprised as some have described cork flooring as indestructible. Though it has been used since 3000 B.C., cork wasn’t able to catch the limelight until Dom Perignon started using cork bottle stoppers for his champagnes.

In this part of our floor buying series, we’ll look into the advantages and considerations when shopping for cork flooring.

For centuries, people have also fallen in love with cork flooring because it has many great properties and advantages:

  • its warm and in terms of comfort, it only comes second to carpets;
  • however, unlike carpet it is hypoallergenic and contains a natural substance called Suberin which makes it resistant to both moisture and decay;
  • cork flooring is produced without harming trees, barks of great cork oaks are harvested by hand, the trees will grow back the bark in a decade or less ready again for harvest;
  • it is a great noise insulator; and
  • cork is one of the more resilient materials available for flooring.

Just like other flooring flooring solutions there are a few considerations before buying cork flooring. One of them is exposure to direct sunlight. Repeated sun exposure might cause your beautifully colored floors to fade. To prevent this, try asking manufacturers or your local distributor if the material has been treated or if there’s some sort of finish you should apply, otherwise, throw in some curtains or have your windows treated.

Another factor is climate. Since cork comes from wood it is not unlikely that like wood, it will shrink and expand when there are changes in climate – temperature and moisture levels. Prior to installation, let the cork flooring get acclimated into the rooms it’ll be installed, also regulate the conditions in each location by installing heaters, fans and humidifiers or dehumidifiers as needed.

In general, basic maintenance and preventive steps is all that is needed in keeping cork flooring in great condition for a long time. As for the material’s longevity, cork is resilient enough to last for well up to a century or so.

Putting protective area rugs near entries and sinks, regular vacuum or sweeping, occasional mopping and immediately wiping or blotting spills; being mindful of your footwear, furniture and pets will also help your cork flooring last longer.