Prefinished Hardwood Flooring the Proscons

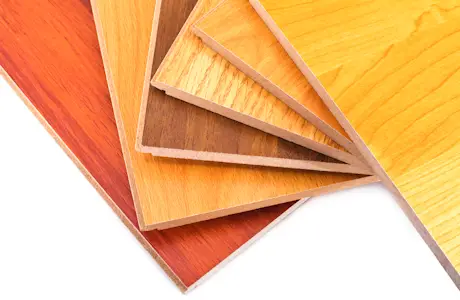
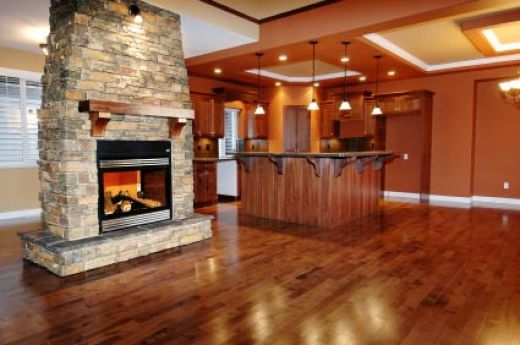
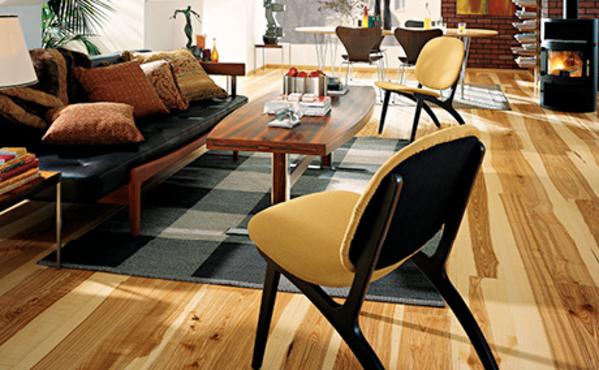
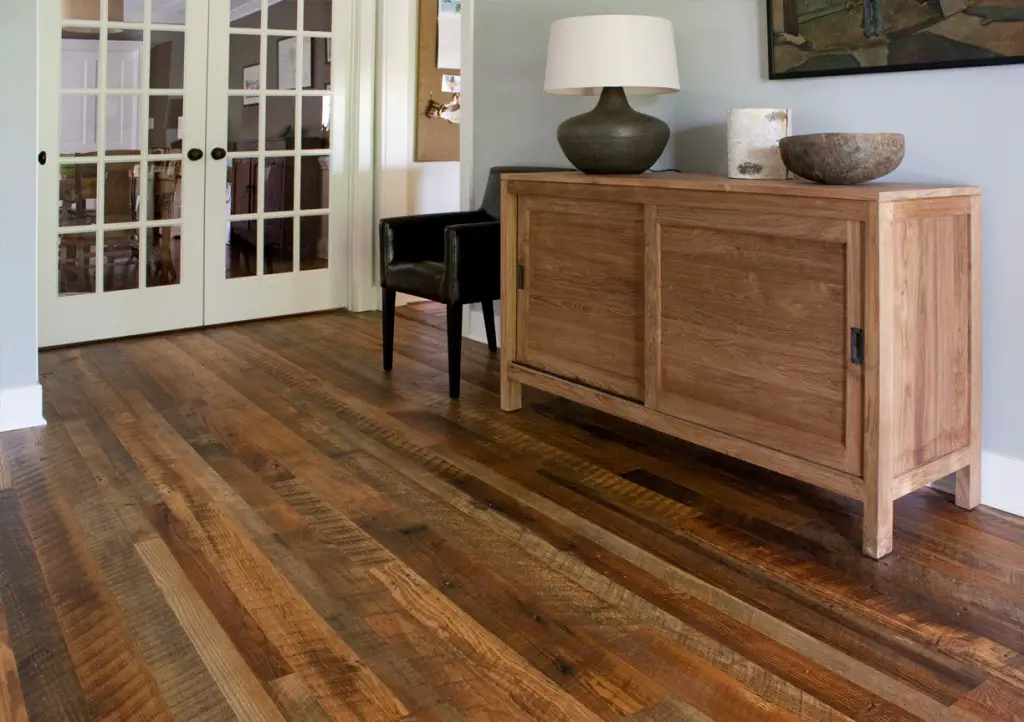
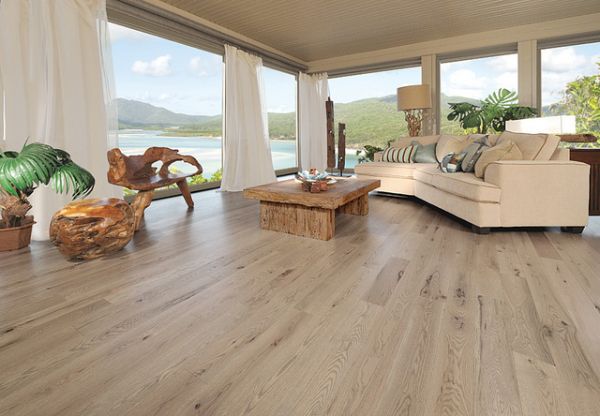
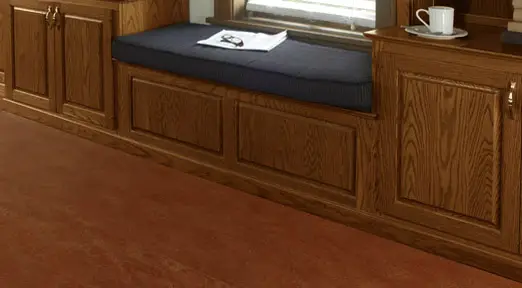
Because they are value adding, more and more homeowners are installing hardwood flooring in their properties.

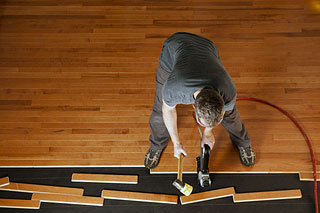
However, over the years, most homeowners have chosen to installed prefinished hardwood flooring instead of having one done onsite.

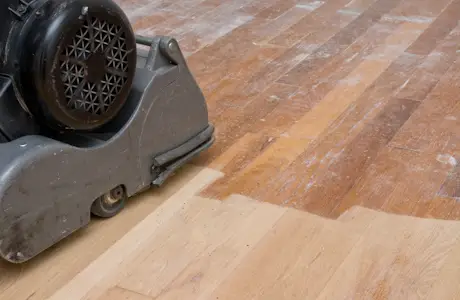
So what is the difference? Simple, as the term implies, prefinished hardwood flooring is already sanded and sealed. All you really need to do is get it locked or nailed down on the subfloor and you’re good to go unlike those ones that are finished on site after installation which requires some waiting time for the finish to dry up and for the smells to tone down.

The Pros

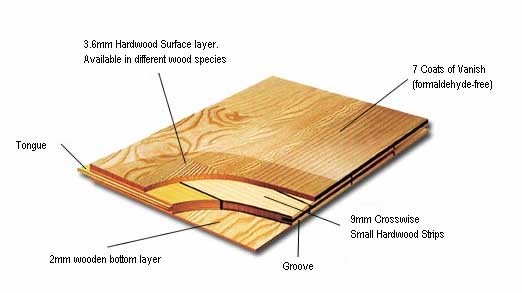
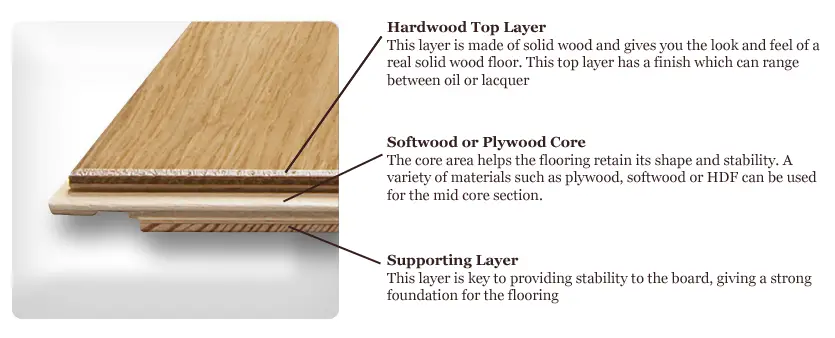
  • Durability. Aside from convenience, this is perhaps one of the greatest advantage of prefinished hardwood flooring. Its not uncommon for prefinished hardwood flooring to have about 5 layers of urethane or 8 layers of aluminum oxide baked onto the surface making it more durable than those finished on site.
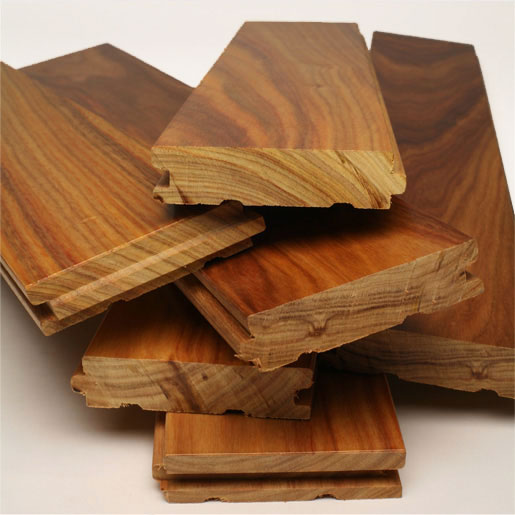
  • Consistency. Factory prefinished hardwood flooring are coated with greater consistency and leveled or even appearance.
  • Easier to purchase. For some reason, it is easier to buy prefinished hardwood flooring than those that requires on-site finishing.
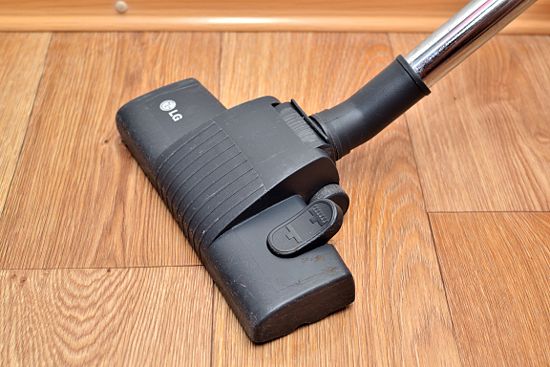
  • Less mess. Since there is no more sanding, staining and coating required, it is definitely easier to install and would require lesser cleaning up once the installation is completed.
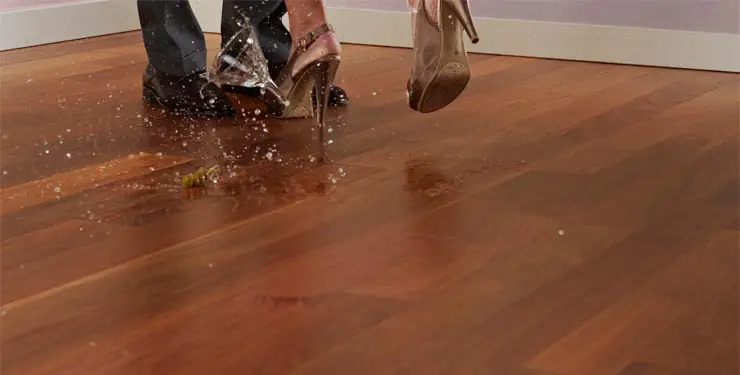
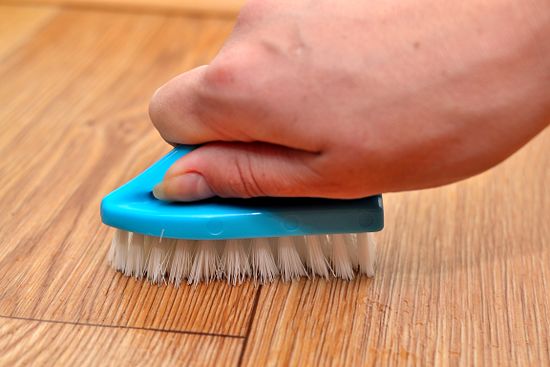
  • Less maintenance. Since the coating is thicker, it is more resistant to moisture, scratches, staining and discoloration. The factory grade in flooring’s finish also makes it suitable for most over the counter cleaning products, though be cautious enough to read the labels.
  • 25-Year Warranty. Yes, that’s right 25 years!This is evident of the product’s durability. Manufacturers are confident that prefinished hardwood flooring can live up to its promise.

The Cons

  • Beyond repair. One thing to be careful for with the installation and usage of prefinished hardwood flooring is that any damage on the surface of the flooring is irreparable. This is simply because we cannot manually recreate the coating that was applied by the manufacturer.
  • Delicate installation process. The installation is a critical point in getting your prefinished hardwood flooring. All that work sometimes causes unwanted damage on the flooring planks. So, if you don’t have that much DIY knowledge or experience better leave it up for the contractors to do.
  • Seal the seams. Since seams won’t exist until the prefinished hardwood flooring has been laid out and installed, it can only be sealed afterwards. Be sure that you use a product recommended for your flooring and be sure it dries up well to ensure that your prefinished hardwood flooring is completely protected.
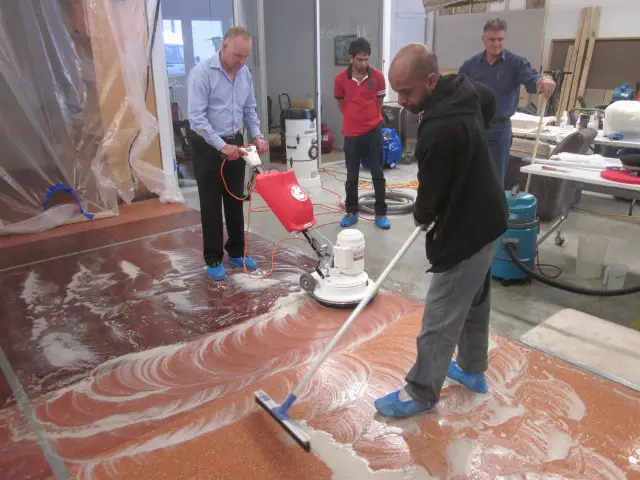
  • Refinishing is a challenge. I think most contractors would agree. The downside of having prefinished hardwood flooring comes in when the floor covering has run its course and everyday use and foot traffic as well as exposure to the elements has taken its toll. The layers and layers of protective material is really tedious to remove.

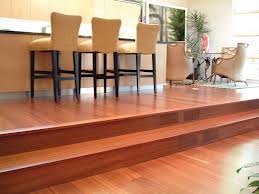
Prefinished hardwood flooring gives us the best of both worlds: the convenience of having hardwood flooring minus the fuss how long you get to keep it depends on how you are going to take care of it.

Natural and Recycled Flooring Options

We’ve all heard that one of the best ways to reduce our carbon footprint is to use natural products and more than once we’ve heard and read about natural flooring. We are guessing you, like most other homeowners are thinking what are the green flooring choices and options available and are eager to learn some basic info to help you decide which one best meets your needs.

www.greenbuildingsupply.com

Aside from being green or environmentally sound, some benefits include cost effectiveness and durability.

Here are some suggestions that can help you decide in picking out the best one for you:

Natural Flooring Options:

  • Natural Stone Tiles. There are several varieties of natural stone tiles and they are by far one of the most durable and environmentally sound flooring solutions available. Stone tiles, as the name implies are sourced from natural stone deposits that developed over time. The most popular of these varieties include:

    • Granite – considered as the second hardest natural material, second only to diamonds, is known not just for its hardness but also for its unique patterns and classic shades of grey, reds and browns as well as greens, blacks and blues.
    • Marble – may not be as hard as granite but it is malleable and durable enough to win the favor of ancient craftsmen and artisans. Architectural wonders and other artifacts are proof of this natural stone’s graceful endurance.

www.country-landscapes.com

    • Slate – while slate may not be on the same level of prestige as Granite and Marble, and definitely on a lower price range as well, it has something that the two lack, and that is traction. Unlike granite and polished marble known for their luster and slipperiness, slate holds the esteem of remaining friendly even when wet.
  • Linoleum.  If you want something easy to install, cheap and eco-friendly, then go for linoleum. We get it, we know you have some doubts on the friendliness of this particular flooring solution so we’ve written about these myths in our recent post and another on how to take care of linoleum flooring.

www.boylesflooring.com

  • Bamboo. It grows without the need of farming, matures easily and have been know for a wide variety of uses in different cultures and across ages and mostly for its resilience bamboo flooring can indeed be a sustainable flooring choice. Its offers variety in design and installation and is low on maintenance. Just make sure to check out this post for some things you need to know about bamboo flooring.

  • Carpets. You can never run out of options with carpets. Aside from the design and considering the variety of materials available, it’s almost guaranteed that something will suit someone’s needs and preferences. There are those made from natural fibers as well as recycled materials.

Recycled Flooring Options:

  • Salvaged Woods. Whether they came from old ships or worn down homes, salvaged woods have this certain history and rustic character that makes it unique and more appealing. Depending on the condition of the wood – its thickness, texture, size and color – you have the option to refinish it to make each piece look more uniform or just keep it distinct for a more detailed character.

www.inspirationgreen.com

  • Recycled Tiles. Tiles, just like carpets are being manufactured from pre-used, pre-loved and pre-worn materials like plastics, metals, glass and carpets. Aside from the lesser strain on natural resources, these recycled products also reduces waste. Another advantage is the cheaper cost, and more importantly, these are usually more precisely cut than natural wood or stone making it more manageable in terms of installation.

www.salvo.co.uk

Antique Stone and Bricks. These are technically salvaged stones – cobble stones, bricks and pavers that are used to highlight, line and even cover floors and paths. Materials are reclaimed from old structures cut from local stone. Just like re-purposed wood, salvaged stones add a sense of history and pedigree.

Maintaining Vintage Wood Floors

Vintage flooring is a thing of beauty, in fact some home buyers wouldn’t mind shelling out a few hundred bucks to get just that. Some who already owns a home would go leaps and bounds scouting and sourcing for the right materials to give their abode a rustic appeal.

If you just bought a house with wood vintage floor that lost its former beauty, don’t fret. All is not lost…and definitely don’t rush into replacing it at once. It can be restored back to its former glory and you can have it looking brand new, in a vintage kind of way of course. Vintage wood floors are durable and beautiful, its an authentic timeless piece of your property that should be given  proper care to maintain its durability and rejuvenate its luster

itsdefense.com

Caring for vintage wood flooring

A lot of people may be thinking that vintage hardwood floors are difficult to maintain and care for. Most of us initially tend to turn a cold shoulder and frown at properties listed with such type of floors. Indeed there are a lot of considerations when it comes to maintaining vintage wood flooring but aside from its natural beauty, well-maintained wood flooring can endure years and years more.

Here are some basic rules you might have to observe at home if you have vintage wood flooring in order to care for it properly and be on the preventive side of things:

  1. Shoes should not be allowed inside the house. This includes stilettos and other sharp and jagged boots as well as dirt-filled shoes as they can not only create a mess of earth but scratch the top coat finish of the vintage wood planks. Instead, provide soft sole slippers to be used inside your home. If the use of shoes cannot be avoided especially when you have parties and guests, make sure to have doormats and carpet runners on high traffic areas to prevent excessive scratch and stains.

  2. Add rubber furniture protectors at the bottom of your furniture like chairs, table, cabinets and any other fixtures and objects that are being frequently moved around the house.

  3. If you keep your pets inside the house, clip their nails. Ensure proper grooming since their sharp claws can easily scratch the surface of the floor.

www.atticmag.com

  1. When there are children in the house, its best to designate their playing areas in places where rubber mats and other protective floor covering can be used to protect the surface of the vintage wood floors. Teach them at a young age its not right to write on the wood floor’s surface or scrape their toys at them.

  2. In cases of spills, immediately dry any droplets on the floor. Longs standing beads of droplets may cause unwanted ugly stains. Be sure to blot it with a soft rag or cloth, do not wipe as there is a greater chance of spreading stains instead of containing them.

Refinishing your wood floor

Shine and luster of the wooden floor does not last for life. Daily wear and tear will eventually leave your vintage wood floors bare and prone to moisture seeping in. Generally, it is ideal to refinish wood floors once a year. This is best done by professionals as the top coat has be removed by sanding and buffing but here are some basic steps you need to know:

www.dexknows.com

  1. The first thing to do is to know is the finish of the floor is waxed or polyurethaned before applying any floor shining products.

  2. For waxed finish, find cleaning products that goes along with waxes. Do the same for the poly finish.

  3. Use floor scrubbing machine with flannel cloth. This machine is not popularly used these days. You can find on flea markets and garage sales at a very affordable price. Some sellers are willing to give it to their customers at for only $5.

  4. Always allow the finish to completely dry before putting back furniture and fixtures into the room.

Cleaning dirty vintage wood floors

Unlike ceramic tiles, natural stone tiles and laminates flooring where you can simply sweep and mop off the dirt, wood floors vary a little in terms of cleaning regimen. Here are the ways on how to keep it shiny and clean:

www.wikihow.com

  1. Sweep away the dirt with a broom.

  2. Vacuum the spaces between each wood plank. This is the place where dust and mites accumulate.

  3. Rub a cotton swab over the stain spots. Inspect it afterwards to know the origin of the stain.

  4. After determining the stain, select the correct product for both the stain and the floor. Then, scrub it over the spots.

  5. Leave to dry.

  6. Apply shine solution.

  7. Mix an equal portion of oil and white vinegar oil. Spray a little over the floor.

  8. Buff the floor to shine.

Caring for vintage wooden floors needs extra patience. The satisfaction you can get, however, overshadows the whole process of making it shine like new again.

Linoleum Flooring Essentials

Most of us would think of something from the past: dirty, worn and in dire need of replacement when we hear the words linoleum flooring. The first images that probably pops up in most people’s brain is a grainy brownish-yellowish images of their grand parents having coffee in the old diner.

Well, as part of our green posts to commemorate Earth Day this month, this post will try to set the fact straight about linoleum flooring and dispel about some myth about linoleum flooring.

“Lin” + “oleum”

Linoleum is a biodegradable product. It is made up of all natural materials which makes it an environmentally sound flooring choice. Based on its patent year, linoleum has been around for 150 years.

Invented in 1863 by Frederick Walton by combining linseed and oil, hence the name together with other natural products like powdered cork, resin, limestone, ceramics and wood flour pressed together in a sheet. The earlier linoleums did not have colorants or stains and basically had the natural patterns from the manufacturing process.


Some appreciated the authenticity of these patterns while others find it a little too bland and common to make any room where it was installed stand out. This is one of the reasons why linoleum, despite its natural beauty and endurance became a second choice, next only to vinyl flooring. The good news is that recent technological developments have made it possible for linoleums to have more colors and hues.

Linoleum and Vinyl, which is which?

After World War 2, with the introduction of synthetic and oil based vinyl flooring, the popularity of linoleum began to wane. This is largely due to the fact that vinyl was easier to mass produce, hence they are cheaper, they come in a wider color range, while linoleum required a little maintenance, vinyl offered far less.

Both vinyl and linoleum flooring come in sheets and tiles, installation can be done by a professional or DIY, depending on the skills you you have, as well as time and tools.

One major difference is in the colors of the flooring solutions – linoleum’s colorants are included in the mixture before it is pressed into a sheet or tile. This makes the colors and patterns more vibrant over the years.

Designs on vinyl flooring surfaces is printed on top and sealed with a sealant coating after the sheet has been manufactured which makes it prone with constant exposure to sunlight and daily wear and tear.

Cleaning Tips

Linoleum is fairly easy to clean. A regular sweep with a damp mop after vacuum will suffice. Since linoleum is sensitive to acidic cleansers, be sure to check cleaning materials you use in order not to damage the flooring’s surface.

Also keep in mind that waxing might be necessary to keep the floor shiny, this usually requires once or twice a year. Be sure use the recommended wax stripper for your product before waxing and check that tools won’t scratch or damage the surface to make sure your linoleum flooring will last longer.

Though the surface is generally waterproof, be sure to prevent prolonged exposure to water and clean out stains using the proper materials.

Laminate vs Engineered Hardwood the Pros and Cons 2

Laminate flooring and engineered hardwood deem to always be going head-to-head against each other when it comes to the best floor covering in terms of factors like durability, design and cost. During a home renovation, many people get confused on which is the better one: use laminated planks or the engineered one which is a form of hardwood. Homeowners are often faced with questions like: which one best serves my purpose; which one costs cheaper; and which one will last longer?

www.dark-hardwood-floors.com

To help you arrive at a sound decision, keep reading and learn about their differences and other characteristics so you’ll know which one will perfectly suit your needs.

What is laminate flooring?

Laminate flooring is a combination of wood materials, paper and other synthetic materials combined together through lamination – pressed together to form single durable board or more appropriately, plank. A protective and stabilizing underlayer is put at the bottom to make it sturdier and on the top layer, a sheet printed with the design is added before the shiny, strong and protective topmost layer to give it a more appealing and realistic appearance. The top layer can be textured to make it more realistic. It is also designed to keep the image inside protected from sun and water damage.

www.sunspeedfloors.com

This type of flooring material is one of the best-selling floor covering material  all over the world because of its beautiful decors that can mimic both wood and natural stone, not to mention the easy installation process at a fraction of the cost of these materials that it imitates.

What is engineered hardwood?

 Engineered wood is like a sandwich. It is a combination of 1/16 to 1/8 inch of top wood and rough

Plywood underneath. It is a total 100% wood. The underlying plywood is placed perpendicular to the wood pattern of the top wood to make it stronger than a regular wood plank. It also has a number of wood varieties to choose from such as oak, cherry, pine, mahogany and maple and because of its construction, most builders agree that hardwood engineered flooring is better than solid hardwood and it is recommended for all around flooring.

www.ukflooringdirect.co.uk

What are the pros of using laminate over engineered hardwood flooring?

There are many things you can think of why you have to choose laminate flooring instead of engineered hardwood and some of these are:

  • Laminates flooring planks cost less that engineered hardwood.

  • They are easy to install. You can finish a room as large as 300 square meters in a single weekend. It has easy click and clock design. Or, you may also want the one where you need glue for easy construction.

  • They are inherently shiny and require minimal maintenance. They can easily be vacuumed to take away the dust. They are also stain-free.

  • They are perfectly cut. Unlike real hardwood planks which have different cuts and require a professional measurement and cutting procedure, laminates have flawless pieces.

  • They are moist-resistant. If you love the wooden appearance of the floor yet you live a very humid region, laminates are the answer to your dreams. They do not absorb moisture because of the resin cover over them.

What are the pros of engineered wood over the laminate flooring?

armstrong.com

Although, laminate flooring may have many advantages, it does not mean that engineered wood fall short on this list. Here are the reasons why you should love the engineered hardwood flooring:

  • They are genuine wood. Anybody can feel that is the real thing and what is not. Engineered hardwood is 100% pure wood. The beauty of the authentic may be imitated but, cannot be completely copied by the laminates.

  • They feel smoother and softer under your feet. Real wood feels warmer than resin.

  • They are less slippery. Real wood are naturally non-slip surfaces.

  • They have high resell price. Have you heard of reclaimed hardwoods? You can do this too, with your engineered wood floor planks.

  • They can be sanded off. Scratches over the floor surface develop over time. You can make your wood floor look like new by sanding it again. Laminates cannot be sanded. Any scratch over the resin surface may require it to be replaced.

Every home has its own ambiance as anyone living in it has his or her own lifestyle and preferences. now that you know more about laminate and engineered hardwood flooring, choose wisely and have fun!

How to Take Care of Linoleum Flooring

Linoleums is one of the good flooring choices around especially if you are looking a home improvement project that’s quick and easy to do, affordable, trendy and good for the environment. Oh, yeah! Linoleum is all of the above and more!

In a previous post, we have debunked myths surrounding this great flooring material that has been around for quite some time and well, there is a reason why it never quite got out of the picture.

www.houzz.com

Linoleum flooring is flexible. It can be installed above and below grade. You just have to be mindful of your subfloor and moisture when you are putting it somewhere where there is direct exposure to water.

Aside from that, linoleum comes not just in timeless neutral shades but they are now available in hip and trendy designs and a wider range of color, texture and thickness. If you are a DIY-er, this definitely gives your creative soul plenty of room to breathe.

www.capri@home.com

Like any project or investment, especially with home improvements, we want to make sure it is well taken care of so we not only make the most out of it but we also make and share beautiful memories with it. In order to help you best take care of linoleum flooring, we have gathered some basic tips on how to clean and maintain linoleum floors.

Cleaning Linoleum Floors

Since linoleum is made of natural components like linseed oil, cork dust and other starchy particles, extreme scrubbing is not a great idea as it may dent and scratch the flooring’s surface. Though linoleum can endure some heavy thorough cleaning, it will have to be done sparingly.

www.wikihow.com

On a daily basis, its enough for you to do the following to make your linoleum covered floor squeaky clean:

  1. Remove dirt, debris and other dust particles with a broom, dust mop or a vacuum. Though we would recommend a dust mop to be sufficient and capable.

  1. Afterwards, make an appropriately light solution of water and cleaning agent – whether it’s soap, detergent or a manufacturer-recommended one and work it with a mop to remove debris built-up and dirt lodged into the linoleum surface.

www.wikihow.com

  1. Begin from the farthest part of the room, regularly rinsing your mop in the solution given the size of the room and the degree of dirt, and go towards the exit.

  1. Be mindful when wiping exit and entrance areas as they are more prone to dirt. You might also consider having some door mats and runners in place for protection.

Maintaining Linoleum Floors

At least once a month, or at least when you think your floors needs it most, have your linoluem flooring deeply cleaned.

jenadyco.com

  • By deep cleaning we mean  having as much furniture covering the surfaces turned or removed from the room and the following the steps mentioned above.

  • After which using a wax stripper or making an ammonia and boiling water solution to remove the wax and reveal bare linoleum surface using a mop.

  • Let the surface wax and apply fresh wax to protect the surface before moving furniture back in.

There you have it. Simple and doable steps to clean and maintain linoleum flooring.

How to Regrout Ceramic Floor Tiles

Ceramic tiles are easy to maintain and they are also very durable. They come in different shapes, sizes and colors so anyone is sure to find a design that perfectly goes well with their preferences and needs. These are just some of the advantages of having ceramic tile flooring.

The most repair you would do is having to replace a tile should it get broken, cracked or severely damaged. For the most part however, it will be cleaning most of the time and regrouting once in a very long while.

www.groutgenius.com

Yes, the grout on your ceramic tile flooring tend to look dirty, ugly and worn over time so you’d need to have it replaced to make your floors looking brand new.

So how to regrout ceramic floor styles? Here are some quick, easy and useful steps:

  1. Choose the right type of grout. There are basically 2 types of grout: sanded and un-sanded. The sanded ones offer more strength and hence, it is recommended for spaces larger than ⅛ inches. If its smaller, then use an un-sanded one. This will make it easier for the grout to be applies and penetrate smaller spaces. Also, since the gaps are smaller, you won’t be needing the additional tensile strength offered by sand. Regrouting marble tile flooring however changes that rule since the and will severely damage the marble floors beyond repair, though the tiles should have been installed with less than ⅛ gaps, it won’t do you no harm to be mindful of these things. Finally, be sure to have the right color of the grout to match your tiles. If you were able to save some of the old one, then check if it has an expiration date or if its still suitable for use. Another neat trick is to chip off a piece of the old grout or take a photo of the floors and bring it to your local hardware store or home improvement shop.

www.wikihow.com

  1. Clean and remove old grout. Clear away the old grout using an oscillating multitool that you can either rent or purchase from your local hardware shops. Two things to keep in mind if you plan to clear the old grout yourself; one, be sure you know how to use the tool and two, that the blade is sharp enough to do the job. Grind away following the old grout line, make sure to go as deep as the tile’s thickness. Next, sweep or vacuum and lightly mop to remove the dust. Using a small hammer and chisel set gently chip of remaining bits and pieces of grout. Note the word: gently. We are going to take out the grout and not the tiles. Sweep off the dirt and wipe the surface with isopropyl alcohol. If there needs to be any repairs or replacements, this is the best time to do it.

  1. Apply the grout. Following manufacturer instructions, mix the grout with the right amount of water in a small plastic tub and stir well until you achieve the right consistency – it has to be smooth: not too crumbly and not too soupy. Allow it to sit for a few minutes and stir again before application. Using a rubber grout float, force the mixture into between the tiles. Swipe the grout in the direction of the gap and force it in. Work from one area within your reach to another. Avoid stepping on freshly applied grout to prevent it from gouging out. Occasionally stir your grout mixture to avoid it from drying out. If you are working on a rather large space, mix small portions of the grout to avoid it from drying up. Dried up mixtures should be discarded as using it might compromise the quality of your work.

www.wikihow.com

  1. Clean it up. Once you’ve finished applying the grout, allow 10-15 minutes for it to dry. Be sure to check the entire floor and make sure the grout is applied evenly and that there are no sections where an excess amount is bulging out. Be quick to scan and immediately remove any before the grout dries up. Use a spatula or a wooden stick to scrape them off. Also using a squeegee, non-corrosive rug or a foam sponge, wipe off excess grout on the tiles. Rinse the sponge often as you work from one section to another.

  1. Add the final seal. Allow the grout to cure following manufacturer’s instructions. This is usually about 24 hours. Then apply a penetrating seal on the grout’s dried surface using a spray bottle or a sponge. This will protect the grout further and make it less prone to molds and mildew. Be sure to quickly wipe off excess sealant on the tile surface as they may cause staining.

www.wikihow.com

How to Paint Floors Essentials

Painting your floors is one of the cheapest, quickest and easiest way to update the look of any of the rooms in your home. Compared to walls and ceilings, we often notice the floors because while we rarely look at them, we often feel them.

One of the main advantages of painting floors is that they are applicable to any floor – whether its wood, stone or concrete. Once the paint cures and sets, it’ll also require less maintenance compared to other floor coverings like wood that will require yearly staining and tiles that needs regrouting. Finally, minor damages are repairable and it takes only a fraction of the costs of other flooring materials.

ashleyannphotography.com

If you are convinced that you want to paint your floors and do-it-yourself while you’re at it, keep reading to know more.

Whether it’s wood or concrete, its best to know if your subfloor is suitable for painting. So, can your existing floors be painted?

In general, laminate, vinyl and linoleum may not be painted. Paint is commonly recommended for concrete and hardwood-based flooring.

Painting Wood Floors

Historically, wood floors are the first ones to be painted as far back in the 1700s mainly for aesthetic reasons. While the last few centuries have waned its popularity, painted wood floors are making a comeback because of certain innovations and of course, economics. There are different varieties and shades of paints available making it possible to create visually satisfying patterns and designs and its not that costly to be creative.

When it comes to wood floors, try to find out about the type of hardwood flooring you have, the paint recommended for it and the type of finish it has. Be sure to re-sand the surface to remove the old stain and finish before applying the paint. Ensure that sufficient sanding is done – meaning all of the existing finish and stain is removed and you are left with nothing but bare wood flooring. A word of caution when sanding though, try not to put too much weight on the machine and do not focus on a specific area for too long as it may cause an uneven surface afterwards.   Test the paint on a small location first to check if its compatible with your wood flooring.

thekidsroomdecor.com

This is very important. If you have painted floors that ages back to 1970 or earlier, its best to have professionals handle paint removal or, if possible, have the old painted flooring replaced because paint before 1970 has lead which is highly toxic. Exposure to lead can cause serious illnesses.

Painting Concrete Floors

Compared to wood floors, there are some tests you need to do if you have concrete floors. First of these if the moisture test that determines if paint can tolerate moisture on the concrete’s surface. To test if there is excessive moisture, cut a piece of plastic crap, about 2×2 inches and place it on the concrete to be pasted securing and sealing all the edges with a duct tape. Leave it for 24 hours if you find that there is water inside or that the plastic wrap is damp, the floor cannot be painted. Consult local contractors to help you fix the problem.

The second test is the porosity test. This is to identify if the concrete has a coating finish that needs to be removed. to do this test simply sprinkle water on the concrete floors surface. If the water droplets get soaked up by the concrete then we are all ready to start painting. If it remains on the surface then we need to have that coating removed.

Clean and clear

Whether you are working with concrete or wood flooring remember to clean it up pristinely after the finishes have been removed. There should be no dust, debris and residue left in order to achieve a smooth and welcoming finish.

glenconey.com

After sanding be sure to sweep or vacuum the surface and wash it with detergent or soap and allow to dry for 24 hours at least. If washing is not possible then thoroughly mop and re-mop until the surface is squeaky clean before applying paint.

Tune in to our next post for more tips and ideas.

How to Level Concrete Flooring

Concrete floors, sturdy and versatile. Gone are the days that decorators and homeowners shunned away from bare concrete flooring. Recent trends have made concrete not only in fashion but also reasonable flooring choice among home builders and DIY enthusiasts.

Cover ‘em up with other flooring products: area rugs and carpet tiles, paint and stickers they offer a cheap alternative than usually high-end markets occupied by natural stones and even hardwood. All it takes is a little effort and considerable amount of imagination.

All throughout our DIY flooring series, you heard us use the phrase “make sure the concrete subfloor is even…” and yada-yada. So today, we take a break from our installation posts and go over how to level concrete floors.

Whether or not you want your concrete slab as a subfloor or the main floor, continue reading and you’ll find useful tips below on understanding some cold hard facts about levelling concrete.

First, sweep and vacuum the concrete floor then grab a level bar and check the entire room. For slightly high spots, use a scraper or buff with heavy grit paper. Vacuum or sweep again till all the dust is removed before checking.

Use a framing square or even a piece of straight, flat lumber and mark all the  low and high points on the concrete floor.

For the larger bumps, better rent a grinder and make sure you know how to operate the tool and gear up for safety. If you’re not familiar with it, better contract to services of professionals. Also remember to cover furniture to protect them from getting scratched by debris from the grinder.

Work on the high spots you’ve marked earlier and grind it down till the bumps are gone and leveled with the flooring.

Sweep or vacuum the floor and check if you were able to even the lumps and bumps. Go back on some spots as needed.

For the low spots, prepare the levelling compound according to manufacturer’s instructions. Apply the dame with a trowel and work on small amounts as the compound hardens easily.

How to Get the Perfect Laminate Flooring

With all the varying features and styles of laminate flooring how do you pick the perfect one that will meet all your needs and add value to the space where it’ll be installed? Below are some basic tips every consumer should consider when shopping for the perfect laminate flooring, we have categorically split them into 2: design and function. These 2 elements are essential to finding the right one for your flooring needs.

The Perfect Laminate Flooring: Design Element

One of the reasons you might have chosen to install laminates over other flooring solutions is because its one of the most cost-effective. Chances are most of us will rather do the design of the room or we already have in mind what we like a particular space to look like. We assume a designer or stylist is no longer necessary and that’s the spirit, trust your own creative genius. However should you find yourself lost in the sea of choices you have, keep these pointers in mind:

  • Keep a particular in color family in mind and automatically eliminate the ones you don’t want to narrow the choices down. You can be bold in choosing the colors: they can contrast or blend with all the fixtures in the room.
  • The size of the room or the effect you want to achieve is another important consideration in terms of style. Darkly colored laminate floors tend to make a room look smaller and light ones give it a more spacious appeal.
  • Traffic is another thing to consider on the stylish side as lighter easily appear dirty or worn compared to dark hues. If you have canines or felines, a good move is getting laminate flooring the same shade as their fur to conceal pet hairs.
  • Bring a picture of the room, an object in the exact shade you’re looking for when you visit the store and show it to the salesperson or design professional if they have one as they may be able to make intelligent suggestions and even provide you with additional information.

The Perfect Laminate Flooring: Function Element

Aside from aesthetics, function plays an important role when choosing the right laminate flooring, here are some important areas to ponder upon before buying:

  1. Locking Systems. Most laminate flooring products available today have click-lock systems that makes them very easy to install and a perfect DIY project. However, be sure to check the quality of the locking system before buying. The pieces should lock perfectly: no gaps and planks should lay flat and even. No piece should be higher than the other.  Tongue and grooves should be thick and must have uniform thickness as this determines the strength and stability of the locks.
  1. Surface Texture. Yes, texture is more of a function than design. While texture initially imitates the feel of the material the laminate is replicating, texture lessens slippage and makes the floor ideal for little kids or the elderly.
  1. Wear Layer. This is probably the most important aspect of laminate flooring. Durability at a lower cost is the promise every manufacturers make but in most online forums, you’ll see unsatisfied customers naming companies or products that failed to deliver on that promise. Traffic is something constant that floors will face daily so be sure to get the appropriate kind of wear layer for your flooring needs.

  1. Core and Thickness. The core provides stability and thickness makes sure your hardwood- or stone-looking floors wont feel hallow and empty underfoot. Normally, those 10 to 12 mm thick ones provide a more solid feel compared to thinner laminate flooring.
  2. Backing & Edges. While these two might seem more compatible with the design element, they serve a more functional purpose. The edges should be seamless and should lock properly to make sure floors stay in place and accidents don’t happen. Backing on the other hand should be non-toxic and moisture tolerant to avoid rotting or growth of molds underneath.

Some final notes:

Aside from form and function, the perfect laminate flooring should also be competitively priced. Check from different stores and see what they have to offer. Its not bad to bargain, in fact its even smart to think of ways to save on costs.

Learn about each stores after sales service and warranties. Since laminate flooring is durable but not indestructible, knowing product warranty can probably help you over time.

Cleaning and upkeep should be another concern since laminate flooring can’t be refinished after they’ve been worn, knowing how to best protect them is probably one of the best bets anyone can have in getting the best out of their perfect laminate flooring.