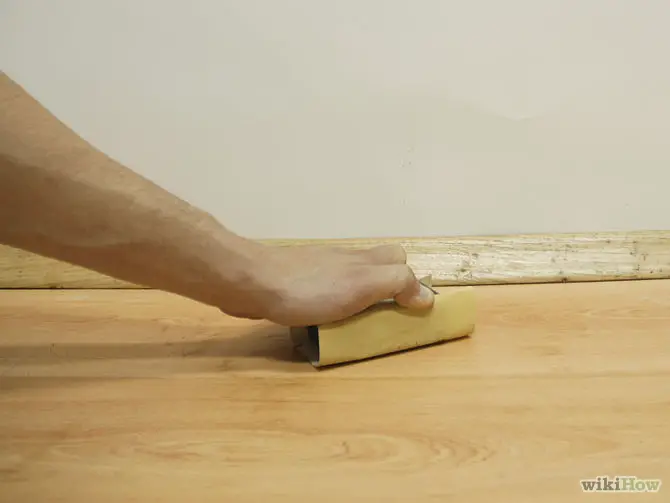
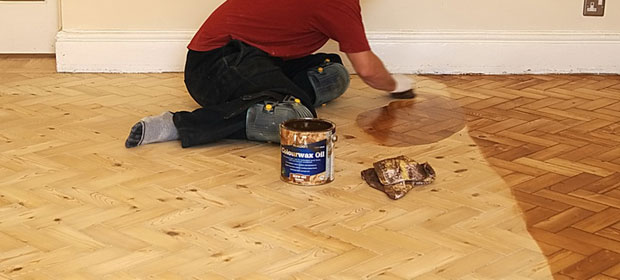
DIY Carpet Tiles Flooring Installation Prep

Carpet tiles are not only cheaper compared to other flooring materials. They are also more versatile and easier to install, keep and maintain. Moreover, they give you more room for creativity as you can create simple patterns like checkerboards or add inlets, mix and match patterns and colors and all that stuff.
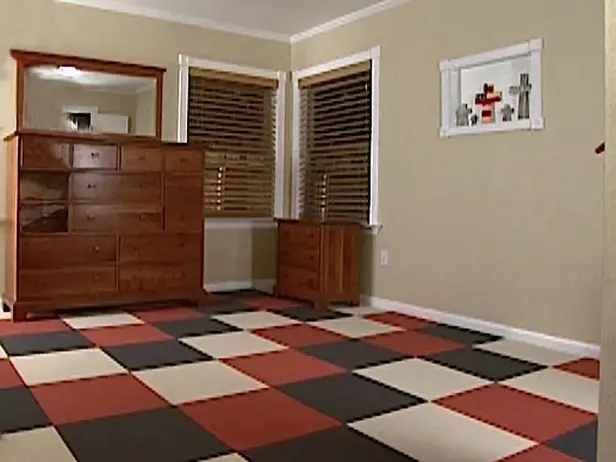
Comfortable and visually appealing, carpet tiles can add that needed oomph by giving instant warmth and comfort in the room or simply a splash of color. With the different colors and patterns available at a fraction of the cost of wall-to-wall carpeting, the possibilities of creating a cool and personalized space is simply limitless.

How much to buy and how much time?

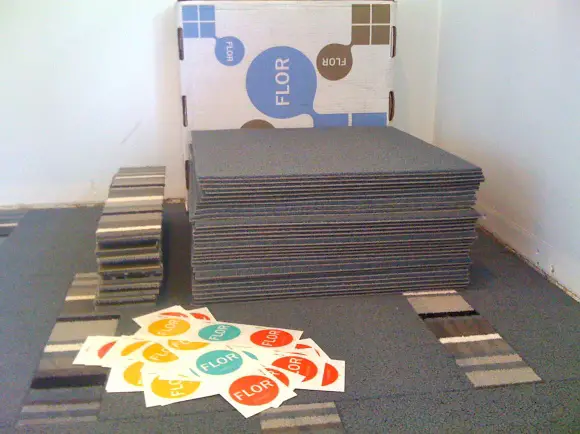
In order to determine how much flooring material you’ll need, in this case how many carpet tiles. Take your tape measure and get the length and width of the rooms you plan to put the carpet tiles on. Once you have them, multiply both to get the actual square footage of the room, don’t forget to add an extra 5-10 per cent to accommodate errors and have spares for future repair or replacements.

If you’re planning to create a pattern more complicated than checkerboards, then you might consider seeking advice from your local stores as their flooring professionals can offer you with a more accurate estimate and perhaps suggest a pattern or design better suited to your needs or purpose.

What’s the time for? It’s for acclimation. Yes, just like wood-based flooring, carpet tiles also need to get acclimated to the place where it’ll be installed. At the very least, this calls for 24 hours.
Preparing Subfloors

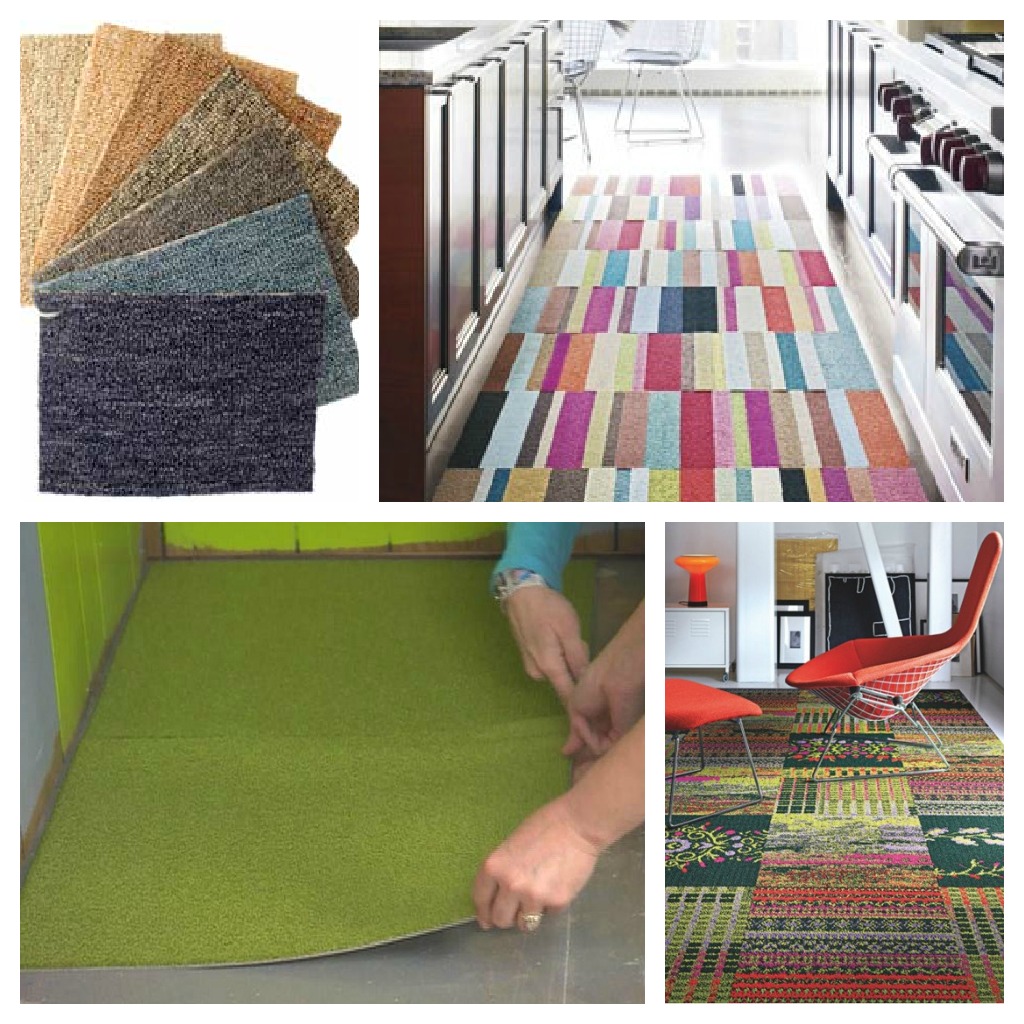
The success of any flooring installation whether done by a DIY enthusiast or flooring experts depends largely on preparing an important component of the flooring process: the subfloor. Subfloor preparation steps vary depending on the flooring you want to install, the subfloor type and its location.

Concrete Subfloors

  • If the concrete subfloor is a new one, be sure to allow sufficient time for the concrete to cure before installing carpet tiles. The recommended waiting time is about 90 days.
  • For the cracks, fill them with concrete caulk. For deep, tiny cracks, use a  caulk gun to make sure all gaps and spaces are filled out.
  • Be sure that the surface of the subfloor is level. Use a level bar to check if the subfloor is even and a grinder to trim high spaces. For low surfaces, you can apply a levelling compound mixed according to manufacturer’s instructions. Let it set and dry according to manufacturer’s instructions then check again to make sure that its even.
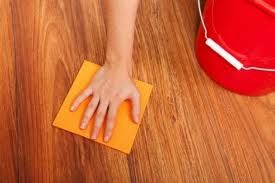
  • Sweep or vacuum the floor thoroughly, removing all dirt all traces of residue from previous flooring, if this installation is an upgrade or replacement. If you have enough time to let it dry, you can also wash and wipe the subfloor to perfection.
  • Depending on your carpet tile of choice, it might be necessary to use a concrete sealer on the subfloor prior to installation. Follow manufacturer’s instructions and set it to dry.
Wood Subfloor

  • Since wood is more prone to damage than concrete, be sure to thoroughly examine the subfloor for damage. Any warping or sheeting might require repairs or replacements. Its also important to check flooring joists as the soundness of the subfloor’s structure will contribute to the overall success of your DIY carpet tiles installation.
  • Again, check if the subfloor is level. Sand o plane as needed.
  • For low spaces, use prescribed latex levelling compound and apply following manufacturer’s instructions.
  • Vacuum, sweep and wipe to remove all traces of dirt and grime and scrape off any stubborn residues.

DIY Bamboo Flooring Installation

After we’ve carefully prepared the subfloor  for our DIY flooring installation, we are now ready to put in our bamboo flooring. First, make sure you get your measurements and lines straight, you can have a dry layout of the planks in a few rows before securing the same with nails or adhesive.

Some things to consider in installing bamboo flooring planks are the longest wall in the room, the direction of the light to conceal seams impact as well as windows and entryways.
Experienced DIYers can cover about 200 square feet in a day.

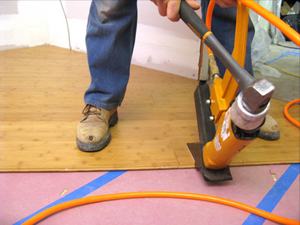
1. Nailed-down Installation – also referred to as secret nailing method, this is the traditional way of installing bamboo flooring, as well as other wooden flooring materials using nails or staples. Here, nails will be rammed on the tongue side of the plank to be nailed on flooring joists using a blind nailer, hence the name secret nailing since the next row will conceal the nails on the tongue of the previous ones.

The challenge here would be the identification and marking or the flooring joists. Each piece of flooring should be nailed every 8 inches and within 2 inches of each end at a 45º angle.
As it is with normal hardwood flooring installation, the first and last rows would have to be face-nailed.

Lastly, checkout manufacturer’s instructions to see if there are recommended putties to help you conceal nail holes on the floors.

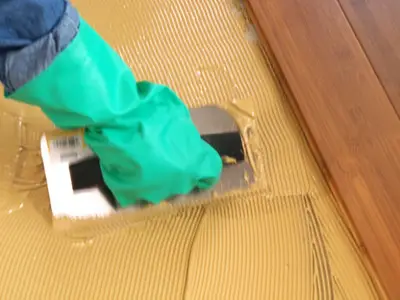
2. Glued-down Installation – this process mimics that of installing tile flooring. This application is suitable for both wooden and concrete subfloors. Some adhesives are formulated to resist moisture build up eliminating the need to use vapor or moisture barriers.

Some adhesive are available ready for use while some would have to be mixed. Be sure to follow manufacturer’s instructions and recommendations when mixing the adhesive from the amount of water required to the ideal consistency of the mixture and  the appropriate trowel size.
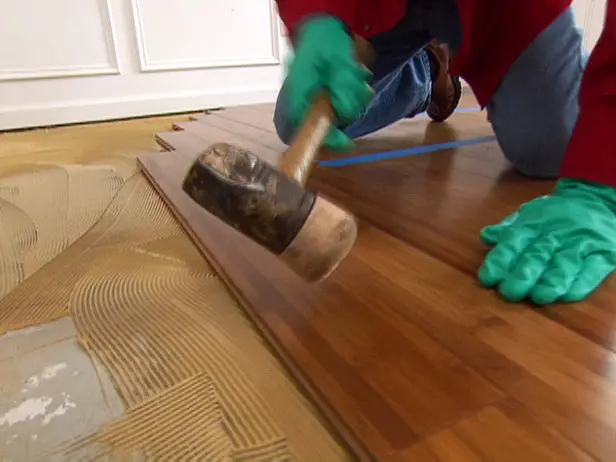
Begin on the side of the wall with the first plank’s grove facing the wall. Make sure that there is enough ventilation in the room and don’t forget the recommended expansion gap. If curing is allowed prior to laying out the planks on top of the adhesive, be sure to do just that.
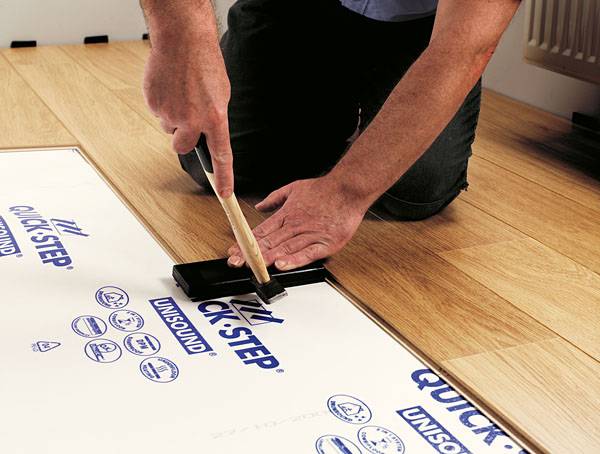
Ensure that planks are straight and correctly aligned. Immediately wipe off excess adhesive on top of the flooring using a damp cloth and walk on the flooring – every square feet of it to make sure that the planks would bond with the adhesive. Use weights as needed.

3. Floating Floor – this refers to gluing only the tongue and groove of the bamboo flooring planks installed over underlayments and other recommended cushions. This is generally recommended for radiant heat and ideal for below grade installations.

Begin on one side of the wall, groove facing the wall. Apply adhesive on the tongue and grooves successively. Lay subsequent rows of planks and use a tapping block to securely lock them. For the ends of each row, use a pry bar for a needed push.
Different Types of Laminate Flooring

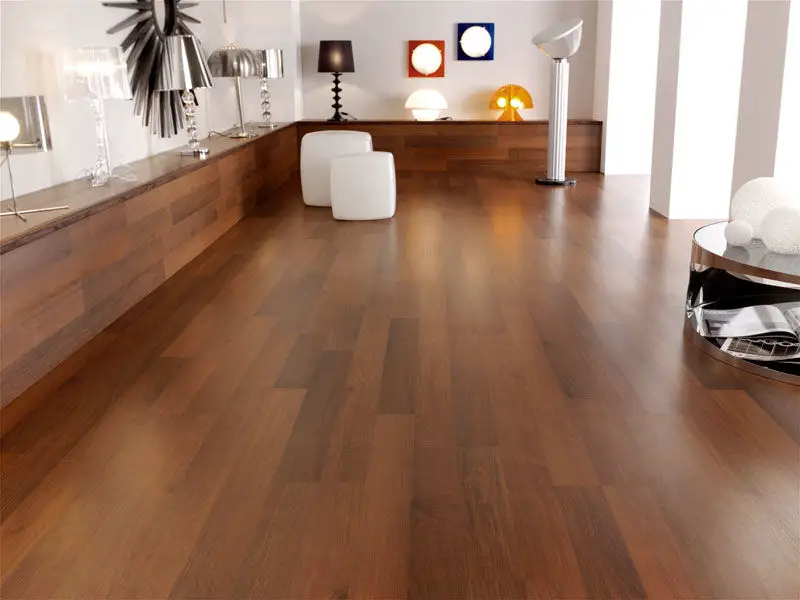
Your floor can be as colorful as you wanted it to be by using different types of laminate flooring to your advantage. Create illusions of grandeur, enjoy its durability for years to come and save on flooring expenses now. These days laminate flooring comes in standard and even larger planks mimicking all sorts of surface from traditional hardwood for an elegant finish to rustic re-purposed planks for a more authentic appeal. They also imitate stone tile flooring surface and appearance as that of marble and granite.

risalafurniture.ae

The key to choosing the right laminate floor material and other flooring needs is understanding the different types of available laminate flooring solutions. Once you know more about the materials, it will be easier to know what best suits your needs and preferences.

What are the parts of laminate floors?

To begin with, laminate floors are great alternative for ceramic and wooden floors. They are durable especially in humid weather. They are also easy to install and cost less that the real wood, marble or ceramic. Finally, laminate floors are also easier to maintain and clean.

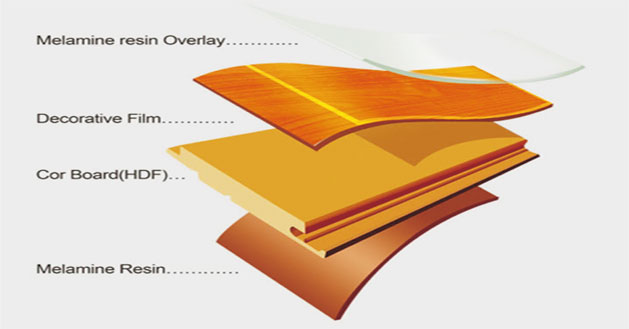
Knowing the different types, parts and components will not only help you buy the right one but it can also greatly help prolong the life of your laminate flooring. Each laminate plank basically has the following parts:

www.kingswell.com.au

  1. The wear layer. This is the top portion which you walk on. It is shiny because it is made of plastic resin and paper cellulose. It protects the print underneath and it is designed to receive foot fall on different levels – from very light to really heavy.

  2. The pattern layer. Known as the design layer. This is where images are printed and gives character to the flooring. Because it is protected by the top or the wear layer, it does not get scratched or faded. Without this, your top layer will only be a transparent plastic.

  3. The core. This is the layer that holds the floor together. Without this, the pattern and the top layers will easily get crumpled. The quality of a laminate floor depends on this part. It can be made thin or thick. Paraffin waxes are made to sip inside it to prevent water from getting in.

  4. The stabilizer. It holds the floor in place with its rough surface made of melamine plastic resin. It also serves as a protection from the outside environment just like the top layer.

What are the different methods of installation of laminate floors in terms of function?

Installation and construction of laminate differ depending on the type. Every piece has its own function in installation. Laminate floors are easy to install and can be done on your own. The types of laminate floors according to construction are:

shutterstock.com

  1. Stepdown Stair Nose – these are laminated planks that are fitted on staircase steps.

  2. Reducer strip. This connects the laminate tile or plant to other type of floor in your house like vinyl or ceramic.

  3. End molding. They regulate the height of your carpet if you wish to add carpet over your floor.

  4. T-molding. It edges the adjoining rooms. It is also serves partition when joining your laminate floor to a different type of floor in your house provided that they have the same height.

  5. Quarter round. It is installed when the laminate plank reaches any wall in your house.

There are many types of laminate floors. Each of them has its own function. Know each and every type so your DIY project will look like professionally done in no time.

Cork Flooring for Bedrooms

If you’re like some who can spend an entire day in their bedroom or if you plan for your kids to spend more time in theirs, better make sure its well decorated and well fit for other activities other than watching TV or sleeping. While the room’s size will always be a big factor, creativity and being organized can do wonders.
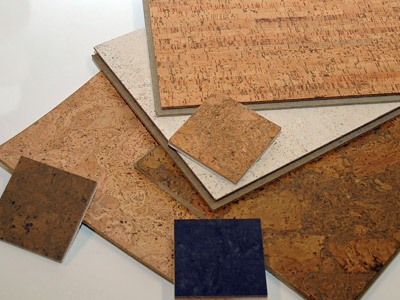
So what’s the best flooring for bedrooms?

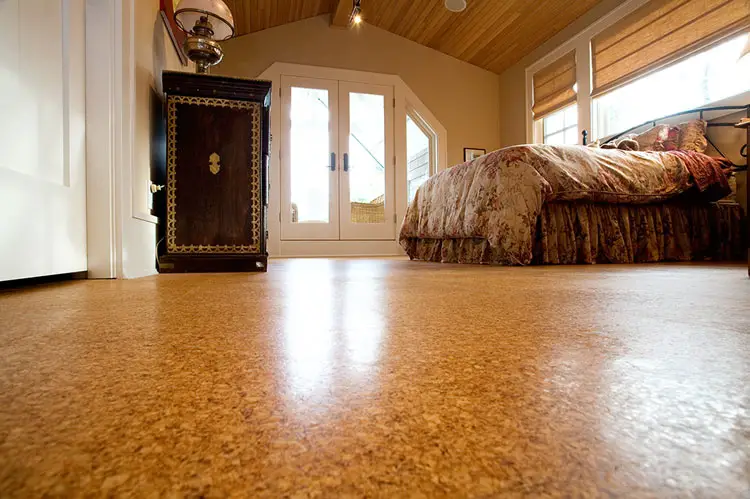
Our top choice, without any question is cork. While it can be a little bit more costly than other flooring solutions available in the market today, it has everything any homeowner can possibly look for:
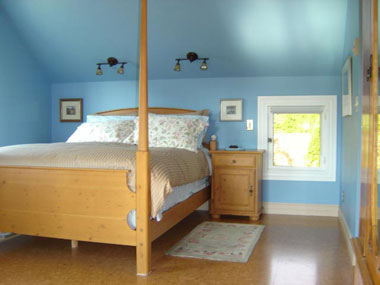
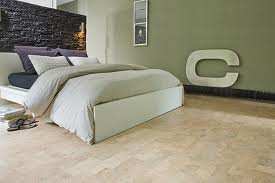
  • Its environmental-friendly. Made from natural materials and totally sustainable. Cork flooring is made from the bark of cork oak trees. When the trees are of age, the bark is taken of carefully by hand. This is usually done in regulated cork oak farms so trees are properly taken care of.
  • Cork is extremely durable. Some old buildings who used cork flooring about a hundred years ago still have their original cork flooring up to this day. Its water-resistant and is made up of mostly air chambers so it doesn’t dent easily.

  • Cork flooring has suberin – a natural chemical that fights decay, adding to its durability and most importantly, suberin repels bacteria making your floor hypoallergenic.
  • Cork is a great insulator – both for sound and cold. Cork absorbs sound when something is dropped on the floor. It also provides warmth and dryness to the floor regardless of the weather.

  • Cork can be stained and it comes in different sizes. Some are even available with pre-attached adhesive making flooring installation a breeze.
  • Its naturally rich patterns and gorgeous wood hues, it can go by its already stylish self without the need of staining.
  • Cork flooring requires less maintenance and it is very easy to clean.

Commercial Flooring Considerations and Choices

Today we’ll take a look at common commercial flooring choices. Knowing a bit about them will help you greatly in choosing the best flooring material for your office, business or shop. Having the right material at the right place for the right use will greatly benefit your investment in the long run plus you don’t have to bother with frequent repairs and replacements.

Before deciding to pick which commercial flooring product is the best for you, think about a the following factors:

  • Location. This is mostly important because location affects the humidity, moisture and climate that can have an impact on your floors. In places where there are frequent rains or there is high moisture, having wood-based products is generally not advisable because it will be pretty hard to control everything that goes on in a commercial environment.

jags-webdesign.com

  • Budget. This is another important factor to consider since your budget might include materials, installation and maintenance all in one. If this is the case then you would have to consider the amount and cost of the material you’ll choose together with the installation costs. It will also be helpful to consider the size of the area you intend to cover to ensure that you are not going over-budget.

  • Installation. This is very important especially if you already have an operational business. Installation will have to be quick and easy to ensure that you are open for business as soon a possible and that clients’ needs are met without much hassle or disruption.

  • Maintenance. The material and installation may have already cost you time and money, in some cases it might have also caused you to close up shop and stop business so maintenance will have to be something that’s easy-breezy to ensure that you don’t close up on your customers any longer than you already have. It has to be something that can be done as quickly as possible.

texturesflooring.com

  • Durability. The product you’d choose to use on your floors should be something that’s very well suited to your needs and purpose. If you expect to have a lot of footfall then choose something suitable to it, the same is true if you expect to have heavy equipment or some amount of water every once in a while.

Now that you have some important points to consider, what then are the materials to choose from? Well, here they are:

  1. Vinyl Flooring – durable, low on maintenance and comes in dozens and dozens of designs to choose from. Vinyl flooring is one of the most popular commercial flooring choices out there because it offers ease of installation and friendliness to the budget. plus its great at withstanding daily wear and tear.

houzz.com

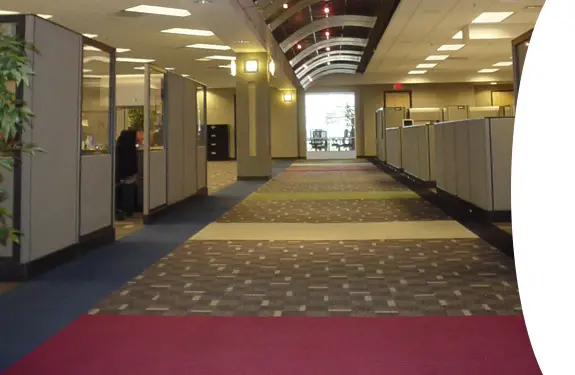
  1. Carpet Tiles – cheap, comes in various designs, colors and textures, carpet tiles are also another popular commercial flooring materials especially in office spaces because of its noise suppression properties. Comfortable and classy, its ideal for work spaces and office cubicles that require some quiet for thinking.

blog.focusfloors.com

  1. Rubber – sturdy, resilient to wear and tear and offers excellent support and comfort, rubber is a popular commercial flooring choice in gyms and other environment where there are a lot of physical activities going on.

flooring.interiorfans.com

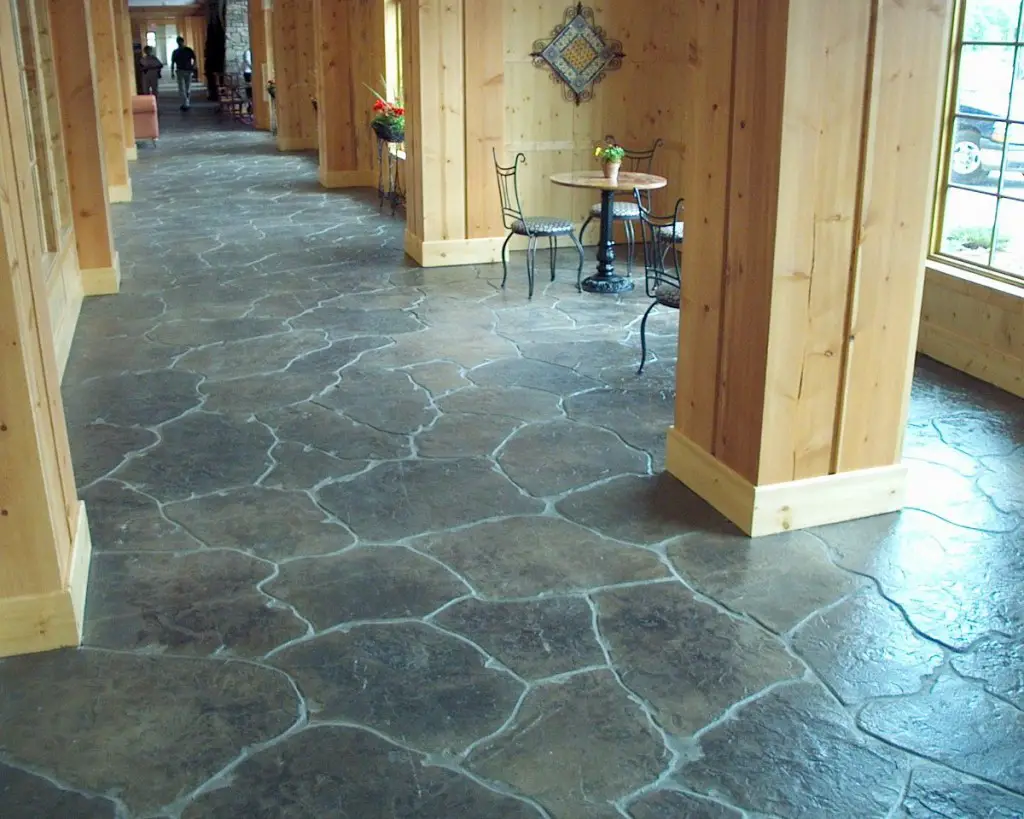
  1. Concrete – known for its practical durability, concrete is another popular commercial flooring choice because it’s both cheap and flexible. Left as it is for a rustic feel or coated with plain latex, rubberized or resin finished special paint to make it more attractive and have more traction and support, concrete will pretty much to the job.

designercustomconcrete.com

  1. Laminate – with a wide array of design choices, sizes and different levels of tolerance to foot-traffic, laminate is another material commonly used in commercial spaces. It is able to withstand moisture and other climatic elements as well as daily wear and tear and it comes with intricate design and even rich textures to mimic either stone or wood flooring minus the pricey costs so that makes it the perfect choice.

pinterest.com

Now, don’t think you have limited choices, again any type can work as commercial flooring. It just have to be very well-suited to your commercial space’s purpose.

Cleaning Prefinished Hardwood Flooring

Ease of installation and durability are two of the main reasons why more and morepeople now prefer having prefinished hardwood flooring in their homes.

Compared to hardwood flooring that are finished on-site, prefinished hardwood flooring is sealed with more powerful finish that allows your flooring to last longer. Since the finish is already applied it can be installed and used as soon as the flooring is fixed on the subfloor – no more waiting for the sealant to dry up and definitely no strong chemical odors will hung around.

Another great benefit is that this particular type of hardwood flooring is also easy to clean. Maintaining them is as easy as following these 4 quick steps:

  1. Sweep it up.  Make sure that you prefinished hardwood flooring gets regular sweeping with a soft-bristled, non-scratching broom or vacuum to lift of dust and other small dirt residue gathered from everyday use. If you’re using a vacuum make sure it has a rubber snooze to prevent unwanted scratching. Dirt and debris can cause scratches and build-up on your floors. Keep them pretty and attractive.

  1. Clean it quick. Whether its an accidental spill or a stain, be sure to quickly soak it up and pat it dry. Take note, soak up  and not wipe, especially if its materials that can cause stain or damage to the finish. Rubbing it on the surface may do more harm than good. After the spill has been soaked up, be sure to pat it dry. Avoid wiping as it may have some debris or residue that can cause ugly scratches on the finish.

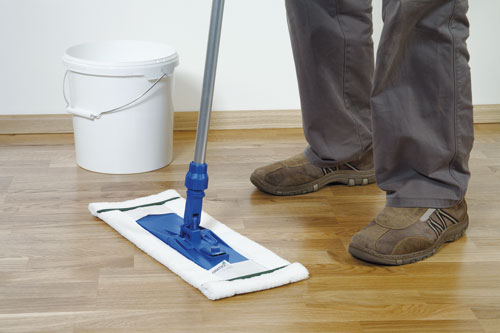
  1. Wipe it right. After the sweeping has been done, wipe the floors with a soft mat or cloth using a solution, wax or any recommended product that is recommended for your particular brand of flooring. As much as possible avoid mixing cleaners because it may harm your flooring’s finish. When trying out a new product for the first time, be sure to test it in a small area that’s hidden or can easily be covered up should your attempt backfire.

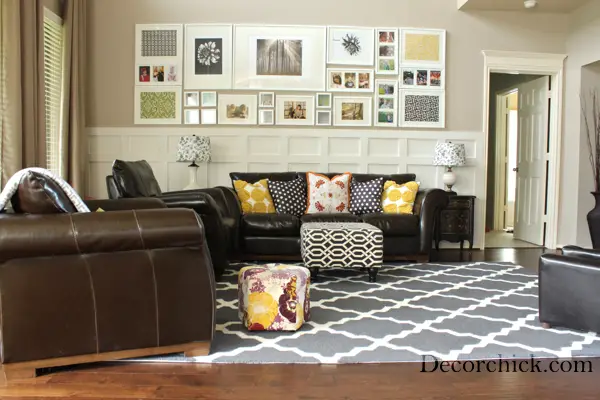
  2. Make rugs and mats work. Area rugs and doormats are more than just accessories, they serve a purpose – to protect your flooring surface. In areas where there is not just high traffic but activities that can pose some risks on your prefinished hardwood, it might be a great idea to use these. All entryways, especially those that are from the outside should have doormats – main doors, back doors, deck or patio doors, basement doors – since these are the areas that would usually bring in more dirt. Workshops, entertainment and play areas are the accident spill and stain prone areas, so you better watch out for these.

We hope that you will follow these quick tips as you continue your spring cleaning!
Cleaning Pet Urine On Hardwood Floors

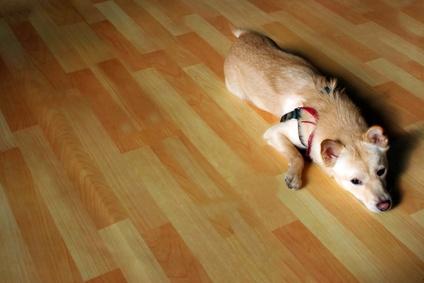
Pet urine stain removers are your best ally when it comes to bringing back the former flair of your hardwood floor. Pets are pets, whether they are being territorial or just simply couldn’t hold themselves, instances like this can happen on any day. Trained or untrained, whether or not you forgot to let them out, this can happen and when it does, it can cause 2 problems on your hardwood floors: first, the smell and second, the stain when the urine seeps in. The smell is easier to manage compared to the stain but don’t worry, all is not lost. We have some steps below on how to clean pet urine on hardwood floors.

How to remove the smell?

www.petswelcome.com

The smell of the pet urine is very unpleasant and can be downright irritating that it affects the concentration of others and leaves them distracted. While most of us will get bleach, soap or other available chemical cleaners that smells good, it is wiser to go to the kitchen and use these less popular but often readily available remedies…that and some chemical cleaners might actually cause more harm to you hardwood flooring aside from the smell.

These common items found in the kitchen include:

  1. Baking soda. Wipe off the urine. Once the floor is dry, sprinkle generous amounts of baking soda over the part where the urine was. Leave it there for an hour before sweeping it away. Baking soda absorbs the bad smell on the floor.

  2. Charcoal. Charcoal has been known as a great odor-absorbing material, its not unusual to keep or find charcoal hidden from plain site in the kitchen for that purpose. SO in order to keep the whole surrounding smell-free, its a great habit to have: placing a wire tumbler of charcoal on every corner of the house. Apart from the smell of urine, charcoal also absorbs other impurities such as fur odors and smoke.

  3. Vinegar. Another known wonder cleaner from the kitchen is vinegar. While it has a strong sour smell, its acidic properties works wonders in eliminating the urine’s stench. To  use vinegar on pet urine: prepare a mixture that is on a 1 is to 1 proportion of water and vinegar. Scrub it over the part where there was urine. Do not worry about the smell of the vinegar.  It will hang around for about an hour. When the smell of the vinegar is gone, you will be surprised that the smell of the urine is gone, too.

How to remove pet urine stain on hardwood floors?

pets.thenest.com

Hardwood floors are really low maintenance and do not need to be frequently replaced regularly, in fact they are only replaced when they have been damaged beyond repair. Most well maintained hardwood flooring can last longer than our lifetime. Waxing, annual staining and refinishing are 2 of the main activities done to preserve hardwood flooring.

When it comes to pet stains, here are a few quick steps to follow:

In general, pet urine do not stain – that is if you act quick enough and follow the cleaning steps we discussed earlier. However should the urine go unnoticed and be left on the floor for a day or even longer, then we have a problem there because by that time, it is possible that the urine has already penetrated the finish, of the wood itself if the floor has no finish at all. Dark spots may be present and it can be hard to get rid of.

First is to try and scrub the stain off the wood. If that don’t work, try adding small amounts of bleach on the affected area. Should there still be stains, then we have to resort to sanding. Now remember to be very careful when sanding. Try to keep the activity on the affected surface and keep it as small as possible.

After you have successfully sanded of the stains, remember to re-apply stain and finish off with a coat of varnish. Allow to dry before use. Now in rare extreme cases that the stain is too much or too stubborn, then replacing the wood plank might be called for.

Hardwood is basically a pet friendly flooring material, you just have to train your pets properly and be prepared to quickly clean up the mess should training fail.

Carpeting Essentials

Carpets have long been associated with nothing but pure comfort and luxury. Its warmth and softness remains unmatched given the different flooring choices available today. Like other floor coverings, carpets have changed with the times – the cut, the color, fabric, shapes, styles and textures even the manner it is installed.

Given limitless options and possibilities in decorating homes and offices, how can one not resist  the charm of carpets. At the same time, and more importantly: how does one choose the type that is most suited to his or her needs?

There are several things we should essentially know about carpet flooring before we go out and scout local stores and retailers.

Location and Purpose

This is very important since this will determine what materials or fabrics will work for the room. Knowing the use – planned activities and expected traffic will help identify if wall-to-wall carpeting or carpet tiles will work best.

This also is true for the installation and backing as well as subfloor preparation. If there are any repairs or alternations to be done make sure they have been implemented before you go out shopping for your carpet flooring.

When you go ask around, don’t forget to mention things like access from the outside, having pets or kids running around, exposure to moisture and the amount of sunlight the room gets in order for you to get the best grade and quality as possible.

Cost

After you’ve identified the location and purpose for your carpet flooring, now its time identify why you want it – are you renovating to sell or you simple want some good-old home improvement?

Knowing this is important because it will help you choose the material and color of the carpeting. Natural and neutral shades is advisable to those who are looking to sell their property as it would be easier for the buyers to match their decor to your flooring. On the other hand, if you’re simply redecorating then you have more options to choose from and more colors and materials to explore.

One more thing to keep in mind if you are selling is to check the warranty on your carpet flooring, especially if you intend to leave them on the property. While most sellers offer transfers to the new owners, its always better to be aware of their policies.
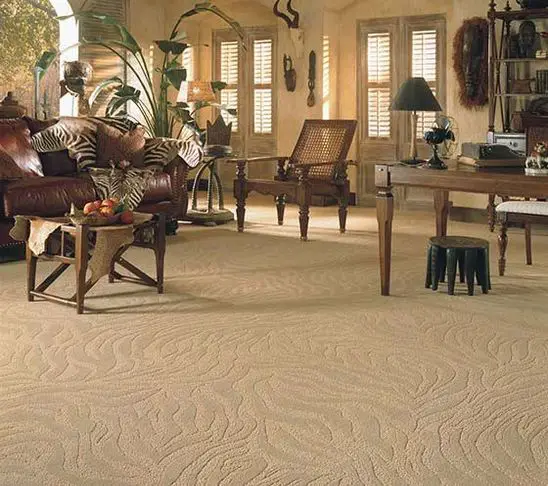
Finally, when considering the cost be sure to include the expenses you might incur when removing the old floor covering and repairs on the subfloor, the cost of installing the new carpet flooring and the fee for the contractors.

Some sellers offer a cost calculator on your websites so you can get an estimate even before you go out. Get the rough estimate of your floor area, including stairs and steps and allow for 10 to 20 per cent allowance in purchasing the material to make room for error and repair.

Styles and Colors

Floors play an important role in any room: it pulls the look altogether. Whatever it is you are trying to achieve with your current decor, chances are it will have greater success if you pay close attention to flooring.

If you have themes for your decor, then you most certainly have a color palette. Use it to decorate your room virtually online buy trying out the tools most seller offer. Better yet, hit your local store and talk to professionals – show them pictures and bring swatches of other fabrics that you used or are going to use in the room so they can show you samples of the shades and textures that will go well with your plans.

Again, style can vary from one room to another, you just have to be mindful of transitions and edges when you go from one area to another to make sure they are as seamless as possible.

Consider having different types of carpets from one area to another depending on the need.

Beautiful Solid Hardwood Flooring

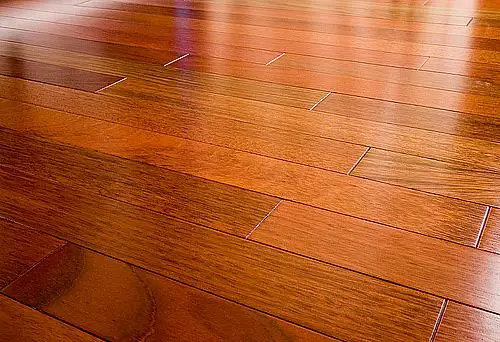
Solid hardwood flooring is perhaps one of the best investments one can make it terms of home improvement. Not only does the quality and warmth of hardwood flooring add personality to a room it also adds significant value to the selling price of homes which they are installed on.

We’ve constantly  tried to provide you with valuable information about hardwood flooring from shopping, installation, maintenance and repair and today will take another look at one of the most ideal flooring solutions around and the most exquisite types of wood used in solid hardwood flooring planks.


So what are solid hardwood floors? As the term implies, its pure wood from top to bottom. No added veneers, as with typical laminate flooring or solid base added, like those in engineered hardwood to prevent natural hardwood flaws like expanding and shrinking. This is pure and unadulterated solid wood not to be confused with either cork or bamboo flooring.

Aside from adding to the monetary value of your property, solid hardwood floors also has other benefits: it is environment-friendly and highly sustainable. Most variety of hardwood these days are grown and harvested in regulated farms. Further, taken care of properly, these floors can last well up to a century.

Solid hardwood flooring planks have a standard thickness of at least 5/16” to 3/4” thickness. The thicker ones is usually better, especially if you plan to keep them for a while because you have the option to refinish these solid hardwood planks several times. Thickness plays a critical part on how many times the surface of solid hardwood flooring can be sanded and resanded because one trademark of hardwood flooring is its tongue and groove system.

While some experts have different opinion where hardwood can be installed, in general solid hardwood flooring can be installed virtually anywhere, yes, including kitchens, basements and bathrooms as long as there is no direct exposure to water or excessive moisture and appropriate steps were taken to prepare the subfloor. All other flaws and defects in the subfloor and the surface beneath it should have been repaired though you might be a little bit more cautious installing it on your basement especially if there are chances of flooding.

Finally, aside from endurance and sustainability, if there has to be only one reason why solid hardwood flooring is still around and remains popular, I would have to be because of its sheer beauty and unmatched elegance. The crisp natural hues as well as the unique grain patterns have helped make domestic oak, maple, walnut and cherry are among the popular species used in most countries because of their beautiful grains and patterns.

In recent years however, there has been a steady and growing demand for exotic hardwoods like ipe, cumaru and tigerwood because of their unique patterns and grains in a richer color.

Each variety however have certain advantages and disadvantages and a common scale wherein the appropriateness of using a particular type of wood is the Janka hardness scale which identifies the hardness of the solid hardwood flooring surface.

9 Steps to Stain Hardwood Floors

Well maintained and cared for hardwood flooring is one great asset in any home. It’s natural beauty is timeless and its endurance has been known to stand the test of time. Whether you are in a new home considering the benefits of hardwood floors or in an old house that came with hardwood flooring that is scratched, faded and worn in every sense of the word, don’t worry. Hardwood flooring is well loved because of another great quality: it can be stained back to its former glory and shine as it it were brand new.

Yes, staining hardwood floors may seem a complicated process but its something that can be done DIY with appropriate preparation and some amount of time. Here are some simple steps you can follow:

www.hardwoodfloorsindianapolis.com

  1. Repair before you restore. All obvious defects – boards to be replaced, subfloor repairs, chips and holes should all be taken care off before proceeding any further with the project. Holes should be stuffed with putties or fillers, also see our earlier post about hardwood repair for some hints and tips.

  1. Clean and clear. Ensure that the surface of the hardwood floor to be stained is clean and clear. By this we mean that all the old floor coverings have been removed. The repair residues have also been cleared together with dusts and all.

  1. Sand it up. This can be done using a sanding machine or by hand. Remember to sand in the the direction of the wood grains. Use this step to make sure minor defects like small bumps and uneven surfaces. Be mindful of the time spent on an area if you are sanding with a machine, be sure you are in control in order to prevent making more uneven surfaces. If sanding by hand, be sure to use 3 different grits of sandpaper: 30, 60 and 80 are the recommended ones. Work your way from one end of the room to another.

  1. Clean again. After sanding clean the floor again. Be sure to remove all the debris. If you are sanding by hand, it is recommended to vacuum with every change of sandpaper. Aside from vacuum and sweeping you can also use a wet mop to lift the debris off since water will raise the grains. Be sure to do this quickly and do not let the water sit on the surface long enough for the hardwood surface to absorb it. Finish up by allowing the floor to dry and making one last pass by wiping the floors with mineral spirits and a soft cotton cloth to pick up remaining debris.

  2. Condition the wood. For best results, use this as a base coat. Check out local retailers for those recommended for the type of hardwood flooring you have. If they offer some free on site checks so they can make better recommendations for the products and services you might need. If you already have found one, apply following manufacturer instructions. General practice is using a 4-inch paint brush when you apply this in the perimeter then use a synthetic applicator to spread the conditioner across the room and allow to dry for 2 hours.

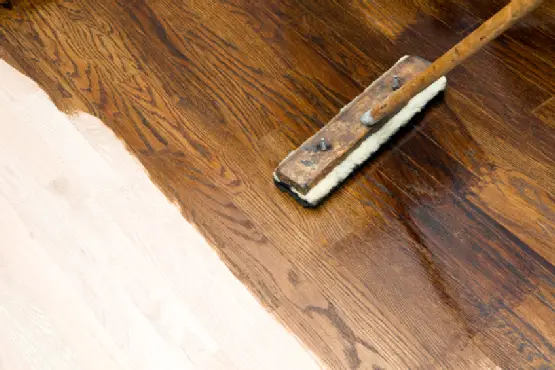
  1. Bring in the stain. Following manufacturer instructions, apply the stain using a brush or a rag. Remember, your strokes should go with the natural grains of the wood. Let it penetrate according to directions and be sure to remove any excess before they dry using a rag. Allow sufficient time to dry.

gaylordhardwoodflooring.com

  1. Second staining. For darker, better and even more dramatic effect, you might want to apply a second coating of the stain to the hardwood floors. Ensure that the first coat is well-dried before proceeding with the second coat. Apply the second coat evenly and again go in the direction of the wood grain. Leave to dry.

  1. Protect with polyurethane. Once the stain have been dried, apply a coat of water-based polyurethane with a clean paint brush. This will help protect and preserve your newly-stained hardwood flooring. Allow to dry for 2 hours or so.

  1. Finish and polish it up. When the first coat of polyurethane have dried, lightly sand the surface. Doing so will allow the second coat to adhere to it. After sanding, wipe it clear with a tack cloth before applying the second coat and allow to dry overnight.