How to Remove Efflorescence from Grout

What is Efflorescence?

Efflorescence occurs when a white, powdery substance seems to grow on the surface of your grout. It can look like patchy discoloration or a bloom of some kind of fungus. If it’s severe, efflorescence can appear thick and bubbly. It could even clog your drain.

But it’s not organic growth; efflorescence comes from the mineral deposits within the grout. Certain conditions cause these compounds to rise to the surface, where they create a white, yellow or tan haze over your tile and grout.

What Causes Efflorescence?

Efflorescence is a phenomenon that happens when too much moisture gets into the grout. Because the grout contains salts and other water-soluble compounds, it’s susceptible to efflorescence. The moisture dissolves the minerals. Then, as the moisture evaporates from the porous grout, the minerals rise to the surface. However, they can’t evaporate along with the water, and their residue remains on the grout.

Porous tiles are also prone to efflorescence. Therefore, you often see it on terracotta tiles and travertine flooring as well as the grout between the tiles.

Efflorescence vs. Mildew

Grout is notoriously tricky to keep pristine. Besides developing efflorescence, grout also seems to create the perfect environment for mildew growth. Identifying the problem correctly will help you take the right action to prevent and correct the issue.

Mold and mildew are organic materials that grow on surfaces that are frequently and continually exposed to moisture. Mildew often grows on the grout and flooring in showers and bathrooms because of the high humidity in that environment. 

While mold and mildew can be just as unsightly as efflorescence, they have the following differences:

  • Mold and mildew usually look darker, whereas efflorescence appears light in color.
  • When you rub it, efflorescence will transfer to your finger as a white, powdery substance. Mildew stays in place when touched.
  • Mildew and mold grow. Therefore, they spread over time. Efflorescence doesn’t change much after it appears.
  • Efflorescence dissolves in water. Mold and mildew don’t.

Is It Latex Migration?

Latex leaching, or migration, is another problem that can affect tile floors. It is also caused by excess moisture and creates a similar light-colored residue as efflorescence. However, latex leaching creates a harder residue. It’s not powdery and soft, like efflorescence.

Can You Remove Efflorescence From Grout?

The same solutions to remove efflorescence from grout won’t necessarily work on mildew, and vice versa. Efflorescence isn’t unsafe or dirty. Therefore, you don’t have to remove it. However, many people choose to remove efflorescence from grout because they don’t like the way that it looks.

On dark grout, the light patches that efflorescence creates make the dark areas look like mildew. Therefore, you should inspect the material thoroughly to determine what you’re working with before you try to tackle the problem.

Use a Stiff Brush

A stiff nylon brush can remove efflorescence without damaging the tile. Simply use the dry brush and moderate pressure to scrub the powdery flakes off of the grout. Don’t use a wire brush, steel wool or abrasive sponge, though. These products can scratch the tile and damage the grout.

Use a Mild Acid

Vinegar is an excellent product for keeping floors clean. It also helps to remove efflorescence from grout. Here’s how to use it to clean your grout:

  • An hour before you plan to clean the grout, saturate it with fresh water.
  • Create a solution of equal parts water and white distilled vinegar.
  • Dip a stiff nylon brush into the solution, then scrub the grout lines with it.
  • Rinse the grout with fresh water.
  • Dry the surface with a towel.

If the vinegar solution doesn’t work, try using undiluted vinegar. You can also purchase a commercial product that’s designed for removing efflorescence from grout. If you use this, follow the instructions on the label to use it properly. You might also want to test an inconspicuous area before you use the product everywhere. 

The process for cleaning with a commercial solution is generally the same as using vinegar. However, you may have to add more water to the grout to prevent the acid from deteriorating it. You should also wear safety goggles and gloves.

Can You Prevent Efflorescence?

Cleaning off the efflorescence is only a temporary solution. The powdery substance will return if you don’t get to the source of the problem. Plus, if excess moisture is leading to efflorescence, it’s only a matter of time until the grout develops mold and mildew growth.

Ideally, you would want to prevent efflorescence to keep your tile flooring looking pristine. Taking steps to combat efflorescence before it starts also reduces the amount of maintenance that the flooring requires over time.

Acclimate Your Tiles

Have your tiles been stored in a humid environment, such as a warehouse or garage? If the inside of your home is drier, it can cause the tiles to leach moisture. Avoid housing unused tiles in moist locations. Allow them to acclimate to the indoor atmosphere before you install them.

Use a Sealant

Creating a waterproof barrier between the tiles and the environment helps to prevent efflorescence. In extremely wet areas, such as spas and showers, you can install a waterproof membrane behind the tile to limit its water absorption.

You can also seal the grout from the front surface. Penetrating sealer fills the pores and prevents water from entering or escaping. 

Never use a sealer while the efflorescence is present. This will make the problem permanent, and you won’t be able to remove it. It’s best to apply the sealant after installation, once the grout is cured. If you want to seal older tile, use the steps for removing efflorescence from grout first.

Reduce Humidity

Basements and bathrooms are usually more humid than the rest of the home. Use the ventilation system in the bathroom during and after showers to prevent moisture from lingering. Run a dehumidifier in damp basements.

After showering or bathing, use a squeegee to remove excess moisture from tile walls and flooring. Follow up by drying the surface with a towel. This will help reduce the amount of moisture that the tile absorbs and holds onto.

Use High-Quality Products

The product that you use to set the tile can affect the grout’s absorption. If the adhesive or mortar is absorbent, it will contribute to efflorescence. You can also find grouts that are designed to minimize this issue. For example, epoxy grout won’t transfer minerals to the surface. However, you could still experience problems with the grout if you have moisture issues that need to be remedied.

Install the Right Underlayment

Efflorescence can build up rapidly and abundantly on concrete. If your house is built on a concrete slab or you’re using concrete tile, make sure that you follow proper installation instructions. This includes taking measures to prevent moisture from building up beneath the floor. Hiring a professional contractor for your flooring needs will help keep efflorescence at bay.

Fortunately, efflorescence is fairly easy to remove. Plus, the methods that you use to remove efflorescence from grout will also minimize the appearance of mold and mildew growth. However, it’s important to minimize excess moisture in any area of the house to keep your tile looking great for years.

Acacia Flooring Problems and Disadvantages

Many people are floored when they come across acacia wood. (Pun intended.) This type of flooring has a distinctive appeal. It’s a departure in appearance from oak and maple, two traditional hardwoods with a classic appearance. Acacia’s grain pattern is highly variable, with contrasting swirls and knots in shades of amber, honey and wine. 

Sometimes referred to as Asian walnut, acacia is one of the hardest woods used in flooring. It resists scratches and damage better than hickory, maple and oak. Its density makes it incredibly water repellant, and it polishes to a beautiful shen.

It sounds too good to be true. But, like everything, acacia wood has its disadvantages. It might not be your best choice for the following reasons.

It Has an Extremely Busy Appearance

There are more than 1,000 species of acacia tree. The different types of trees have distinct hardness levels. They also bring a lot of variety into the mix. Some species are almost as light as pine, while others have chocolate-colored waves and gold undertones. 

If your jaw drops when you see an impressive acacia floor and you want to replicate it in your home, you might have trouble replicating it without knowing the species. Moreover, the inconsistencies in the design will likely look very different in your space than someone else’s.

Here are some other disadvantages of busy flooring:

  • It makes the room look smaller – In some cases, you can take advantage of a striped grain pattern to widen a narrow room, much like vertical stripes make you look taller. However, busy floors aren’t recommended for small spaces if you want to make them look more expansive. If you do want to incorporate acacia wood into a smaller area, use it as an accent. It would look excellent in a sunroom, foyer or living room if the rest of the house had neutral flooring.
  • It can make your room look cluttered – This floor is the conversation starter. The rest of your decor should complement the acacia without competing with it. If you have too much variation in the patterns around the room without giving the eye a chance to rest, you might feel as though your atmosphere is always chaotic.
  • It doesn’t appeal to everyone – Although some people love the look of extremely variegated flooring, others prefer a more uniform look. On one hand, expensive flooring can improve the resale value of your home. On the other hand, buyers who are looking for a simpler aesthetic may move on. 

The Planks are Short

Unless you are using engineered hardwood or laminate with an acacia wood design, you won’t find long planks. The acacia plant is a tree-like shrub. The trunk is often short, and the undulating branches spread out horizontally. This plant doesn’t give manufacturers much room for cutting long, interrupted lengths. 

Therefore, it typically comes in planks that are only two to four feet long. While short planks are convenient to handle and transport, they take longer to install.

Moreover, short planks can make your room look small. Some people prefer long boards for hardwood flooring so that they can expand the illusion of depth in the room. 

When several short planks are installed adjacent to one another, they showcase the grain pattern variation between the boards. One long plank will always look more uniform than many short planks. If you’re trying to minimize the disparities in your floor design, you might not like the way that acacia’s short planks come together.

It’s Prone to Shrinkage and Buckling

It’s hard to imagine that a wood this hard would ever lose its straight, smooth profile. But acacia wood is susceptible to buckling. This is one of the acacia flooring problems that can make your floors look uneven and wavy. Acacia flooring can also shrink, leading to gaps between the planks. 

Buckling and shrinking are problematic for a number of reasons. They can:

  • Increase the risk of trips and falls
  • Attract moisture beneath them
  • Create spaces for dirt and debris to settle, causing abrasion and damage
  • Be difficult to clean

Acacia wood is more likely to warp if it hasn’t been dried properly during the manufacturing process. The fresh wood must be heated in a kiln until its moisture content is between 6% and 8%. 

Before installing them, you should acclimate the planks to your interior environment. Let them sit in the room in which they’ll end up for several days before attaching them to your floors. This gives them space and time to expand or contract as they get used to their final resting place. If you skip this step, the expansion and contraction may leave gaps around the planks and the borders of the room.

Acacia wood floors may not be the best option for extremely dry climates or rooms that experience a lot of temperature fluctuation. If you have this type of flooring, keep the humidity levels lower than 55%. 

Acacia Flooring Is Brittle

Hard flooring has many advantages when it comes to durability. However, it can be difficult to work with. It’s harder to cut than softer flooring materials. It’s also prone to cracking and splintering.

Acacia wood doesn’t contain as many natural oils as some other hardwoods. Unsealed acacia can dry out quickly in certain environments. Follow the manufacturer’s directions for sealing your floors. Keep it out of direct sunlight to prevent the material from drying out.

Some Scratches Are Difficult to Hide

Even though acacia is a durable, resilient wood, it can get damaged if it’s mistreated. Grooves that follow the wood grain blend into the design. However, scratches that cross the grain disrupt the undulating lines that make the wood look so beautiful. They can be hard to disguise. 

Pet nails probably won’t create deep gouges in acacia wood. However, they can mar the finish and make it look dull. They may even catch the light at certain times of day and look more obvious.

The good news is that acacia hardwood can be refinished. In fact, experts recommend that you sand and replace the coating on your floors every 10 years or so. 

To keep your floors looking great on a daily basis, keep them free of sand and grit. Sweep them daily, or use a dry mop. Avoid dragging heavy furniture across the floor without protection. Casters and children’s toys can mark up the floor. Put down a rug in play areas, and consider replacing traditional casters with rubber ones.

Acacia Flooring Problems Aren’t a Disadvantage for Everyone

One person’s trash is another person’s treasure. If you have reached this point and think, “I don’t understand how these acacia wood features are problematic,” then this is a flooring material that you might consider.

There are several ways to make this wood work for your space:

  • Cover some areas with solid rugs.
  • Don’t use busy flooring in other rooms.
  • Pair it with painted cabinets and neutral stone in the kitchen.
  • Complement it with vibrant or neutral upholstery with simple or no patterns.
  • Use the short planks to create a basket weave or herringbone design.
  • Stain it to merge some of the contrasting colors together.

These tips are especially important when you’re selling your home. Avoid turning buyers away by simplifying the rest of your decor so that the flooring gives off a peaceful vibe instead of a chaotic one.

The acacia flooring problems that have to do with its structure and maintenance are not much different than the problems with other hardwood flooring. Therefore, if you’re trying to decide between a similar material, make your selection based on your preferences. A floor that you’re proud of will bring you joy every time you enter your home.

How to Replace a Kitchen Floor Without Removing the Cabinets

Kitchen floors take a beating. If your floors weren’t new when you moved in, you will likely need to replace them in the next few years. Perhaps the surfaces are worn and damaged. Maybe you just want to update your decor. But you’re thinking about replacing your kitchen floors. 

Removing the old material and installing the new floor is a major project. You might wonder if you can save time, money and headaches by working around the existing architectural elements and appliances. Here’s how to replace a kitchen floor without removing the cabinets.

Some Considerations

Before you decide to replace a kitchen floor without removing the cabinets, ask yourself the following questions.

How Long Will You Keep Your Cabinets?

Depending on the material, kitchen cabinets can last at least 20 years. If you plan to renovate between now and then, will you want to change the layout? You would want to install the flooring under the cabinets if so. That way, you don’t have to fill in gaps or redo it when you update your kitchen.

Are You Replacing Your Flooring and Cabinets at the Same Time?

If you’re doing a complete remodel or building from scratch, you probably wonder whether you should install the floors or the cabinets first. This largely depends on the flooring material. The main rule of thumb to keep in mind is that flooring that isn’t glued down should not be weighed down by cabinetry.

Most experts agree that hardwood and tile should be installed before the cabinets if at all possible. This produces a uniform surface throughout the kitchen and keeps the counters at the proper height. 

On one hand, hardwood and tile floors can withstand the weight of the cabinetry. But they can get damaged by the cabinets. If you expose covered areas in the future, you might have to replace or refinish them anyway to get rid of unsightly blemishes. 

Also, you’ll use—and pay for— more material when installing flooring beneath the cabinets. But you may save on the cost of labor. Laying out a floor in a rectangular room is faster than cutting out complex angles.

When you’re installing floating floors of any kind, you should avoid running them beneath the cabinets. The weight of the cabinetry will cause the floors to shift and buckle over time. Floating floors need room to expand and contract. Therefore, if you know that you’re going with floating floors, feel free to install your cabinets first. A benefit of doing this is that you won’t damage your brand-new floors.

Is Your New Flooring a Different Thickness?

Is your new flooring is significantly thicker or thinner than the old surface? If you replace the kitchen floor without removing the cabinets, the height of the countertops is going to feel different. 

This change is negligible to most people and becomes less noticeable over time. But you can prevent this from happening by removing the cabinets and running the flooring underneath everything. You can also adjust the underlayment, which is often necessary if you’re switching to a new flooring material.

What Kind of Toe Kick Will You Need?

The toe kick is the vertical piece of wood that butts up to the floor at the base of the cabinet. Sometimes, quarter-round molding is used in place of a toe kick. These boards provide a clean line and seal gaps at the edges of the floor. 

You can customize toe kicks to match laminate floors by cutting extra laminate planks to fit. Don’t be tempted to extend other flooring materials up the base of your cabinets, though. Vinyl or tile toe kicks would look strange. All other flooring materials should be paired with a toe kick made of plywood or a material that matches the cabinet.

Should You Install Kitchen Flooring Under Appliances?

Your refrigerator, oven and dishwasher hide much of your kitchen flooring. You can save money if you don’t extend the flooring beneath the appliances. Plus, you wouldn’t want your dishwasher or refrigerator to leak on the material. 

Many people choose to install a piece of plywood that’s the same thickness as the flooring under their appliances. Still, you should extend the flooring far enough under appliances so that you can’t see the plywood. Alternatively, you could install a toe-kick across the appliances. This creates a cohesive, finished look across the kitchen.

First Things First: Removing the Old Flooring

Before you think about installing new floors, you have to get rid of the existing material. Check whether it is installed beneath or around the cabinets. Laminate is usually installed around the cabinets. Vinyl and linoleum may be cut around the edges or run under the cabinets. Hardwood flooring often spans the width of the room, traveling beneath the cabinets as well.

If the cabinets cover the flooring but you don’t want to remove them completely, you have the option of cutting around them. You can use the following method to remove hardwood, laminate and engineered wood flooring. It works around any baseboard, such as in cases where a floor travels under a narrow wall.

  1. Remove the quarter-round molding or toe kick from the base of the cabinet.
  2. Cut through the depth of the wood at the edges of the cabinet using a toe-kick or flush-cut saw. Follow appropriate safety precautions when performing this step. Cutting through hardwood is a tedious and labor-intensive process.
  3. Use a circular saw to cut across the hardwood planks, perpendicular to the direction they’re installed. This makes each plank shorter and easier to remove.
  4. Use a tapered reciprocating saw or a hammer and chisel to finish scoring through the wood at corners.
  5. Pry the planks off of the floor with a pry bar.

Vinyl is much easier to cut than hardwood. You can remove it by following the steps above. However, instead of using a toe-kick saw, you can use a sharp blade to pierce the material.

Tile is a bit harder to cut. Use a diamond blade on the toe-kick saw to get through it cleanly. 

Installing the Floor Around the Cabinets

When installing a kitchen floor around the cabinets, the most important advice is to measure several times before cutting and laying out the planks or tiles. 

The following tips on how to replace a kitchen floor without removing the cabinets should help:

  • Remove baseboards, toe kicks and molding before you start.
  • Leave an adequate expansion gap to allow for movement in the floor.
  • Don’t cut all of your planks at once; measure and cut as you go.
  • Seal the edges, especially in moisture-prone areas, such as around the sink.

If installing a kitchen floor after the cabinets seems like a complex task, that’s because it is. If you’re not proficient in carpentry or home renovation work, you’ll probably get the best results by leaving the installation up to the experts. 

Flooring professionals understand how to measure and lay the floor so that it withstands the test of time. This is especially important in the kitchen, which is exposed to more moisture and traffic than most other rooms in the house. Your contractor can also help you make the final decision as to whether to install your floors or cabinets first.

What Causes Moisture Under Hardwood Floors?

Improper Installation

Proper installation thwarts a lot of moisture problems that could occur with your hardwood floors. This involves installing the right subfloor and protecting it with an adequate underlayment. Cement floors require a moisture barrier so that the condensation produced from temperature changes doesn’t seep into the hardwood. 

How to Fix It: Unfortunately, the best way to remedy an installation problem is to have the existing flooring removed and reinstalled. You could repair a small area if the moisture problem is not widespread. However, without installing the floors properly, you will probably continue to have issues down the road.

Make sure that the hardwood floors are properly sealed before you walk on them. You should also acclimate the wood to your indoor environment before installing it. This allows it to breathe, adapting to the humidity levels in your space and letting go of excess moisture before it gets trapped beneath the floorboards.

Using too Much Water When You Mop

Liquids should always be cleaned off of hardwood surfaces right away. If you mop the floors using puddles of water, you risk the liquid leaking into the cracks and creating moisture problems under the hardwood floors.

How to Fix It: Sweep, dust or dry-mop your hardwood floors regularly. Doing this daily prevents the need for deep cleaning. If you must use water to remove residue or grime from your floors, use a barely damp cloth, and dry your floors after you’re done.

Leaking Appliances

Is your washing machine or refrigerator leaking without your knowledge? If appliances are losing water in hidden areas, the liquid could pool beneath the floor. The hardwood underneath could buckle, but you won’t see it. 

Some signs that you have a hidden water leak from an appliance include the following:

  • Your refrigerator keeps freezing
  • Your water bill is higher for no obvious reason
  • Walls and ceilings in lower levels have water stains
  • You notice a musty smell around your appliances.

How to Fix It: Identify and repair the source of theleak. Before replacing your appliance, however, you’ll need to inspect the flooring and subfloor. Remove decayed boards, treat the area for moisture, and install the new flooring properly.

Water Intrusion

If your roof, exterior walls or foundation is compromised, you could develop moisture under hardwood floors. Water can flow into the tiniest cracks. If the water volume is high or consistent enough to prevent the material from drying out, it could rot and warp your flooring.

How to Fix It: Call the appropriate professional to identify and repair the problem. Moisture in the crawlspace can also make its way under your hardwood floors. Some tips for keeping water at bay include adding gutters to your roof, having your crawlspace inspected and using the right vapor barriers, dehumidifiers and insulation.

Incontinent Pets

Unfortunately, pets can have accidents inside. Moreover, you may not notice until you start to smell urine. By this time, the moisture may have seeped underneath the floorboards. If your pet has accidents in the same spot repeatedly, the hardwood will get damaged. The subfloor might also absorb the liquid.

How to Fix It: It’s not easy to get the smell of pet urine out of any material, including hardwood. The best course of action is to replace any affected pieces of flooring. Restrict your pet to parts of the home with waterproof floors, such as tile or vinyl, when you’re not around. Clean up accidents as soon as you see them happen.

Signs of Moisture Under Hardwood Floors

As wood absorbs water, it swells. Soaking a piece of wood in a bucket of water would cause it to expand uniformly. But If your hardwood floor is only picking up water from its underside, it will only expand on that surface. 

Cupping

The material’s uneven expansion leads to cupping. The edges of the planks will turn upward, creating a u-shaped profile. The floors will begin to feel uneven, and the raised surfaces will be vulnerable to more wear and tear than the valleys. As the wood swells, it can shift, creating gaps between the boards.

Water Droplets

Have you noticed beads of water forming on top of your floors, but you can’t find a source? The wood may be holding onto moisture that it’s absorbing from below. Condensation on your floors is also a sign that the indoor humidity is too high. Use your air conditioner or a dehumidifier to keep humidity levels below 55%.

Softening

If parts of the floor feel weak or soft, they might be rotting. Moisture beneath the floorboards almost always leads to decay. The rot can transfer to other floorboards and affect the structural integrity of your home. If your floors are rotting, you probably have moisture damage to the subfloor and underlayment too. Hire a professional to remediate the moisture problem and repair the flooring.

Pest Problems

Many pests, such as ants, cockroaches, silverfish and earwigs, are attracted to moisture. If they’re infesting your home, you might want to have your flooring inspected for moisture under hardwood floors. Humid environments are also magnets for termites. Prevent this from becoming a bigger problem by identifying the source.

Musty Odors

Musty, mildewy odors are almost always a sign of a moisture problem somewhere in your home. Dampness promotes the growth of bacteria and fungus, which make your home smell bad. It often takes a professional to remediate the issue and prevent these organisms from spreading.

Squeaking Floorboards

You might think that it’s normal for floorboards to squeak. However, properly installed hardwood shouldn’t make noise when you step on it. Plus, a new squeak is a sign that something has changed.

Creaking floorboards don’t always indicate that you have a moisture problem. Your subfloor could be uneven, or the joists could be sagging. Still, it’s a good idea to rule out moisture under hardwood floors if you’re noticing strange noises underfoot.

Stains

Water stains that come from above will usually create rings or discolored patches on the surface of your floorboards. But if there’s moisture under your hardwood floors, the staining will look different. You might notice darkness along the edges of the room or between the planks. 

Check for Moisture

If you’re not sure whether your flooring is damaged from water or another issue, you can conduct a moisture test. Use a moisture testing meter in various locations where you spot damage. High readings could indicate that you have moisture under hardwood floors and it’s time to call in the professionals.

Is Cork Flooring Waterproof?

When you think of cork, you probably picture the soft stopper that comes in wine bottles. Many people assume that cork flooring isn’t a good match for water because of its flexibility. But that cork protects and preserves liquids in wine bottles, and it also has water-resistant properties when it’s used on floors.

Understanding Cork

Cork is a type of wood that comes from cork oak trees. These plants are native to the Mediterranean region and have special adaptations for using water efficiently. In areas where this tree grows naturally, winters are wet and summers are dry. The plant’s outermost layer of bark grows as a grayish, nubbly surface. It develops over time and keeps the tree hydrated during the dry season.

This is the portion of the tree that is harvested for cork flooring. Its sponge-like structure contains air pockets that create a bouncy, pliable feel. But although cork has a spongy texture, it doesn’t soak up water. This flooring material contains suberin, a waxy substance that resists moisture.

Water Absorption of Cork vs Hardwood

Hardwoods seem like they would be relatively impenetrable by water. Those that fall at the high end of the Janka hardness scale are more water resistant than softer woods. However, wood is largely porous. The open cells in hardwood soak up moisture. You can prevent this by sealing the wood appropriately. But in its natural form, hardwood is not the best flooring option for extremely damp areas, such as basements and bathrooms.

Although more than 50% of cork is air, the material doesn’t absorb water like hardwood does. The suberin that coats the honeycomb-like walls prevents liquids from entering the open areas. This substance makes the cork hydrophobic, which means that it repels water.

In contrast, hardwood is hygroscopic, which means that it absorbs moisture from the air. The more humidity that there is in the environment, the more the hardwood soaks it in.

If you soaked a cork block in water for 48 hours, its mass would increase by 3%. That’s because it’s not completely waterproof. It does have hygroscopic properties, but those are moderated by the hydrophobic qualities.

If you soaked a block of hardwood in water for 48 hours, its mass and weight would increase by much more than that. Some types of wood can absorb more than their weight in water.

Is Cork Flooring Good for Bathrooms and Kitchens?

Cork is an excellent material for kitchen and bathroom floors. It can be used as a surface layer or as an underlayment.

Cork’s limited water absorbency makes it a deterrent to mold and mildew. It isn’t susceptible to rot, making it ideal for areas that are prone to pest infestations and flooding. Another reason that cork flooring is practical in kitchens and bathrooms is that it has a naturally non-slip surface. It’s an ideal option for indoor/outdoor rooms and sunrooms.

You should avoid using flooring in rooms that are always damp, such as saunas and pool rooms. Prolonged contact with moisture will eventually cause the cork to swell.

The type of cork flooring that you use influences its susceptibility to moisture damage, though. Cork tiles, planks, rolls and sheets are made by grinding the wood into small particles. Then, the manufacturer binds those granules together with an adhesive. Some manufacturers create pure agglomerated cork, which involves pressing pieces of the material into a mold and activating the natural resins under high heat.

Many cork tiles and planks have several layers. Although the top layer may be made of agglomerated cork, the other layers often contain medium or high-density fiberboard. This material is similar to the substrate on laminate flooring. It’s more absorbent than cork and may be susceptible to water damage.

The process that the cork undergoes affects its water resistance. Check with the manufacturer to determine if a particular product is appropriate for use in a damp environment. The most waterproof kinds of cork flooring are made with non-absorbent materials and techniques.

Can You Waterproof a Cork Floor by Sealing It?

Cork flooring is usually factory finished with a water-resistant coating. Some manufacturers recommend re-sealing the material every so often.

If your floors have a polyurethane sealant, you should reapply it every five to seven years. Cork floors with natural wax sealant should be refinished every 6 to 12 months. Acrylic and oil-based urethane sealants are much more popular than wax nowadays. They last longer and require less upkeep. Therefore, some homeowners strip the wax from existing cork floors and apply a polyurethane top coat.

Applying the top coat over seams in the flooring prevents moisture from seeping into the gaps. It also protects the floor from wear and tear by preventing dirt particles from settling into the spaces. Your flooring will stay waterproof much longer if you avoid grinding abrasive grains, such as sand, into the material.

Protecting the Surface

Even though cork is naturally water resistant, it gets some support from the top coat. Enhance the waterproof nature of your cork floors by treating them gently.

Some tips for reducing wear and tear on cork flooring include the following:

  • Replace casters on furniture with wide, rubber ones.
  • Place breathable rugs or mats at sinks and entryways.
  • Avoid using rubber-based rug pads.
  • Sweep abrasive particles off of the flooring regularly.
  • Inspect the floor for gouges that penetrate the finish or top layer.
  • Clean up liquids immediately.
  • Avoid dragging heavy items, including chairs, across the floor.
  • Wear soft-soled shoes.
  • Keep indoor temperatures and humidity levels steady.

Factoring in the Installation Method

The installation method also makes a difference in the water resistance of a cork floor. If you use adhesive tiles, make sure that you use the right type of adhesives. Solvent-based glues will dissolve water-based binders. Add a moisture barrier beneath cork flooring in moisture-prone areas, such as basements and sunrooms.

In some cases, you can lay down a subfloor that includes adequate moisture protection. Glue cork tiles directly to this material. You can also install a floating floor with a moisture barrier over concrete slabs.

A reputable professional will install your cork flooring using the most effective methods. Let them know if the flooring will be exposed to high humidity. They will help you select the best products and techniques to prioritize the waterproof qualities of your new floors.

Look for a licensed and insured installer, and learn about their guarantees. The manufacturer will also offer guidelines for proper installation and maintenance of cork flooring.

How to Protect Laminate Flooring

Laminate flooring allows you to create a customized look that often mimics tile, stone and hardwood for a fraction of the price of those materials. All types of laminate flooring have similar maintenance and care needs no matter what they look like. This material is resilient and reliable, but you can damage it if you’re not careful. If you’re wondering how to protect laminate flooring, you have come to the right place. Follow the guidelines for protecting laminate flooring to get the most from this versatile material.

Install it Properly

The best tip for how to protect laminate flooring is to install it correctly. Many types of laminate are convenient for advanced DIY-ers to install themselves. But you need to make sure that you’re using the right type of moisture barrier and technique. If you don’t have the skills, hire a professional. Investing in the installation can save you money and headaches down the road.

Protect Your Laminate Flooring From Furniture

Chairs might be laminate flooring’s worst enemy. Every time you drag a chair across a laminate floor, it creates the potential for damage. Protect the surface by attaching felt pads to the feet of any movable furniture. If you have furniture with casters, replace the firm wheels with soft rubber ones. Lift heavy furniture if you have to move it across the floor.

Use Rugs Intentionally

Areas that encounter heavy traffic can wear out before other parts of the floor. Protect them with strategically placed rugs. Prime spots for throw rugs or welcome mats include the following:

  • Hallways
  • Entryways
  • In front of sinks
  • Beneath desks
  • Under dining tables

A high-quality, non-slip rug pad will prevent falls. Natural rubber and felt pads are safe for laminate floors. Avoid cheap rug pads because they may be made with plastics that damage and discolor the flooring. If you don’t use rug pads at all, you run the risk of scratching the laminate by grinding trapped dirt particles into it every time you step on the rug.

Instead of a rug, you could use a waterproof floor cover. These are excellent options for kitchens, playrooms, laundry rooms and pet areas.

Keep the Floor Clean

Cleaning properly not only improves appearances but also serves an important role in protecting laminate flooring. As people and pets walk across the floor, they deposit particles of dirt, food and dust. Although these grains are tiny, they are abrasive. As you track them across and grind them into the flooring, they create scratches. Repetitively abrading the surface erodes the wear layer and shortens the lifespan of the flooring.

Cleaning the floors also reduces static. While static buildup won’t damage your floors, it is annoying. Keeping the surface free of dust reduces the static electricity that makes you get shocked every time you touch someone in your home.

You should never use an oil-based product to clean your laminate floors. It can damage the material and make the floors slick. Also avoid using steam mops, which introduce moisture and cause buckling.

Use the Right Vacuum

Don’t use a carpet that’s designed for carpet on laminate. Cleaning equipment with hard edges or rigid wheels can scuff the flooring. Use a vacuum head that is protected with felt or another soft material. Avoid using vacuums with rotary brush heads. Better yet, use dry cleaning pads to attract dust, sand and grime and leave your laminate floors looking spotless.

Maintain Steady Humidity Levels

Laminate flooring is especially sensitive to humidity. Excessive moisture makes the material expand. This creates bubbles and waves in the flooring. Keep the humidity levels in your home between 35% and 65% to protect your investment.

Using central air conditioning and keeping your windows closed in warm weather helps you achieve this goal. You might also use a dehumidifier in damp areas, such as basements and bathrooms.

Wear Socks More

Shoes with hard soles can scratch and dull laminate flooring. You can make it a habit to wear socks or soft-soled shoes around the house. But you can’t make your pets wear socks. Keep their nails trimmed to avoid marring the finish with pesky surface scratches.

Be careful when you’re cleaning your laminate flooring, though. If you walk across damp floors with socks, you’ll create temporary marks that look dull when the light reflects off of them. Make sure that the flooring is completely dry before you allow anyone, including your pets, to step on it.

Can you Make Laminate Flooring Waterproof?

Laminate flooring has a relatively tough wear layer on the surface. However, the absorbent core can swell if water makes its way to it. Therefore, take measures to prevent water from seeping into the cracks.

  • Seal the seams – Seal the expansion gap with caulk or silicone. This is essential in high-moisture rooms, like the kitchen and bathroom.
  • Add sealant – Coating the floor with polyurethane provides an extra layer of protection. You can also use sealant in the locking systems to fill the gaps between the planks. However, you should check with the manufacturer to find out which sealants they recommend.
  • Install waterproof flooring – Some types of laminate are more waterproof than others. Use these in areas that are exposed to moisture and spills. No laminate is completely waterproof, though. You should use these recommendations for how to protect laminate flooring even if you have the waterproof version.
  • Wipe spills quickly – Don’t let liquids pool on the floor; keep the surface dry at all times.

Don’t Ignore Problems

Gouges that penetrate several layers of the material, warping and peeling issues should be addressed as soon as they happen. If you compromise the wear layer at the surface, dirt can get in and cause deeper erosion. Moisture can also enter, creating bigger problems.

If you notice that the laminate is warping, buckling or bubbling, you should investigate the source of the moisture issue. Leaving damp laminate on the floor can create further moisture issues and encourage mold and mildew growth. But you might keep encountering the problem if you don’t identify the cause.

Remove the boards and look for water damage around them. Address leaks in the perimeter of your home or from pipes. Replace the damaged parts of the floor with fresh laminate.

Contact a flooring expert if you’re not sure how to protect laminate flooring. They can guide you toward the right methods and products. A professional can also help you make repairs to extend the life of your floors.

Oak vs Maple Flooring: Important Differences

Oak and maple are both classic materials for flooring. These hardwoods are fairly neutral and create a solid foundation for the rest of your decor. Even though they have some similarities, oak and maple have distinct qualities. You may be partial to one over the other based on appearance, durability and personal preference.

Do Oak and Maple Look Different?

When you think of hardwood floors, do you imagine medium-brown planks with some grain patterns? Oak and maple may both fall into that category. However, you might be surprised by the subtle intricacies of each material.

Maple is lighter than oak. It has a blonde hue that borders on creamy white. Depending on the manufacturer, some types of maple flooring are beige or light brown. The overall appearance of maple is uniform. The wood doesn’t have high-contrast grain, and all of the planks that you’ll buy for a single project will have a fairly consistent tone and pattern.

White oak has a golden brown color. It has chocolate tones in the grain, which contrast nicely with the base color. The grain pattern of white oak is much more pronounced than that of maple. However, the type of cut influences the grain definition. Some oak planks have straight, subtle lines, while others have a swirling, organic design.

Red oak is lighter than white oak and has a reddish hue. Some experts say that it has a salmon-colored tint. This hardwood is an excellent option if you prefer the warm tones and want a floor that’s not as light as maple but not as dark as white oak.

Staining Oak vs Maple

Most people select the type of hardwood in part for its color. It makes sense that you would choose maple if you wanted lighter colored floors and white oak for a grayer, more neutral hue. If you want dark floors, you’re likely better off choosing a different type of wood. However, this isn’t always possible. If you’re interested in changing the color of your existing hardwood, you should consider the way that the different materials accept stain.

Maple flooring usually comes with a factory finish. This may differ between manufacturers. It might also include a stain that changes the natural color of the wood. If you want maple floors in a particular hue, you should select planks that best match your preferences. Most maple planks are finished with a light or clear sealant.

Maple is very difficult to stain once it’s on your floors. That’s because the grain is tightly closed on most of the plank. These spots don’t absorb stain well. The more porous areas do soak in plenty of stain, resulting in an uneven, blotchy appearance.

Manufacturers often use special techniques to prevent this from happening. But those techniques are difficult to replicate at home. Consult with a flooring professional if you are interested in changing the color of your existing maple floors.

If you’re looking for something darker than maple, consider oak. Not only is oak naturally darker than maple, but it also takes stain better. That’s because the wood is more porous and less dense than maple. If you want to darken existing oak floors, you can sand, stain and seal them.

You can stain oak flooring with any hue. Dark brown stains will camouflage some of the grain pattern and provide a more uniform appearance. However, dark floors aren’t as forgiving as light hardwoods when it comes to seeing dirt and dust. If you have a busy household and want dust and other particles to blend in with your floorboards, you might want to choose a lighter shade.

Is Oak or Maple More Durable?

Maple is harder than oak. However, these materials don’t fall far from each other on the hardness scale. Both are extremely good choices if you’re looking for a floor that will last for years.

These hardwoods resist scratches, gouges and dents. While dragged furniture or your pet’s claws can mar the finish, they’re not likely to dig into the wood itself. If your maple or oak floors do become damaged, you can sand and refinish them.

Even though maple is harder than oak, it’s not as stable in the face of humidity. The cells in any hardwood floors swell when they’re exposed to moisture and shrink in dry environments. Wood species that swell less in response to moisture are more dimensionally stable. Oak has more dimensional stability than maple.

This means that oak is less likely to become cupped or warped. Oak floors are less prone to developing gaps between the planks than maple. If your room is in a humid environment, oak may be the best option.

To reduce the risk of gapping between the boards, however, you can also choose narrower planks. These display less movement in response to moisture than wide boards.

How to Maintain Oak vs Maple Flooring

The best way to keep your oak or maple floors in good condition is to keep the humidity levels in your home stable. Using an air conditioner or dehumidifier in wet weather prevents moisture changes from affecting the floorboards. You can use a humidifier in dry weather, but don’t let condensation build up on the floors. You should also avoid leaving wet towels, shoes or bathing suits on the flooring.

Maintain your roof, and inspect your home regularly for signs of moisture damage. Standing water and leaks can permanently disfigure both oak and hardwood flooring.

Maintenance requirements for oak and maple flooring are similar. Keep them free of dirt and debris by sweeping or using a vacuum with a soft head. Avoid harsh cleaning equipment with hard edges, which can dull or scratch the finish on your floors.

When it’s time to deep clean your floors, feel free to mop them with a damp cloth. You can find many commercial cleaners that are designed for any hardwood. You can use these interchangeably between maple and oak. However, you might want to use the manufacturer’s recommendations for the best cleaning products for the best results.

Which Flooring Fits With Your Style and Budget?

It’s difficult to separate cost from style. Maple is often less expensive than oak, but it offers fewer variations in grain, color and pattern. While oak generally costs more than maple, it comes in a broad range of styles.

If you’re looking to spend less money to put down a neutral, classic and timeless floor that matches any decor, you might want to consider maple. However, if you have a unique color and design in mind, you can usually find a type of oak flooring to match your vision.

Oak vs Hickory Flooring: Important Differences

Hickory is one of the most durable materials for flooring. However, many consumers overlook it in favor of oak, which is much more common for floors. Most people are familiar with using hickory for cabinets, though. If you’re the type of person who researches all of their options before making a decision about home renovations, you might want to compare oak vs hickory flooring so that you achieve the outcome that you desire.

Several species of oak and hickory are native to North America. For many American consumers, this is important. You can support the local economy by choosing wood flooring that is sourced and manufactured in the U.S. The abundance of these hardwoods makes them easy to find and relatively inexpensive.

Appearance of Oak vs Hickory Flooring

While function is important, we will get to that later in the article. Aesthetics play a significant role in flooring choices. Your floors should reflect your style and coordinate with the rest of your decor. Hickory and oak are both classic choices.

Grain Pattern

Oak has a fairly consistent grain pattern. Its appearance depends on the type of oak, the way that it’s cut and the stain color. However, it generally provides a traditional look. Rift-sawn and plain-sawn planks offer the most consistency of appearance. The grain in these types of cuts runs parallel to the board, and there are few, if any, wavy patterns. Live-sawn wood highlights the variation in grain pattern and contains more curving lines.

Hickory is usually bolder than oak. It has an extremely varied grain pattern with plenty of contrasts, swirls, knots and waves. To make the most of its unique appearance, manufacturers often cut hickory in wider planks than oak.

If you want a subtle design that adapts to any living or working space, oak flooring is probably the way to go. Hickory is much busier, and some people find it distracting. However, if you want the floor to stand out and add interest to your environment, you might want to consider hickory flooring.

Even if you’re looking at engineered hardwood or laminate, it’s helpful to keep the differences between oak and hickory flooring in mind. These materials mimic the look of each type of flooring and maintain the characteristics of the different hardwoods.

Color

White oak has a neutral brown tone. It falls in the medium-brown range and may contain notes of honey and sepia. Red oak is lighter than white oak and has pink or salmon undertones.

Hickory is lighter in color than oak. However, it has a wider range of hues and shades within each plank. The heartwood warms up the space with a reddish cast. However, most hickory is extremely neutral and ranges from beige to medium brown.

Both materials accept stain well. Therefore, you can adjust the tone to complement your environment. Adding a dark stain to hickory makes it look more uniform. The distinctive characteristics will show through, creating an interesting finish that’s less chaotic than that of unstained hickory. Staining oak also camouflages some of the variation in the planks, delivering consistent results. An unexpected stain color can take your oak floors from subdued to dramatic.

Oak and hickory flooring can both be distressed. This process adds character to any hardwood floor, making it look worn in certain places. It also makes the planks look like vintage wood flooring.

Durability of Hickory vs Oak Flooring

Hickory is one of the hardest types of wood for flooring. It has a rating of 1820 on the Janka hardness scale. Only pecan and exotic hardwoods, such as Brazilian walnut and Patagonian rosewood, are harder than hickory.

White oak is rated 1360 on the Janka hardness scale, and red oak is rated 1290. While oak is harder than many other popular flooring choices, including pine, black cherry and teak, it is softer than hickory.

Therefore, hickory is a solid choice for high-traffic areas and rough activity. It’s ideal for play areas, mudrooms and foyers but can be used in any room. Because it is resistant to scratches, it won’t be easily damaged by pets, furniture or falling objects.

Interestingly, hickory is not as stable as oak in the face of temperature and fluctuations. This could be due to the way that the planks are cut.

But hardwood is an organic material that is always susceptible to moisture damage. Even if the wood is sealed, it deteriorates faster when it’s exposed to moisture. Therefore, if you’re considering installing flooring in a bathroom or basement, you might want to look at alternatives.

Engineered hardwood is more waterproof than solid hardwood. Therefore, hickory or oak engineered hardwood is likely a better choice for moisture-prone areas. If you already know that you want engineered hardwood, you can base your decision off of the appearance because both materials have similar properties otherwise.

Does Oak or Hickory Flooring Cost More?

The price of flooring varies depending on the grade, quality and manufacturer. Because oak is more abundant, it’s generally less expensive than hickory. Still, you should look into all of your options before making a decision. The finish, plank size, texture and installation method also affect the cost of the floor.

Because it is harder, hickory is more difficult to work with. It takes longer to cut through a plank of hickory than oak. You also need to pre-drill nail and screw holes to avoid cracking the wood. A professional flooring installer understands how to work with various hardwoods to provide you with optimal results.

Keep your lifestyle and the durability of the wood in mind when you’re pricing out hickory and oak flooring. If you expect that your floors will be exposed to plenty of abuse, you will likely save money in the long run with a more durable option. If you go with oak, you may end up spending more to repair and maintain it over your floors’ lifespan.

Do You Have to Care for Oak and Hickory Differently?

Oak and hickory floors have similar maintenance needs. As with any hardwood, you should keep the surface free of abrasive particles. Sweep them regularly. Dirt that accumulates in the grooves and cracks wears down the finish. Pet hair that gathers in these areas can accumulate moisture.

These hardwoods withstand vacuuming well. However, you should make sure that your vacuum is designed for hard flooring so that it doesn’t scratch the finish.

While these hardwoods can withstand some humidity, they will swell, buckle and warp if they’re submerged in water. Leaving wet towels or spills on the floor dulls the finish in those areas, creating a mottled appearance. Clean up moisture from the floors immediately, and dry the floors after mopping them.

Finally, hickory doesn’t tend to discolor with age like oak does. Therefore, it might be a better option for sunroom and other areas that are exposed to UV light.

Cork vs Bamboo Flooring

If you like the look of hardwood but want something more unique and sustainable, you might consider bamboo or cork flooring. These materials have a similar price and offer a sustainable way to cover your floors. However, there are several differences between the materials. Compare their characteristics so that you end up with the perfect flooring for your space.

Sustainability of Cork vs Bamboo Flooring

Cork and bamboo are considered to be eco-friendly flooring options. Both come from resources that are more renewable than hardwood.

How Environmentally Friendly is Bamboo?

Although bamboo can grow to 100 feet tall, it’s not a tree. Bamboo is a grass that regenerates through the root system. When a stalk is cut, the plant puts out new shoots. That means that bamboo grows more abundantly the more it is harvested.

Unlike hardwood trees, bamboo doesn’t need to be replanted after it is cut down. Plus, bamboo reaches maturity in about five years. Its fast growth cycle allows for responsible farming. Because bamboo requires no fertilizer and less maintenance than other crops, it’s quite sustainable.

However, there are some concerns about the way that bamboo is farmed. If land is cleared to plant a single crop, it damages the natural ecosystem. Look for FSC-certified bamboo products. These have been certified by the Forest Stewardship Council to ensure that the farming procedures preserve the biodiversity of the environment and allow for long-term sustainability.

How Environmentally Friendly is Cork?

While cork flooring comes from trees, it doesn’t require the entire plant to be harvested. When a cork oak tree reaches maturity, which takes about nine years, the bark begins to separate from the live tree fibers. At this point, workers carefully remove the bark without cutting down the tree. The bark grows back and can be harvested again every ten years or so if it’s done properly.

Cork trees can live for centuries if they’re cared for properly. In Portugal, where the majority of cork is harvested, cork trees are protected. The bark must be removed by skilled workers without harming the tree.

Is Cork or Bamboo Flooring More Durable?

Cork and bamboo flooring are both relatively durable. When properly maintained, cork flooring lasts about 25 to 40 years. High-quality bamboo flooring lasts 20 to 50 years.

How Durable Is Bamboo Flooring?

Even though bamboo flooring is harder than most hardwoods, it doesn’t usually last quite as long. Its longevity depends on the product’s type and quality.

There are three basic types of bamboo flooring:

  • Vertical – Bamboo stalks are arranged vertically before being fused into planks, creating a narrow grain pattern and a modern look.
  • Horizontal – Stalks are arranged horizontally, offering a wider grain pattern and a more traditional finish than vertical bamboo flooring.
  • Strand-woven – Instead of being butted together, bamboo stalks are separated into fibers. Those fibers are compressed with a resin to form a solid block.

Strand-woven bamboo is up to three times more durable than vertical or horizontal bamboo flooring. It’s often the best option for high-traffic areas and spaces with pets or kids.

However, you can also choose engineered bamboo. Instead of bonding bamboo into a solid plank, engineered flooring fuses a thin bamboo veneer with a sublayer and a wear layer. In some ways, engineered bamboo is more durable than solid bamboo. That’s because the wear layer provides extra protection against moisture and stains. However, you can’t sand and refinish engineered bamboo if the surface becomes marred.

Even though it’s harder than many hardwoods, bamboo doesn’t have the same resilience. Hardwoods contain natural oils and other compounds that naturally resist abrasion and cracking. But bamboo is less sensitive to moisture than hardwood, which makes it an ideal choice for humid environments.

How Durable Is Cork Flooring?

Although cork flooring is soft, it’s more durable than you might think. Because it’s so pliable, it resists cracking and scratching. In fact, it’s a naturally self-healing product. Small dents and gouges spring back into shape when the source of damage is removed.

However, cork is generally more delicate than bamboo. If large chunks of flooring are chipped away, they will need to be repaired or replaced.

Still, with an adequate finish and proper maintenance, cork flooring can last longer than bamboo. Cork contains a natural wax that makes it resistant to water and pests. However, some cork planks are made with a layer of high-density fiberboard at the base. If water seeps into the cracks, it can cause this layer to swell or buckle. Choosing high-quality tiles or waterproof click-together planks and installing them properly can prevent this from happening.

Installing Cork vs Bamboo Flooring

If you have some skill with power tools and home improvement projects, you can likely install bamboo or cork flooring yourself. It’s essential that you prepare your subfloor properly, however. It must be level, clean and dry. Take measures to protect the subfloor from moisture to extend the life of the bamboo or cork floor.

Most types of bamboo flooring are pre-finished. You won’t need to add any sealant, and you can walk on it immediately after installation. Click-and-lock cork planks may be pre-finished with a polyurethane sealant. However, glue-down cork tiles require one of the following sealing agents:

  • Acrylic urethane
  • Polyurethane
  • Wax

The sealant must be reapplied every several years, depending on the type. Without sealant, a cork floor will readily absorb moisture and deteriorate quickly.

Cork vs Bamboo Flooring Maintenance

Cork and bamboo flooring don’t require too much special maintenance. Take care of them by sweeping off grit regularly. Particles of dirt are abrasive and wear down the surface. Although both materials are water resistant, they last longer if the humidity and moisture levels in the environment are controlled. Clean up spills as soon as they happen to prevent moisture from seeping into the flooring.

You can deep clean both materials every month or so. Use a product that is designed for cleaning each type of flooring, and avoid dousing the surface in water. A damp mop works well for removing residue and freshening the floors.

You probably don’t need to reseal bamboo flooring during its lifetime. However, cork requires resealing every few years to help it last as long as possible

What Are the Benefits of Cork vs Bamboo Flooring?

If you’re still trying to decide between cork and bamboo, evaluate the benefits of each type of flooring for your needs.
Some of the benefits of cork flooring include:

  • Insulation from extreme temperatures
  • Provides a cozy, comfortable surface
  • Unique appearance that can be stained to your preferences
  • Excellent noise absorption
  • Non slip

Some of the benefits of bamboo flooring include:

  • Versatile for homes with fluctuating temperatures
  • Easy to keep clean
  • Durable and scratch resistant
  • Ideal for transitional pieces

Both surfaces resist mold and mildew growth, making them excellent choices for people with allergies. They also offer a distinctive look that can transform your space.

How Much is Marble Flooring?

Even though it’s not the most versatile, durable or expensive material, marble flooring holds a special place in our impressions of luxury. Marble is certainly elegant. But it can be as understated as it is dramatic. Some marble is so subtle that you mistake it for quartz or tile at first glance. Is it the epitome of luxury? And if you love the look of marble flooring, you probably wonder, “Is marble flooring expensive?”

What Makes Marble Flooring so Luxurious?

There is something so serene and refreshing about marble. It’s not just the delicious sensation that you get when you glide across it in bare feet, but also the way that it makes you marvel at the beauty of nature.

Marble is as grounded as it is lavish. It is formed in the ground and mined from quarries. Each slab of marble is unique. Your marble floor will not be identical to any other marble floor. This rare quality makes marble desirable.

But marble is a natural stone with inherent beauty. It can be polished to a smooth sheen, making it silky to the touch. The reflections that bounce off of the surface create depth and illumination. Although it is cool, marble retains temperature well and feels comfortable underfoot.

Marble flooring is also extremely durable. When maintained properly, marble can last many lifetimes. Because it is water resistant, marble flooring is suitable for high-moisture areas, such as kitchens and bathrooms. When it is used in living spaces and bedrooms, it offers a surprising warmth.

How Much Does Marble Flooring Cost?

Most residential marble flooring is made with marble tiles. These cost between $5 and $40 per square foot. Professional installation protects your investment and ensures the longevity of the floor. Installation costs an additional $3 to $7 per square foot. According to HomeAdvisor, the average total cost is between $10 and $20 per square foot. Luxury marble slabs cost between $50 and $80 per square foot.

Below are some general ideas of the cost of marble compared to other flooring materials (per square foot):

Factors That Affect Marble Flooring Prices

The following elements influence the price of marble flooring:

  • Flooring type – Marble tiles are much less expensive than solid slabs.
  • Complexity – An intricate design or complicated layout can boost the cost.
  • Additional prep services – Installation costs more if it includes floor removal or subfloor repair.
  • Custom sizes – Standard marble tiles are generally 12 by 12 inches or 12 by 18 inches.
  • Thickness – Thicker tiles are more durable and more expensive.
  • Finish – Tumbled finishes reduce the slickness of the surface, which is ideal for bathrooms and poolside areas.

Basic tiles usually hover around the $10 per square foot range. Specialty marble typically starts around $45 per square foot.

How the Grade of Marble Affects the Price

Marble’s quality and appearance are rated on a grading system. Grade A is more expensive than grade D. However, it’s not always preferable for flooring.

  • Grade A – Few natural imperfections, consistent coloring and little veining; this is the least dramatic type of marble.
  • Grade B – Few flaws, dry veining; this marble contains subtle veining that may be filled to reinforce the structure of the stone.
  • Grade C – Moderate flaws, significant dry veining, voids and pitting; the manufacturer fills chipped areas and dry veins to stabilize the marble.
  • Grade D – Significant flaws; this grade requires repairs before it can be polished and used, but it results in some of the most dramatic effects.

Types of Marble by Cost

The type of marble that’s used for decorating is classified into several categories. Each group has a distinct appearance and quality. The following are the most common types of marble, arranged by price per square foot:

  • Carrara – White surface, uniform texture, little to no veining, $6 to $12
  • Crema Marfil – Light surface with beige base, honey-colored veining, $6 to $12
  • Calacatta – Light surface, warm glow, subtle veining, $12+
  • Breccia – Dark and dramatic, comes in many colors, high contrast, $10 to $30
  • Emperador – High contrast, illusion of depth, increased variation in veining and colors, $70 to $90

How to Save Money on Marble Flooring

Although marble is one of the most expensive flooring materials, it pays for itself in longevity. You can save money on flooring repairs and replacements down the road by maintaining your marble floor properly.

Maintain Your Marble Floor

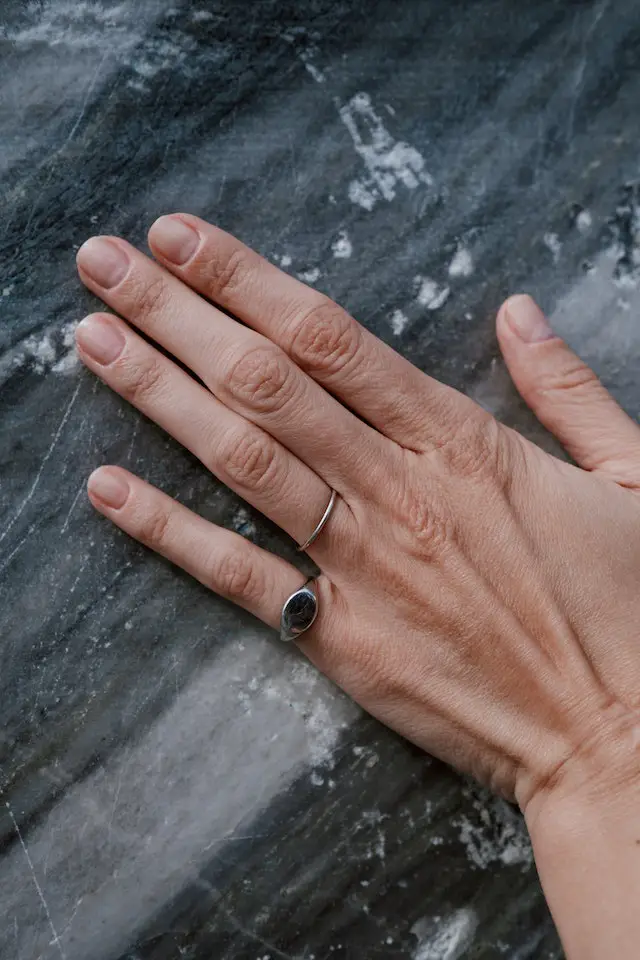
woman hand on marble floor

You’ll get the most life out of your luxury flooring by keeping it clean. Sweep and use a dust mop frequently. Doing this will eliminate the particles of dirt that degrade the floor. Be careful when using a vacuum cleaner on marble floors. The wheels and hard components can mar the finish.

Blot up spills quickly. Acidic foods and beverages can stain the marble. Therefore, you don’t want to spread the stain by wiping it around the floor. Only use mild dish soap with water or a specialty product to deep clean marble flooring.

Use an appropriate sealant to protect your marble floors from stains. Depending on the level of traffic that your floor is exposed to, you’ll need to reapply the sealant once or twice a year.

Marble feels hard under your feet, but it is prone to getting scratched and scuffed. Protect high-traffic areas with area rugs. Keeping rambunctious pets and children’s toys away from marble floors will also reduce the chances of damaging your floors.

Choose Small Tiles

Although marble slabs make for impressive flooring, they’re expensive. The price of marble increases with larger tiles. However, smaller tiles may fall within your budget. Standard-sized tiles are also more cost-effective than custom sizes.

Fill Small Spaces

You don’t have to cover your entire floor plan in marble to benefit from its splendor. Use it as an accent in smaller areas, such as bathrooms, hallways and foyers. Creating a pattern with small tiles creates interest without requiring truckloads of material. You can also create a base with lower-priced tile and reserve the specialty marble for accents.

Hire a Professional

While it costs more to hire a professional than to lay the tile yourself, working with an expert saves you money in a number of ways. They’re insured, which means that you won’t be liable for costly mistakes or accidents on their end. Marble requires special equipment, and a professional is likely to work more efficiently and produce less waste. Moreover, professional installation optimizes the longevity of your floors. You’re less likely to have to deal with costly repairs down the road.

Consider Alternatives to Marble Flooring

If you love the look of marble flooring but don’t feel aligned with the price tag, you have plenty of options for achieving similar results. The following materials come in designs that mimic marble but have a lower price tag:

  • Porcelain and ceramic tile
  • Vinyl plank flooring
  • Laminate flooring

While these materials don’t have the same feel or requirements of care, they may offer benefits that make them preferable. For example, vinyl and laminate are softer underfoot and excellent for families with kids. Porcelain and ceramic don’t stain as readily as marble. Check out some of our other flooring articles to research the best options for you.