What is Cabin Grade Flooring?

Hardwood floors come in many styles, grades and prices. Some hardwood flooring is clean, modern and minimalistic. But that doesn’t always complement the rustic, farmhouse style that’s so popular nowadays. Plus, hardwood flooring can get expensive. Cabin grade flooring satisfies your desire for a casual, natural look and saves you money.

Cabin Grade Flooring is Utility Grade

Like eggs, hardwood flooring is graded according to certain aesthetic characteristics:

  • Prime – AB grade flooring is uniform in color and grain pattern and has minimal knots.
  • Select – ABC grade flooring contains some knots and color variation.
  • Natural – ABCD grade flooring has plenty of variation in its pattern and color and contains significant knots.
  • Rustic – CD grade flooring offers a vintage, pastoral style and has lots of knots and grain variations.
  • Utility – Cabin grade flooring is the most rustic, with many natural imperfections.

You may read that cabin grade flooring is low in quality. However, it’s not an inferior product. It simply contains more of the deviations that occur in natural wood. Don’t confuse cabin grade flooring with factory seconds, which are usually cast offs that do have quality issues.

Cabin grade flooring is harvested from parts of the tree in which knots, cracks and scratches are likely to be found. These types of planks are not milled as meticulously as other grades. Therefore, they may not have a uniform thickness or length.

Because of the nature of cabin grade flooring, it may also contain more defects than other grades. But these are like beauty marks; they create character. Nevertheless, you may have to work around some of the flaws and generate extra waste.

Types of Imperfections Found in Cabin Grade Flooring

We think of flaws as something negative, but many people look for wood with imperfections because it has more character than uniform planks. Some of the variations that you will find in cabin grade floors include:

  • Heartwood – Strong, decay-resistant wood from the center of the tree, which often contains tannins that darken its tone
  • Sapwood – The outermost layer of wood, which is lighter than heartwood
  • Knots – Illustrative of the location where a branch meets the tree, these oval shapes contain resins that make them darker than the surrounding wood
  • Pinholes – Narrow cavities that formed when wood-boring insects lived in the tree before it was harvested
  • Filler – Material that is added to holes, particularly in knots, to close the gap
  • Splits – Cracks in the surface of the wood that add character without impairing its durability
  • Mineral coloration – Patches of color that are formed when minerals from the soil leach into the wood as the tree grows

What You Should Know About Cabin Grade Floors

Having realistic expectations can help you get the look that you’re going for with cabin grade floors. Here are some things that you should consider before making a decision.

Boards Are Shorter Than Usual

While many planks will be a standard 24 inches long, about 50% of them will be shorter than that. This can add work to the installation process. However, many installers feel as though the labor balances itself out because they don’t have to deal with bowing and warping. Also, the shorter planks let you create a unique pattern with plenty of contrast.

The Species of Wood Affects the Aesthetics

All cabin grade flooring is not the same. The look that you’re going for depends on the type of wood that you buy.

Maple contains fewer knots than most other types of wood and may come with more short planks. It provides one of the cleanest finishes of all of the cabin grade planks.

Hickory features some of the most contrast. The background color ranges from almost white to dark honey, and the splits and knots are deep chocolate. The tone variation on hickory cabin grade flooring may even look splotchy and organic. Gray hues are also common in this species of wood.

Oak provides balance between color and contrast. It offers a medium honey background color, and the splits and knots are not as noticeable as they are in hickory.

Expect Some to Go to Waste

The average installer discards up to 20% of cabin grade planks. Keep this in mind so that you purchase enough to cover the entire area.

You’ll have to decide which defects are acceptable and which won’t work in your master plan. You can minimize much of the waste by placing less desirable boards in low-visibility areas, such as inside closets, near baseboards, beneath furniture and under rugs.

Look at the Floor as a Whole

A hardwood floor is supposed to look like a mosaic. When you look at individual planks, you may not think that they’ll go together well. But when you step back and look at the entire space, you will appreciate the way that the variety adds depth and interest to your décor.

Make sure that you open all of the boxes of flooring before you install it. This allows you to mix up the planks and produce the most pleasing results.

You might not like all of the nicks and blemishes on the planks. However, you can sand, stain and fill areas to produce a finish that you’re happy with. The knots and texture may show through stains, producing an interesting look that’s never too uniform.

Why Would You Choose Cabin Grade Flooring?

Cabin grade flooring has a rough-hewn appearance that many people aim to incorporate in their homes. The grading system doesn’t reflect the integrity of the wood; it just indicates that this is on the rustic side of the spectrum.

Some reasons that you might prefer cabin grade flooring are as follows:

  • Excellent value – This type of flooring costs up to 50% less than prime grade planks. It’s an affordable way to swap out your carpet or linoleum without derailing your budget.
  • Complements multiple styles – You don’t need a cabin to make this flooring look good. Cabin grade flooring can look vintage or surprisingly modern, depending on the way that it’s installed.
  • Unique character – It’s difficult to predict exactly how cabin grade floors will look before they are installed. Because the planks have so much variation, you can change the overall appearance by configuring them differently.
  • Perfect for busy spaces – Floors in high-traffic areas, such as mudrooms and playrooms, get lots of abuse. Damage will blend into cabin-grade flooring, but it could create obvious blemishes on other grades of hardwood.

All natural wood has imperfections. If you’re looking for a floor with character, you can capitalize on those flaws by using cabin grade planks. This type of flooring offers a distressed, rustic look that will never be identical to anyone else’s floors. It may not be the best option for people who want a uniform, even-looking floor. But if you install cabin grade floors, they’re sure to complement many styles of décor and start conversations.

Bamboo Flooring Transitional Pieces

Bamboo flooring is a great hardwood floor option that is quite popular in so many homes today. Bamboo is not only the environmentally smart choice, but it naturally resists water, humidity, and the damage that can be caused by a busy family, dropped objects or heavy furniture. If you choose this great looking hardwood floor type to go into your home or project, you will need to make some informed decisions about selecting the most suitable bamboo flooring transitional pieces.

What are Bamboo Transitional Pieces?

Bamboo transitions are pieces of flooring that help provide a smooth surface from one room or level, to another. the important finishing touches to complement your existing wood floors, home style, and décor. Transitional pieces include the moldings and trims that add a professional, finished look to your home’s space. There are a wide variety of options available to provide the proper function and to match your design elements and overall interior.

Types of Transitional Pieces

  1. Bamboo T-Moldings are the common transitional pieces that will take you from one room to another when the floor surfaces are of equal height, or between two floor surfaces if they are within 1/8″ in height of each other. T-molding is flat on the showing surface area and has a raised notch down the middle and across the length of the underside. It is often used when a bamboo wood floor transitions into a kitchen or a bathroom that has either a thick vinyl flooring or tile. Bamboo t-molding will cover the expansion gap between the two floors.
  2. A Bamboo Reducer is used to transition from wood flooring to a floor covering that is at a lower surface. A reducer is sometimes seen at an entry foyer, or when leading to a vinyl covered floor or a short pile carpet. The reducer should be the same thickness as the wood floor and will have a groove on the back of it. It is an essential piece for eliminating awkward gaps and for reducing tripping hazards.
  3. A Bamboo Threshold is for use to complete the flooring at a door and also used at sliding glass doors. It makes a beautiful stopping point and gives a great finished look. As well as being functional, a bamboo threshold is often a way to add a design accent or to create a sense of boundary in an open-concept room. It is a versatile trim piece that can also be customized by making adjustments on it with a table saw when a standard reducer does not work for a particular flooring change.
  4. Bamboo Stair Nosings are used to transition from a floor to a staircase, on staircase landings, or on step downs. They are also known as bull nose or bull nosing. These pieces have a small lip to give the floor a finished look that is consistent with the stairs below. You would also use this type of transitional piece when you have bamboo flooring on a stair landing or as part of stair steps. To go even further, you might even decide to use a bamboo stair tread on the horizontal surfaces of stairs to give a beautiful and more unified look to staircase, landings, and an upper level.
  5. Bamboo Shoe Molding is similar to quarter round and used to cover expansion gaps where the floor ends into the wall. It is a small piece of molding that fits right into the corner and has a rounded edge on the outside.  Shoe molding makes a great transition not only between the floor and the wall, but also from the floor to cabinets.
  6. Bamboo Baseboards are often used in conjunction with shoe molding. Baseboards cover the lowest part of an interior wall and act as a beautiful transition between the floor and the wall, covering any uneven cuts along the wall. A baseboard is also good protection for your wall and adds a professional finish to any room.

Tips for Installing Bamboo Transitional Pieces

You don’t have to be an expert carpenter to spruce up a room with bamboo wood trim pieces, but you will need a few tools and a little bit of patience. First off, be sure to have a measuring tape and table or miter saw for accuracy and nice clean cuts. You will also need a nail gun, drill, and non-water based adhesive, depending upon whether you will be nailing, gluing, or both. Aside from selecting the appropriate tools and materials for the task, here are some general guidelines for your project:

  • Read the manufacturer’s directions, if available, for information that is specific to the product you are using.
  • If using a nail down method, it is recommended that you predrill first and use nails that will be fine enough not to be detected.
  • If using glue down method, you will need to glue to either one floor or both depending on the flooring type. Be sure to use high-quality urethane based glue.
  • When using glue methods, use enough of it to fasten the product down, but don’t overdo it so that excess is visible and is filling the gap.
  • After the glue application, use weights or tape to help secure the piece depending on the type of trim. Be sure to wait until the glue has fully cured which may take 12 hours or more. .
  • Transitions must be fastened directly to the sub-floor and not to the actual flooring material.
  • Some transitional pieces may come with a track that must be fastened in first.
  • Plan your project in its entirety before you start to avoid do-overs or backtracking. Don’t forget the old adage- Measure twice! Cut once!

It’s All in the Details

There is a lot of thought that goes into professionally completing a wood floor project. How will the floor transition into another room? Where is a natural stopping point? Will any gaps been created and if so, how will those be addressed? How can safety issues, awkwardness, or any unsightliness be avoided? Where can interest and design be added?  These are a few of the items you will want to think about before you even start your project. 

Bamboo transitional pieces are not only the solutions to these challenges, but used correctly, they give you a professional, high-end, showcase appearance that adds splendor and value to your space. Your project deserves that final, customized touch. Using the proper transitional and trim pieces will help you protect, sustain, highlight, and truly enjoy the craftsmanship of your beautiful flooring. 

How Much Does Bamboo Flooring Cost?

Bamboo flooring is one of the most popular, resilient, and beautiful options available to those looking to upgrade their homes. Which is all very well, but unless you’re independently wealthy, budget is also going to be a consideration in your flooring decision making. By taking some time to understand what elements factor into the cost of bamboo flooring, you can take a more agile approach to your renovation plans, make confident decisions, and — most importantly — keep those budgets down.


Answering the question of how much bamboo flooring costs is not as simple as looking at the online averages — which, depending on where you look, is estimated between $750 and $1300 per room — and getting to work. We’re not going to be of any help to you if we just pluck a price out of the air and expect you to muddle through as best you can. The honest answer is, the cost of bamboo flooring really depends on your approach. Perhaps you’re an avid DIYer with a bit of know-how and some useful equipment in the garage. On the other hand, you may be one of those myriad of us who knows your limitations, and are quite happy to let the experts ply their trade. Either way there’ll be a selection of budgetary issues that will contribute to your final cost. 


The final cost of bamboo flooring will come down to a few key aspects. Your choice of materials, where you’re sourcing them from, the labor or equipment costs of installation, and — an aspect many overlook — essential maintenance to keep it safe and beautiful for years to come. It’s worth remembering that bamboo is a premium quality product, and with that comes cost. But it’s also an investment. Like all investments, it’s essential you do some research, and seek out guidance.

We can certainly help you along the way. 


Materials


Whether you’re setting off on your own DIY flooring adventure, or engaging a professional, material costs will be among your first considerations. If you are new to the area, it can be a little bit overwhelming, but at the most basic level, your choice of bamboo flooring options will likely revolve around what you’re hoping to get out of your hoping to achieve in the target room. Are you leaning toward aesthetic considerations? Longevity? An easy to clean surface that suits your lifestyle? There are material options that cover each of these goals, and some which give a basic coverage of all three. It’s worth bearing in mind that your expectations of your material will certainly factor into the bamboo flooring cost.

However, before making any solid decisions, you should take some time to understand some of the finer points of bamboo flooring, in order to help guide your search and budget considerations. 


First off, bamboo is not a tree, unlike those used in other wood flooring options. It’s a grass that  grows abundantly in warmer areas of the globe. It’s been used for over 4,000 years, mostly in early civilizations in the Far East and South America. Bamboo’s uses range from the kitchen, the battlefield, libraries, hospitals and the buildings themselves largely due to the fact that it ranks high in the Janka Hardness Scale. With a tensile strength of 52,000, this fragile looking tall grass swaying in the direction of the wind is actually harder than most commercial soft and hardwoods used for flooring.

Why is this important to know? Well, by understanding bamboo’s qualities, you gain a better insight into why the flooring materials are constructed in certain ways. This helps you make better informed decisions that help balance the budgetary aspect. The first thing you’ll notice when selecting your materials is the manufacturing process that has been used. This will generally fall within 3 categories: 


  • Strand Wovengenerally considered to be the hardest wearing of the bamboo flooring materials. It is manufactured by stripping the bamboo down to its fibers, combined with resins, and then compressed under significant heat and pressure. Once these have been molded into solid blocks, they are trimmed and laminated into boards fit for flooring. This process, and its relative longevity, contributes to making strand woven among the higher bamboo flooring cost options. Depending upon the manufacturer, current averages for strand woven run at about $3-$5 per square foot. 


  • Horizontal and Vertical bamboo flooring – this method is relatively simple, involving stripping the bamboo into thin strips and then gluing these together in order to form flat planks. While less well wearing than other types, this process has an aesthetic appeal due to the retention of grain. Currently, horizontal and vertical bamboo flooring cost is usually found between the $2 – $5 per square foot mark. 


  • Engineered Bamboo – For those on the lower end of the budget, pure bamboo materials may not be a practical consideration. The manufacturing process for this type involves applying a core of MDF underneath thin layers of bamboo. This option is neither particularly hard wearing, nor refinishable, however that does tend to result in a lower price tag, coming in on average at $2 per square foot.


Aside from the core manufacturing process, another material factor to consider is carbonization. This is a largely aesthetic aspect, which results in the bamboo flooring having a richer color pallet. The costs aren’t prohibitive, usually falling in line with strand woven options. However, since the process entails use of chemicals and tremendous amount of energy to carry out, more and more people now opt for natural hues.


DIY Installation


Taking the reins on your flooring project can be a rewarding experience. Not to mention that you tend to save money, particularly if you have some of the equipment already to hand. However, it’s important at this point to really consider whether it’s realistic for you to sacrifice the benefit of expertise in order to save some money. However, if you are intent upon installation yourself, there are a few budgetary considerations to bear in mind. 

Materials

Aside from the type of material you’ll be using (as detailed above), when undertaking home installation it’s imperative that you consider the possibility you’ll make some mistakes. When you go out to buy bamboo flooring, be sure to add about 5-10 percent of the material to allow room for errors as well as spares should there be a need to replace some planks or boards in the future.


You’ll also need to take into account that the condition of your subfloor will affect not only the appearance of the bamboo flooring but also its durability. It’s important to have a structurally sound subfloor to support the bamboo flooring. If you need to replace, repair, or adjust your current subfloor before starting work, this could add to the price tag. 


Equipment


The cost of bamboo flooring self installation can be exacerbated by the need to purchase new tools. Therefore it’s worth reviewing which of the following you have at home, and factoring the price of any missing items into your budget:

  • measuring tape
  • hand saw or power saw
  • tapping block
  • wood or plastic spacers
  • pry bar
  • hammer
  • chalk line
  • pencil


There are several ways to install bamboo flooring and these types of installations will also require different tools.


Nailed-down Installation – for this type, we need:

  • the appropriate nailer/nail gun
  • nail application chart


Glued-down Installation – for this type, we need:

  • recommended flooring adhesive
  • trowel
  • pail, optional for mixing adhesive


Floating Installation – for this type, we need:

  • poly film foam or other manufacturer recommended product
  • PVAC glue
  • poly or duct tape


While most of us certainly go by the adage “measure twice, cut once” to avoid mistakes, it’s best to err on the side of caution and assume that you’ll need a little more of these items than strictly required. Don’t budget to get it right the first time unless you are confident in your expertise in the area. 


Professional Installation


There are various reasons why professional installation may be the best option for you. Convenience or lack of know-how might mean that it’s a more prudent step to take, alongside the reassurance that your floor has been fitted by an expert that understands how to operate in a way that supports longevity. 


Unfortunately, convenience and expertise tend to come at a premium price, so here’s some things to bear in mind when assessing the cost of bamboo flooring pro installation. 


Research by Homeguide suggests that the current average labor cost on top of materials runs at approximately $3 – $5 per square foot. This means that the cost of installation is about as much as the average for materials at the upper end of the market.

Remember, though, that this is just the cost of the labor itself, and likely won’t also take into account sundry requirements such as any required underlay, removal and disposal of pre-existing floor, or preparation and protection of baseboards and static features such as cupboards and fireplaces. Consideration too must be paid to underlying problems that may hamper the installation process, such as weak or damaged floorboard and joists — it could be the case that your pro installer will need to repair these, raising the budget requirements overall. 


One of the bamboo flooring costs involved with installation that is easy to overlook is the potential for accommodation for your professional. In most cases, your contractor will be able to advise you in advance whether this will be a necessity; considering the length of time the installation will take and how far away from their home base the work site is. This could still be a factor with a relatively small room if there is a need for stains to be applied as these can take upwards of 24 hours to dry.   


This is where some intelligent research can really help you to keep costs down. In making your cost comparisons, consider:


  • Can you save some money by removing and disposing of the existing flooring yourself?
  • Engaging in a meaningful dialogue with your professional bamboo flooring installer. It may be the case that they’re happy to use lower-priced materials you’ve sourced yourself, or they may be able to secure better deals through the wholesale relationships they’ve built over time and experience.
  • Investigating signs of structural damage on your floorboards and joists. Are they squeaky? Do the floors shift when you walk on them? Do parts of the floor appear sunken? It’s worth getting separate quotes from your floorboard installer and a professional in these types of repairs — it may be the case that you can save some money here, or plan to space out the costs.
  • Negotiating the cost of accommodation if it is required. If you have contacts with hotel or Air BnB spaces available, perhaps you can obtain a discounted price.   


On the plus side, the costs of installation equipment, required adhesives, protective sealants, and fasteners are all generally included in the installation fee. However, contractor standards often vary; don’t be afraid to really dig in to understand what is included in their pricing, bring up potentially costly scenarios, and what your options would be. Remember, you’re engaging an expert in their field — use their knowledge to your advantage. 


Maintenance 


How much bamboo flooring costs does not end at materials and installation. When making a decision about whether this is the correct material for you and your family, it’s worth bearing in mind the cost of essential upkeep in the future. Certainly, the higher end range of the floorboards themselves — strand woven — are relatively hard wearing; but do you need to take additional measures against heavy traffic, fluctuating moisture levels, or the inherent risks of rambunctious, messy children? 


If you’ve elected to buy a bamboo flooring option that has been pre-treated, you won’t need to apply any additional sealant. However, if for aesthetic or budgetary reasons you’ve opted for an unfinished product, you’ll need to budget for sealant.  


One of the enduring misconceptions about bamboo flooring is that it naturally has sufficient protection from the elements. While there is an element of truth in this — bamboo has a natural layer of biogenic silica, that protects the base material from harsh elements — this is usually significantly deteriorated by the manufacturing process. We can’t assume that our finished floorboards have retained their natural protective properties; particularly in the low cost bamboo flooring. 


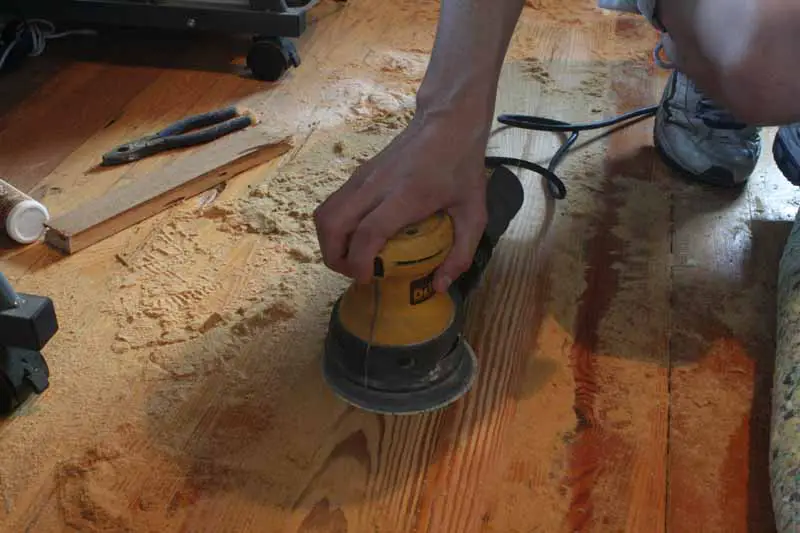
If you’re undertaking this process personally, attention needs to be paid to preparation. Depending on the manufacturing process, elements of the silica layer may still be present, which means that any sealant you apply on top of this runs the risk of failing to adhere, or flaking off — resulting in more of your budget going down the pan. You’ll need to strip the top layer of your floorboards following installation,and sand it until it is smooth. Which means the cost of a power sander with 60 and 100 grit sandpaper may need to be added to your overall flooring budget.


The sealant itself is not prohibitively expensive; a gallon of good quality polyurethane sealant  doesn’t usually run much over $40, but this can obviously vary depending upon the brand you choose. You’ll also need to incorporate the cost of some good quality mop applicators into your budget — though these are usually only around $20, all of these little expenses have a tendency to add up. It’s also prudent to bear in mind that this is unlikely to be a one-off expense; in order to keep your bamboo flooring looking fresh, it’s usually recommended that this process is undertaken once every 6 months or so. 


Don’t skimp on the little extras that keep your flooring from becoming scratched, either. Apply felt pads to the bottom of furniture. Buy some doormats to discourage the tracking and staining of dirt into the grain of the floorboards. If you’ve installed bamboo in a bathroom or kitchen, invest in good quality rugs to surround sink, shower, and bath areas as water spillages over time can lead to warping. These small expenses following installation can prevent the more significant ones in future.


How Much Does Bamboo Flooring Cost? 


Ultimately, the final cost of bamboo flooring will depend upon a variety of factors. The base material options range from the lower quality engineered floorboards (approximately $2 per square foot) to the well produced and hard wearing strip woven variety (around $4 per square foot). Professional installation could add another $5 per square foot, and means you can be confident that you’ve received a quality product and fitting. On the other hand, DIY enthusiasts could save money in labor, but this needs to be weighed against additional equipment and material expenditure. Each installation option also has the potential to result in ancillary costs which need to be taken into account. 


Keeping costs low is essentially a matter of quality research. Don’t rush into a project, or signing a contractor.  Survey the target rooms, consider whether the materials are appropriate to the traffic it sees. Take a measured approach, explore all the options, and seek expert help where needed. This not only helps to ensure you’re minimizing the cost of bamboo flooring, but can rest assured that you have taken steps to ensure you’ve made decisions which result in quality and longevity. 

Vintage Wood Flooring

Vintage flooring continues to be popular and people, most of the time are willing to shell out  great amounts for it. This is for the simple reason that a classic never goes out of style.

Vintage flooring, pretty much like vintage clothes are those that are either really old flooring that genuinely looks worn and tattered or maybe made up of new materials made to look as if they were really old.

Vintage Wood & Vintaged Wood Flooring

One of the most sought after type of vintage flooring is reclaimed wood. The popularity of this flooring solution is largely due to the fact that reclaimed wood flooring poses to be more environmentally sound because it is salvaged from an old flooring or was previously used as something else. Hence, no new trees were harmed to create the product. Another plus factor is that since the material is sort of aged, there would be cases when minimal treatment is required to make it look older.

However, there is limited supply of reclaimed wood some people are willing to use wood flooring materials that have been mechanically aged – colored or stained, scraped and distressed to give it that vintage look and feel.

There are a number of ways to make wood flooring appear aged and new techniques are continuously being added. One way of artificially aging wood is through distressing. This process can be done mechanically or mechanically. Manual distressing can be done by hard or by using chains, hammers, scrapers or other objects that can cause damage to give it that look of years worth of wear and tear. This effect makes it look like the floor has a certain history that works well with both traditional and modern setting.

Another technique for aging wood is through a process called tumbling. This is done  by rotating floorboards on drums, causing damage to both surfaces. Compared to distressed wood flooring however, marks here are more random and with the edges of the board damages, it gives a more credible aged look.

Some Useful Hints on Hardwood Flooring Repair

Hardwood floors are an asset in any property and should be well taken care. While they are very resilient, day-to-day wear and tear leaves even the hardest floors prone to damage. Repairing damaged hardwood isn’t easy and is better left to flooring professionals.

However, should you feel a little bold and daring and decide that this is something you can do, ask professional advise and also consider some tips below:

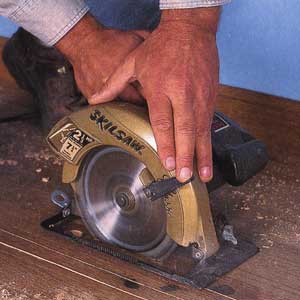
  1. Cut with caution. In repairing hardwood floors, the first and most difficult step is getting the damaged board or boards off. Be very careful when you do this because there is the risk of splitting or damaging surrounding boards which could mean more work and expense. Make sure you have all the appropriate tools and that they are in the best condition before doing the repair.

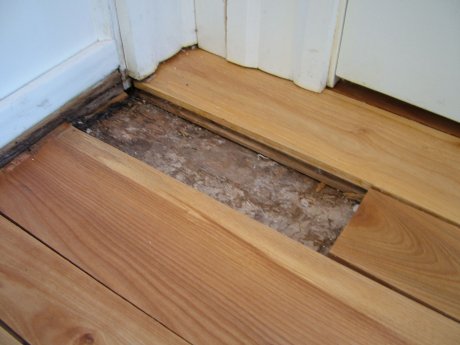
  1. Keep it clean. After the damaged part has been removed, make sure to clean the place it was taken from and the surrounding areas. It must be free from debris and dirt. You can either sweep or vacuum the spot to make sure that replacement will smoothly go in and fit perfectly.

  1. Pay attention to details. Be mindful of aesthetics when replacing a damaged boards. It is very important that the replacement piece should be of the same hardwood specie, same color with matching grain patterns and directionality. If you have leftover from the original installation, its better to use that or you can always call the store where you bought it from and ask if you can get a plank or two.

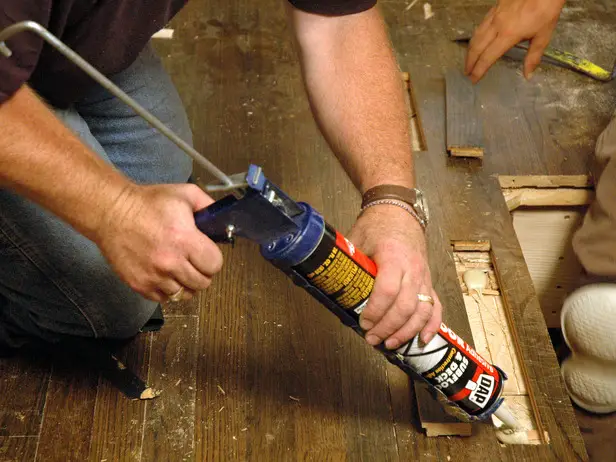
  1. Time is always of the essence. Be sure that the piece of hardwood you’ll replace the damaged one with fits perfectly because once the adhesive (commonly used is Epoxy) has peen applied it will immediately settle and dry down so you have to be very quick and if the piece doesn’t fit or ends up uneven then you might end up with another problem.

  1. Finish to perfection. After the hardboard flooring piece has set and dried, its time to finish the repair job. Keep in mind not to overdo it. Sanding is done to make sure the replacement is leveled with the original flooring. As for the finish, use the same material applied in the original installation to avoid any unsightly discolorations. If you’re not familiar with it, it wont hurt to ask the company who handled the project and originally installed your hardwood floors. They should have information on record.