
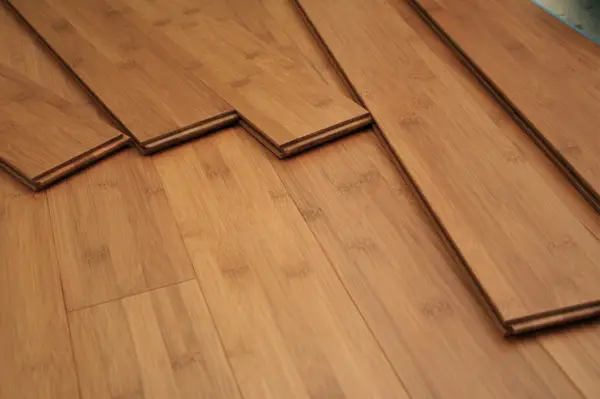
Hardwood flooring is without a doubt one of the best improvements anyone can put in their homes and still continue to reap benefits long after one has retired. If you intend to keep an ancestral home or at least live on that particular property for the next 10 years or more, then consider this little DIY project that will add significant value to your house and even more significant value to your relationships. Hardwood flooring is both durable and enduring. It can be re-sanded and refinished, at least once for engineered hardwood, and several times for solid hardwood flooring to make it appear as if its new. This saves the homeowners both money and wood resources making it an environmentally sound choice.
 The first key is of course get the right hardwood flooring material that would flatter your living space and at the same time meet your needs. Some quick tips to get the right amount of hardwood flooring you need: first, measure the length and width of the room and multiply both quantities to get the square footage and then add 10% to the resulting product to allow for errors, waste and future repair.
 Keep in mind that when the hardwood flooring planks are delivered to you, you are not to install them the following day. Read on to see how to prepare the flooring material and the subfloor before installation and what skills and tools one would need to successfully execute a DIY hardwood flooring installation project.
Materials and Tools
After you’ve calculated the costs of your flooring materials, before placing your order make sure that you have enough to cover for the purchase and rental of tools and equipment for your installation project, otherwise should you opt for flooring professionals to do the job, be sure to do basic search to identify the skills and customer feedback for each to make sure you’ll get quality service as the project is costly.
However, if you think you are fairly skilled and experienced to pull this thing off, then read on to get some important insights.
Carefully read manufacturer’s instructions for more specific directions about the flooring product and be sure you comply with the building code in your respective area. Keep in mind that the instructions here are common practices only and might not meet the exact manufacturer requirements for specific flooring products.
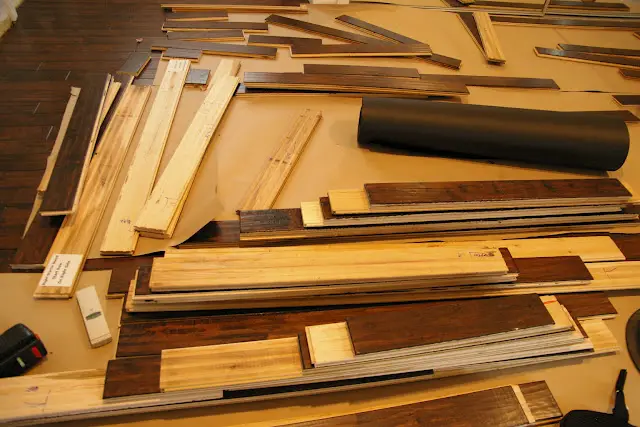
 After the flooring products have been delivered, be sure to open the boxes and carefully examine each hardwood plank for any visual or material defect. Also it is very important to leave the hardwood planks in the room where it would be installed for at least 72 hours to let it acclimate to room’s natural humidity and temperature and give it time to naturally shrink or expand prior to installation.
Lastly, consider the mode of installation best suited for the flooring product of your choice – if it is glued application or a nailed-down installation as site preparation and tools needed might slightly vary depending on the manner of installation.
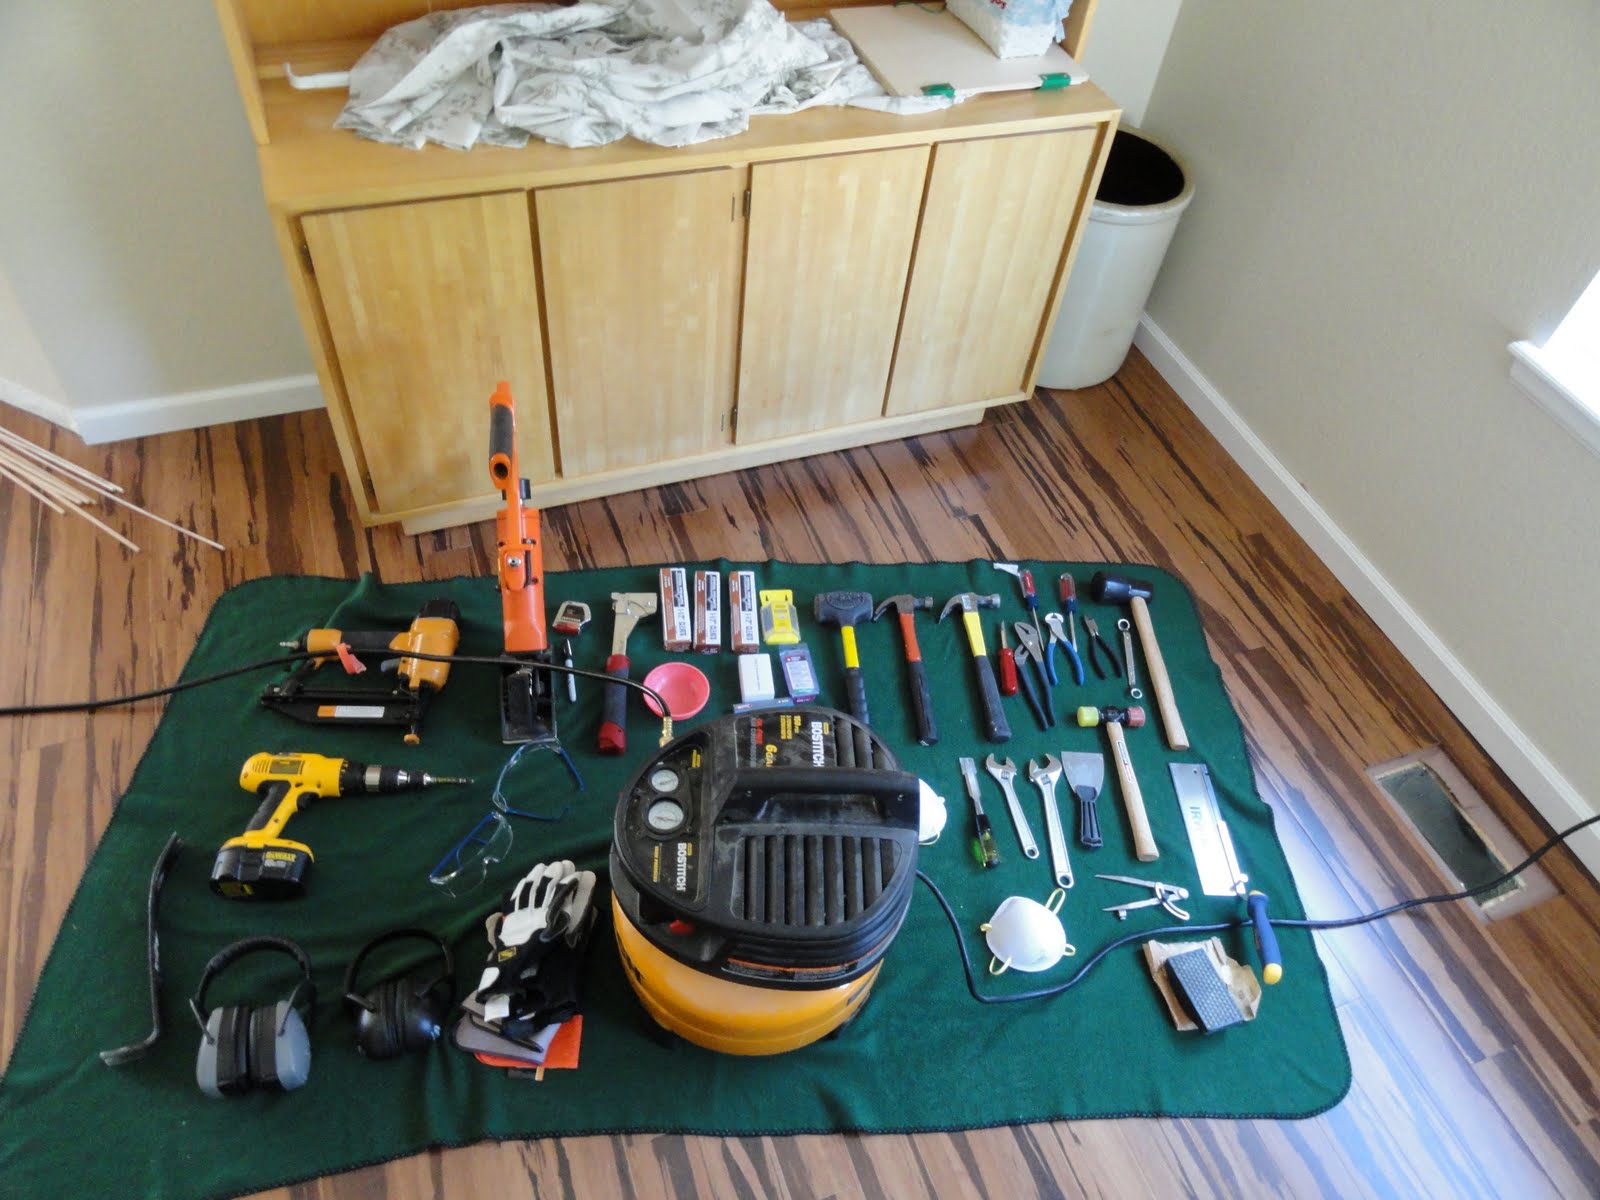 Common installation tools are:
- hardwood flooring planks
- underlay and vapor barrier (depends on product requirements)
- adhesive (as recommended by manufacturer, for glued-down installation)
- spacers
- pneumatic nailer (for nailed-down installation)
- drill and drill bits
- hammer
- nail set, nails and finish nails
- wood putty (same shade as the flooring planks, for nailed-down installation)
- saws – circular, mite, table or hand saw
- prybar
- dead blow hammer and tapping block
- pencil
- tape measure
- utility knife
- dust mask and knee pads
