In our previous post, we showed the basics of preparing for laminate flooring installation, today we’ll continue with the rest of the process.
Laying the first plank.

For best appearance, it is generally advised to place laminate flooring boards parallel to the longest wall.
Remember to place your spacers to allow for the contraction or expansion of your new flooring. Spacers should be placed in intervals of 12 inches.
Also make sure that the groove-side is the one facing the wall and tongue on the opposite.
If its hard to tell which the longest wall is, as the room seems a squared one, then begin at the left wall going to the right.
Make sure that the first line is a straight line so that it’ll follow all throughout.
For stability, maintain a minimum length of no less than 8 inches. Also consider the length of each plank or board when laying down your flooring.
Laying the rest of the flooring.

Be sure to secure each piece of laminate flooring laid down by connecting all the grooves and tongues properly. To do this, position each board at an angle of 30-40 degrees.
Use tapping or pull bars when hammering is needed in order to prevent damage to tongues and grooves.
Measure and re-measure each board or plank to get the correct length before cutting your laminate flooring piece.
Also, you may have to cut the width of the last piece to make sure it’ll fit perfectly in the room.
Transitions, Doors and Stairs
As we’ve already measured the new floors resulting thickness and taken note of other accessories needed, then this should be easy.
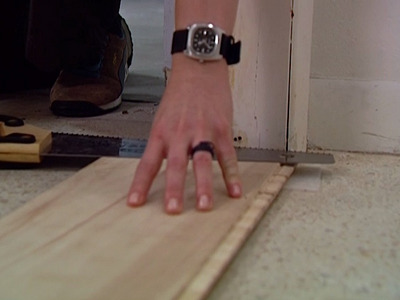
Baseboards, door jambs and panels should be trimmed in order to fit laminate flooring planks. You can do this with power tools such as a miter saw or a simple hand saw. Just simply measure the thickness of the laminate plank to get how much to trim from the door jambs or panels.
Since we left spacers between our laminate flooring pieces and the wall there will obviously be a visible gap so we would need to install baseboards.
Also known as wall trims or baseboard trims, they conveniently hide the gaps as well as provide additional decorative highlight to the room.
To accommodate the floorings contraction or expansion upward, be sure to nail the trims to the wall and not to the floor.

When transitioning from one room to another, then be sure you have the appropriate transition piece and cut it accordingly. There are several transition pieces depending on the purpose.
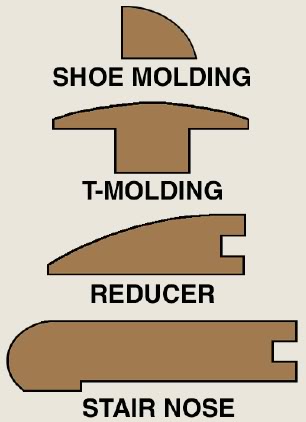
Shoe molding, T-molding and reducers are often used to transition from one flooring material to another or from one room to a different one.
If the laminate flooring is basically the same level with the next flooring its transitioning into, shoe molding is normally used.
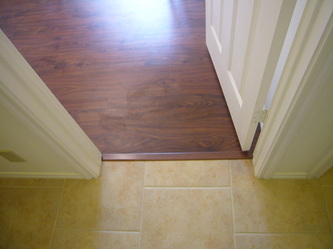
When the floor we’ll be transitioning too is lower than our new laminate flooring, then the best piece to use is a reducer.
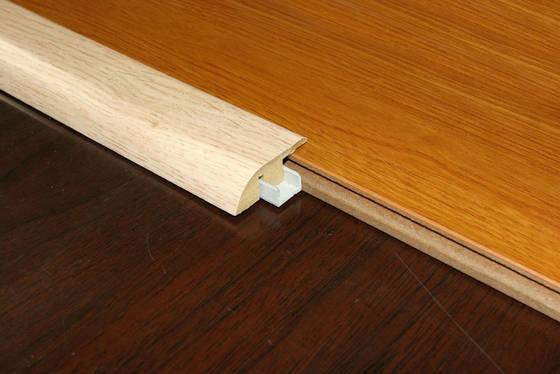
What about transitioning to stairs? Well, you can use stair noses that’ll go along with the color of your new floor, these are commonly available too.

One thing to consider about buying stair noses is that they are a bit expensive to take measurements before placing your orders and of course, keep in mind to add a little extra for waste and future repairs.
There you go, we hope you have fun doing your own DIY laminate flooring installation project!

